top of page
Our Projects
Discover the Agustin Concierge Construction commitment to excellence.
From interior renovations and detailed finishes to exterior improvements, decks, masonry, and custom construction, every project reflects our commitment to quality, attention to detail, and care for our customers' homes. Explore some of our work and see how we bring homeowners' ideas to life.
Masonry & Stonework
.png)
01
Brick Repointing (Before Images)
Images of the project before any work
.jpg)
02
Brick Repointing (Before Images)
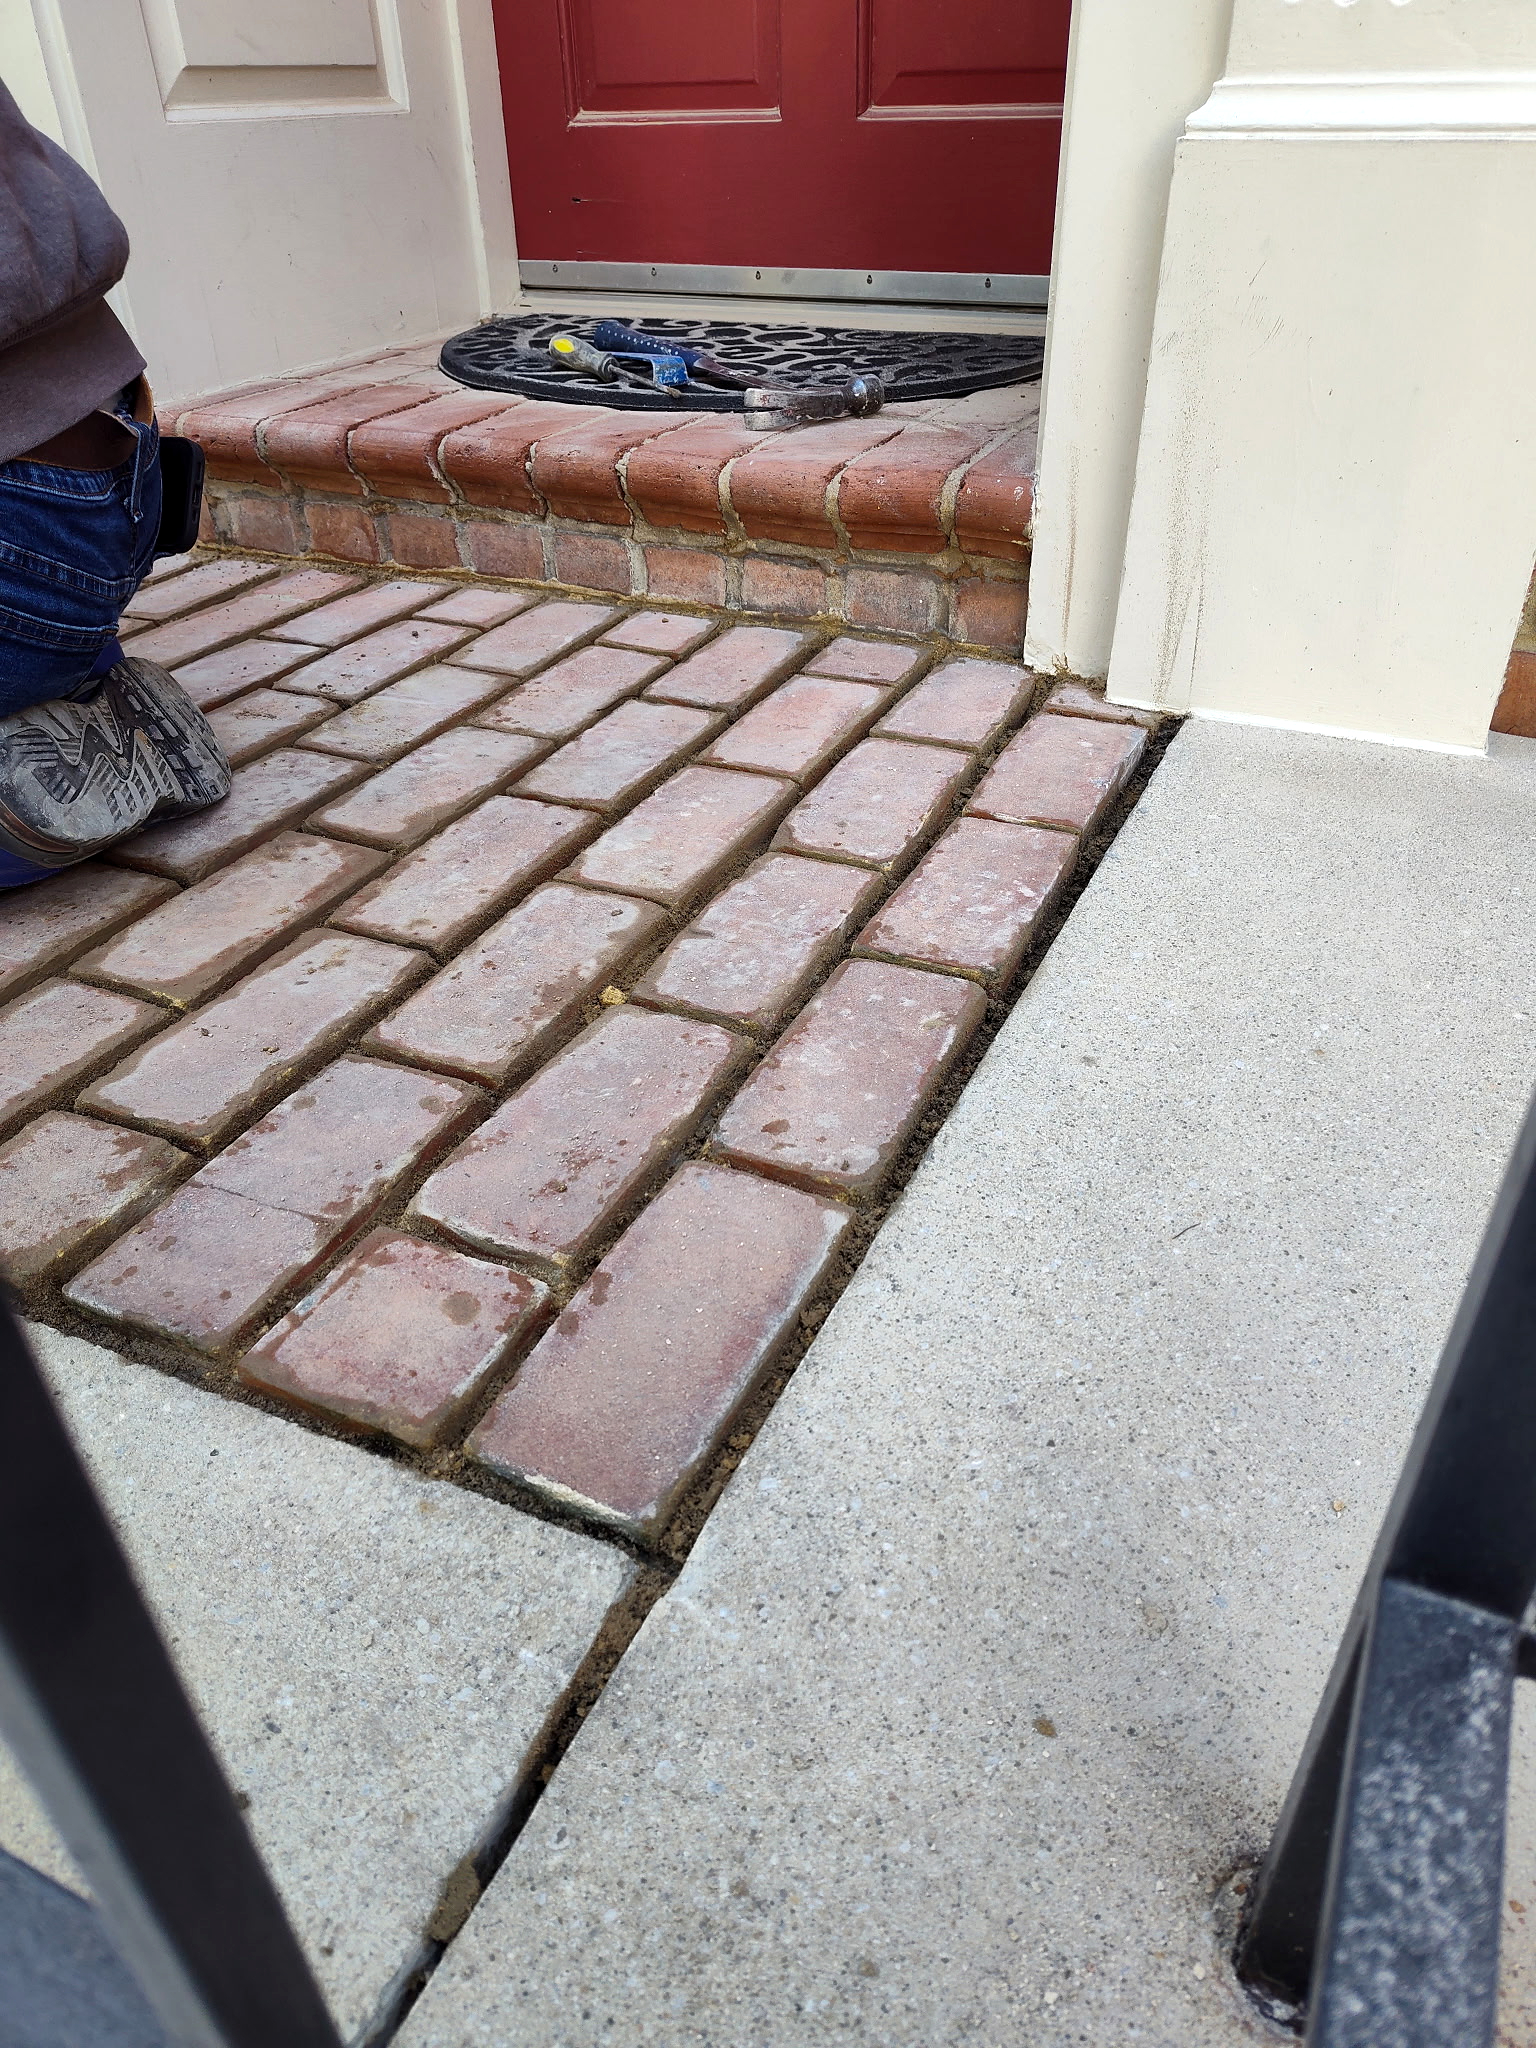
Process of removing any deteriorated mortar from the joints between the bricks.

03
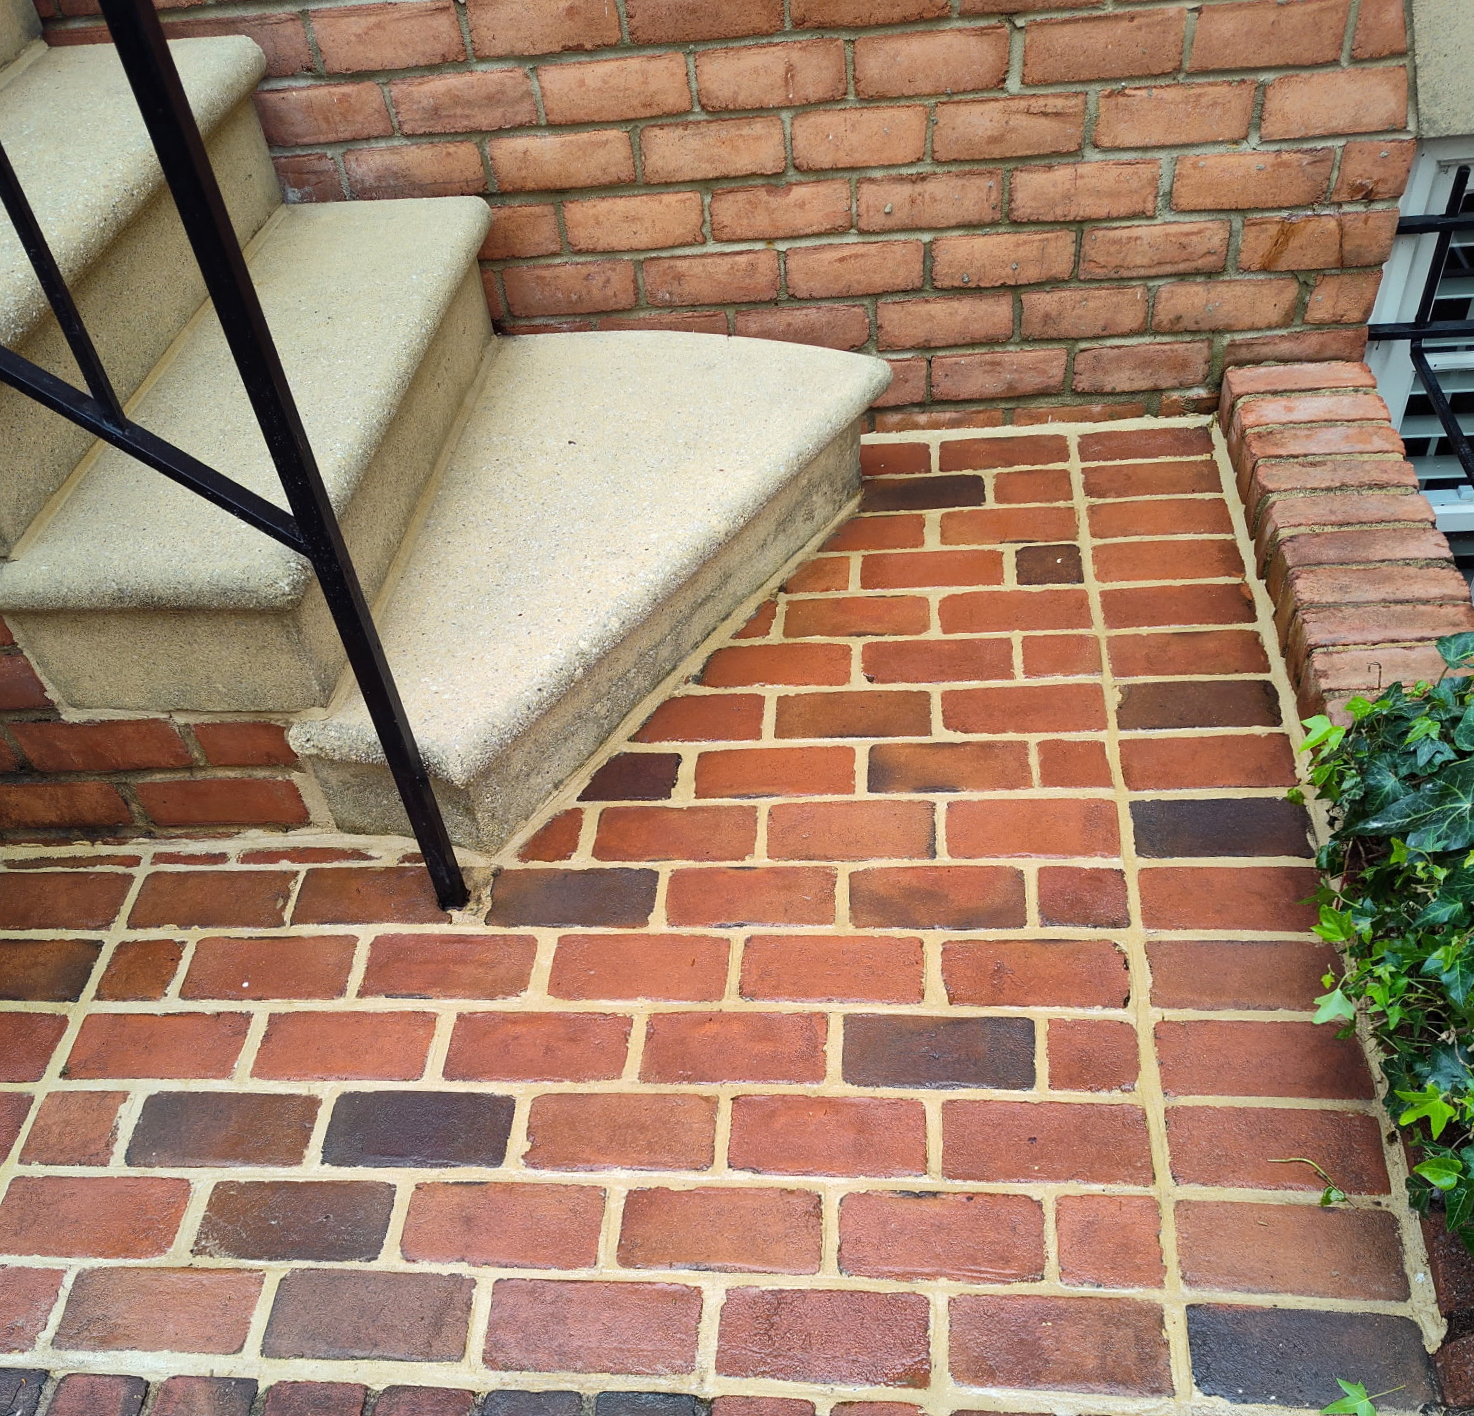
Brick Repointing-
Finished Product
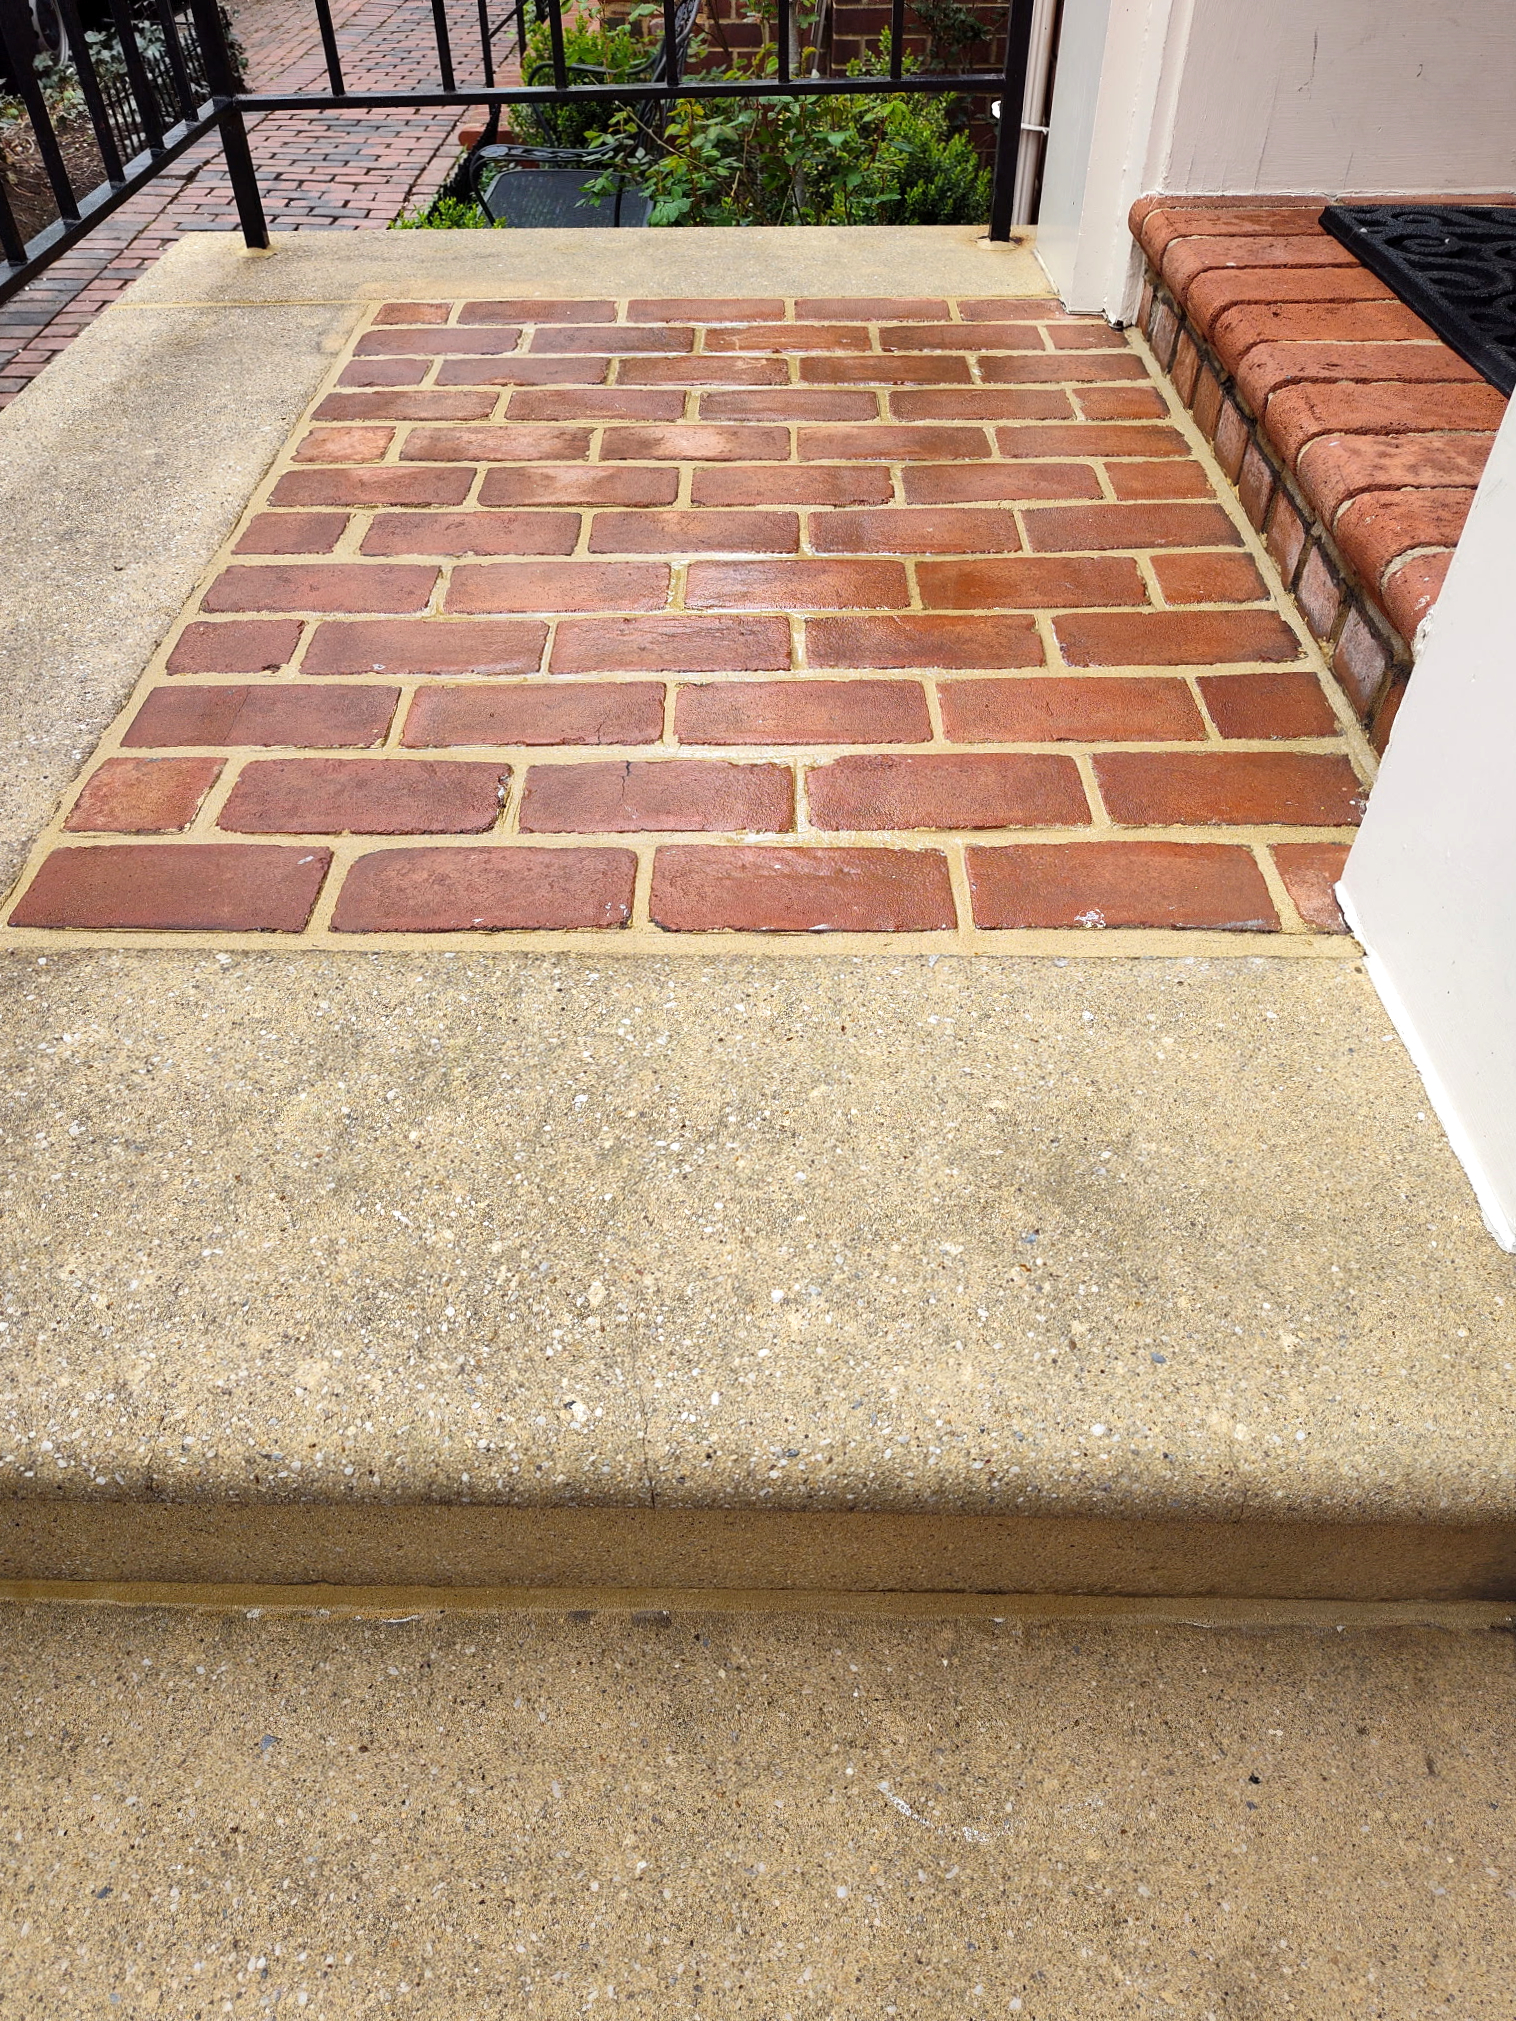
Once the deteriorated mortar was carefully removed from the joints between the bricks and replaced with fresh mortar. The joints were properly finished to restore the appearance, strength, and overall condition of the brickwork.

04
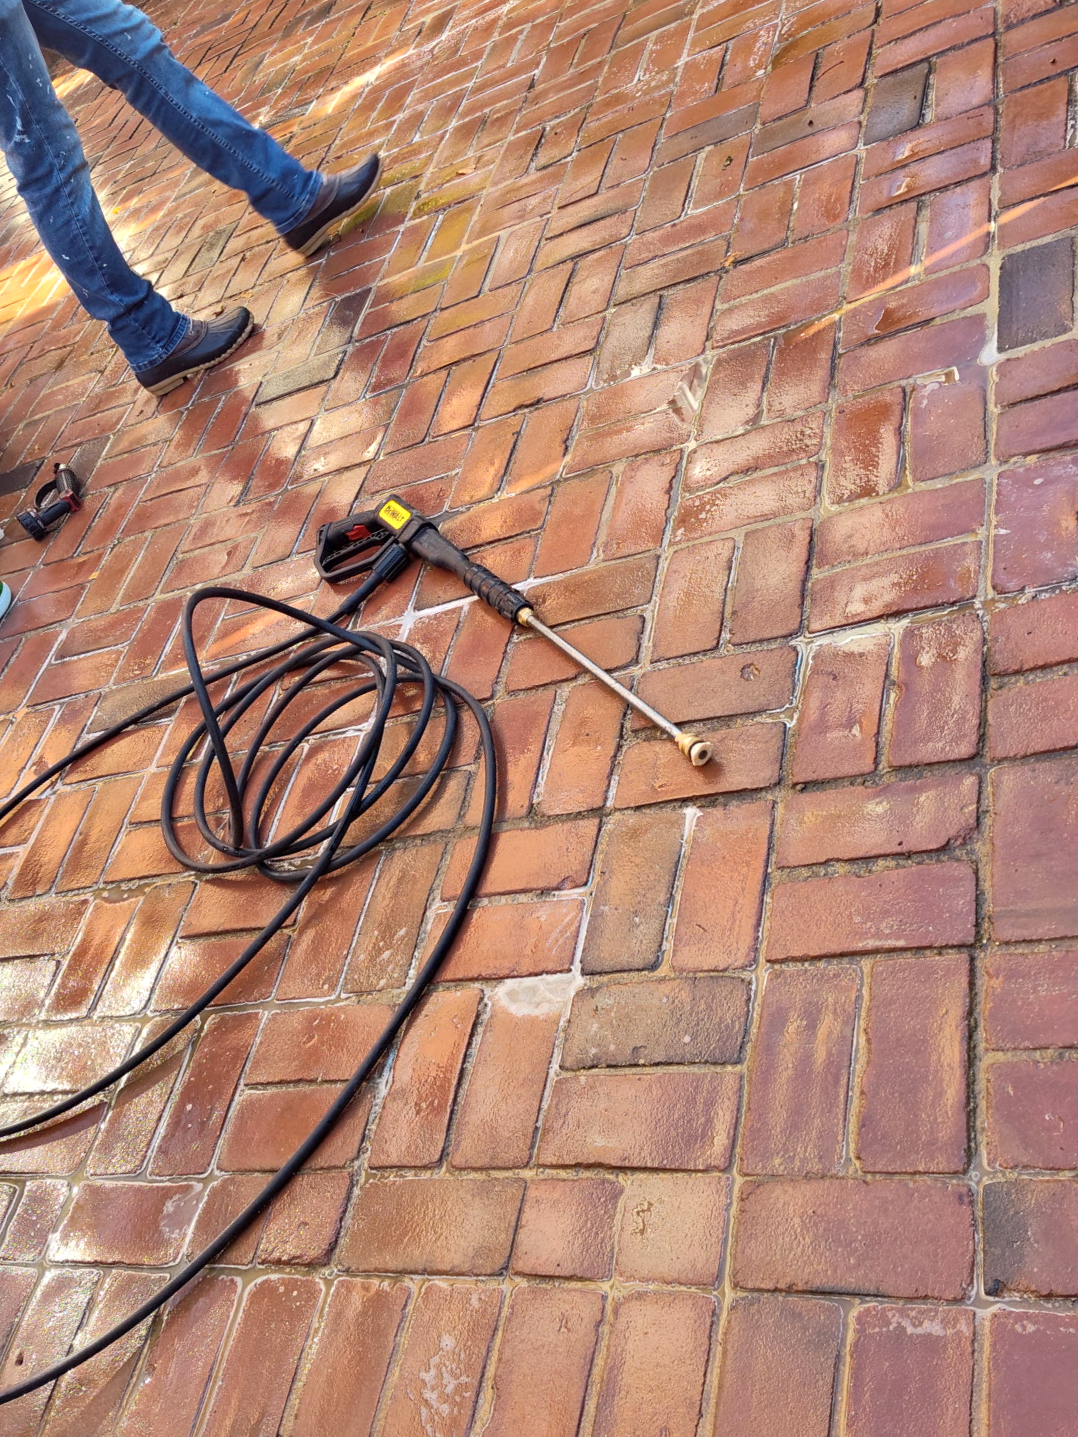
Existing Brickwork — Power Washing & Cleaning
The existing brickwork was thoroughly power washed to remove dirt, buildup, and surface grime, providing a clean surface for the restoration and new brickwork.

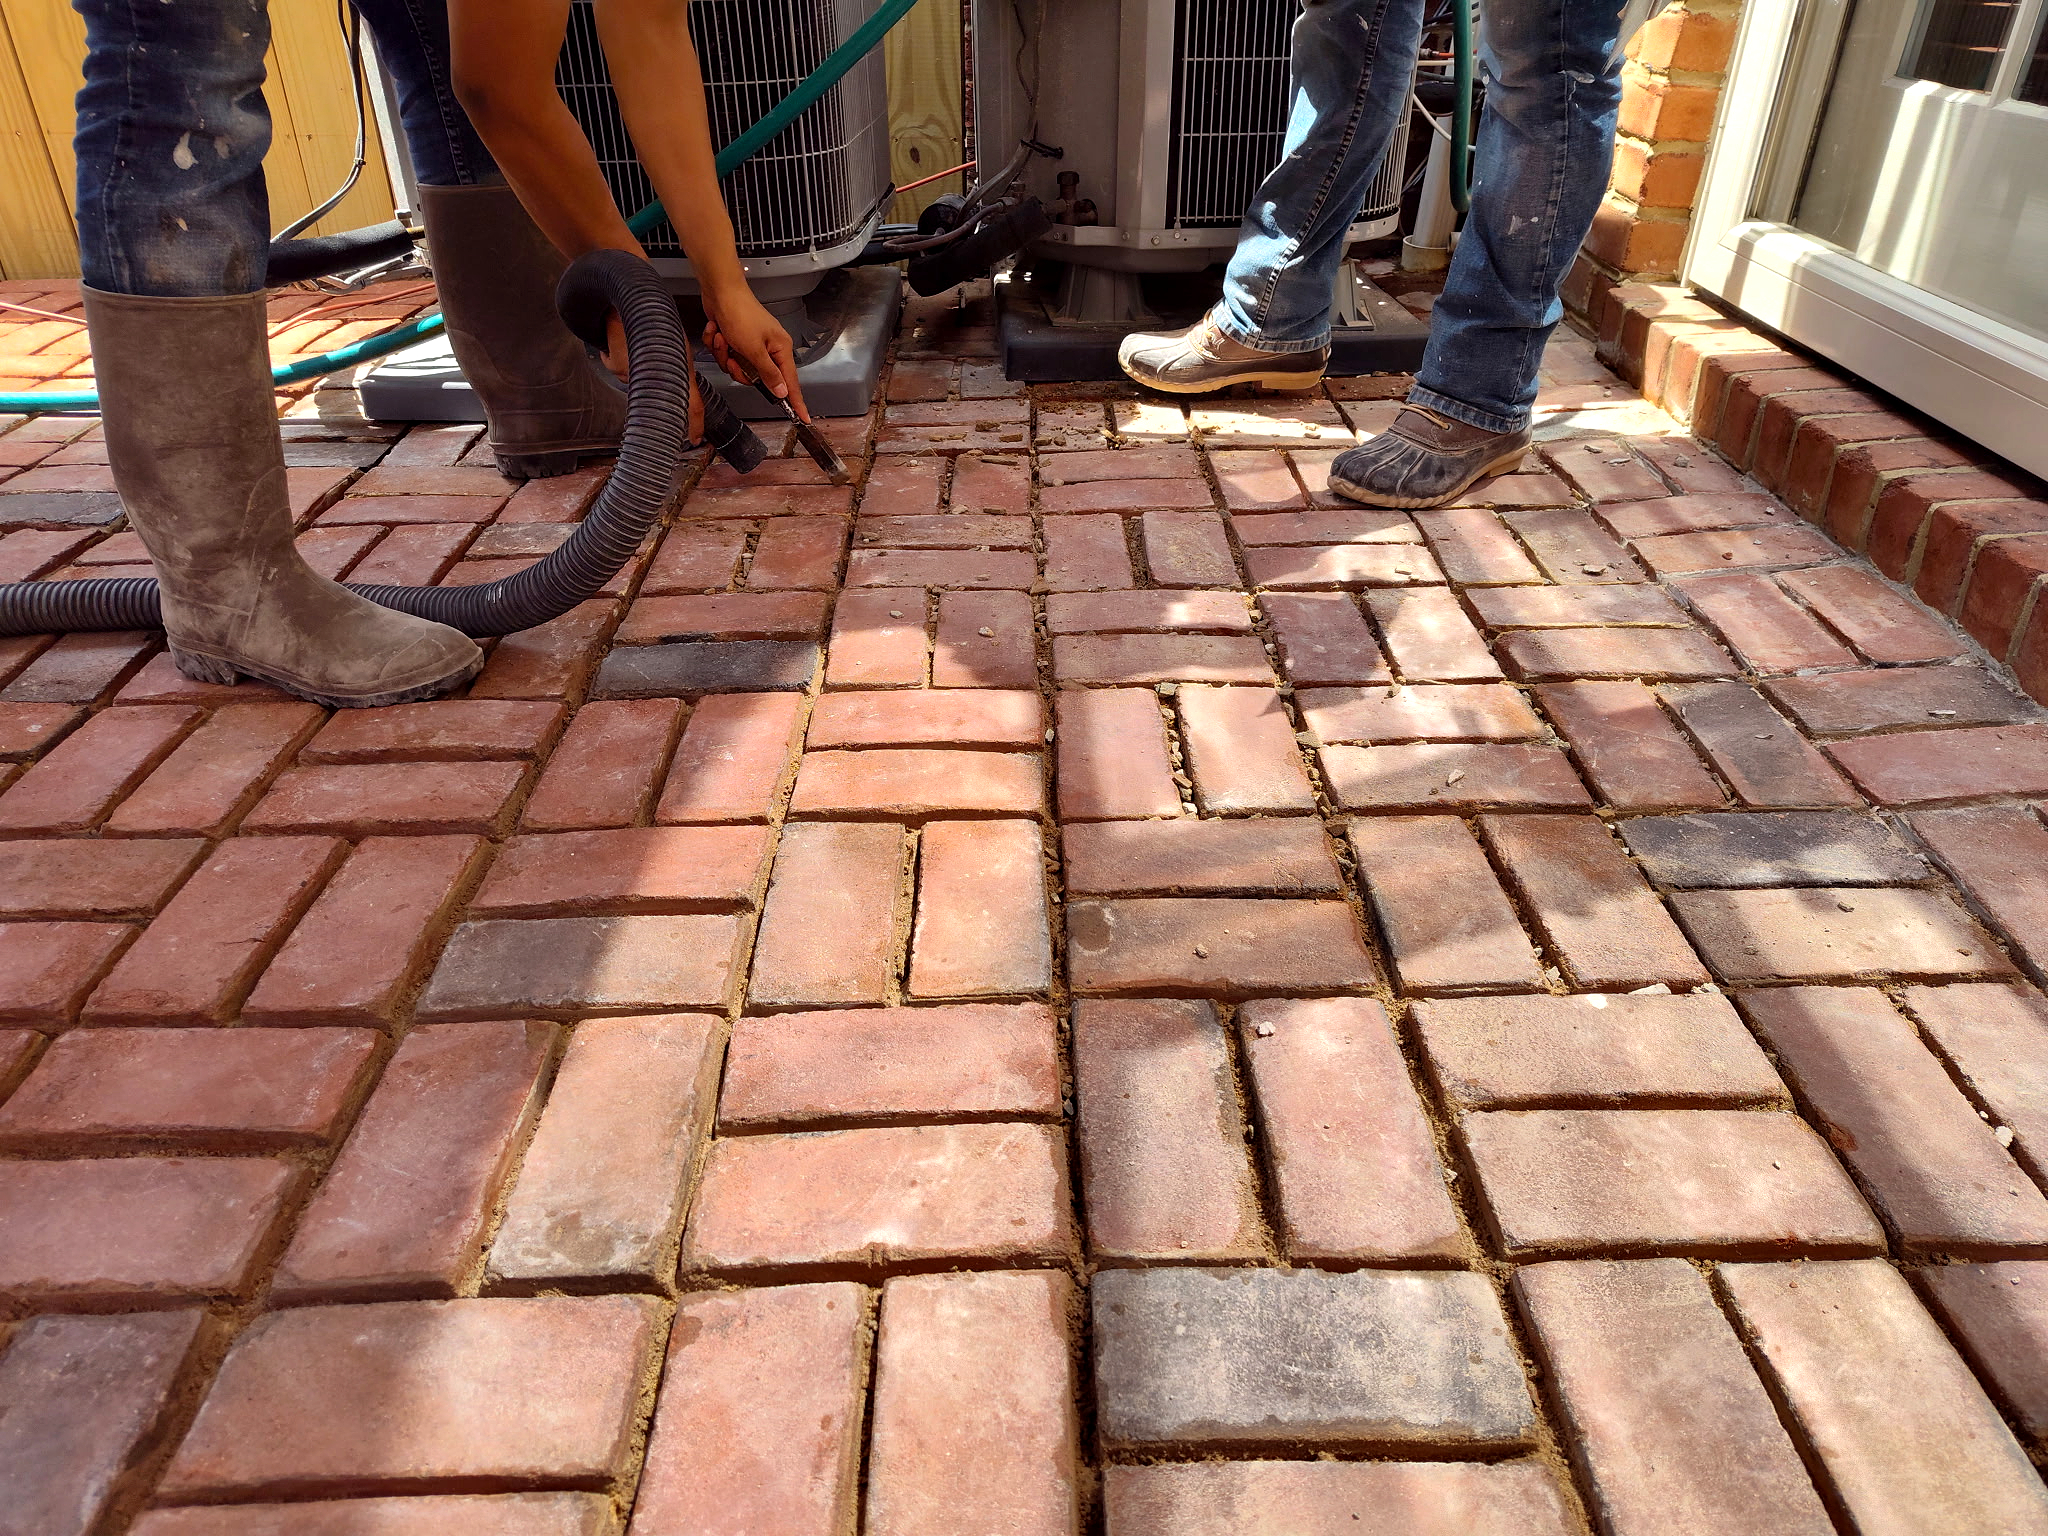
05
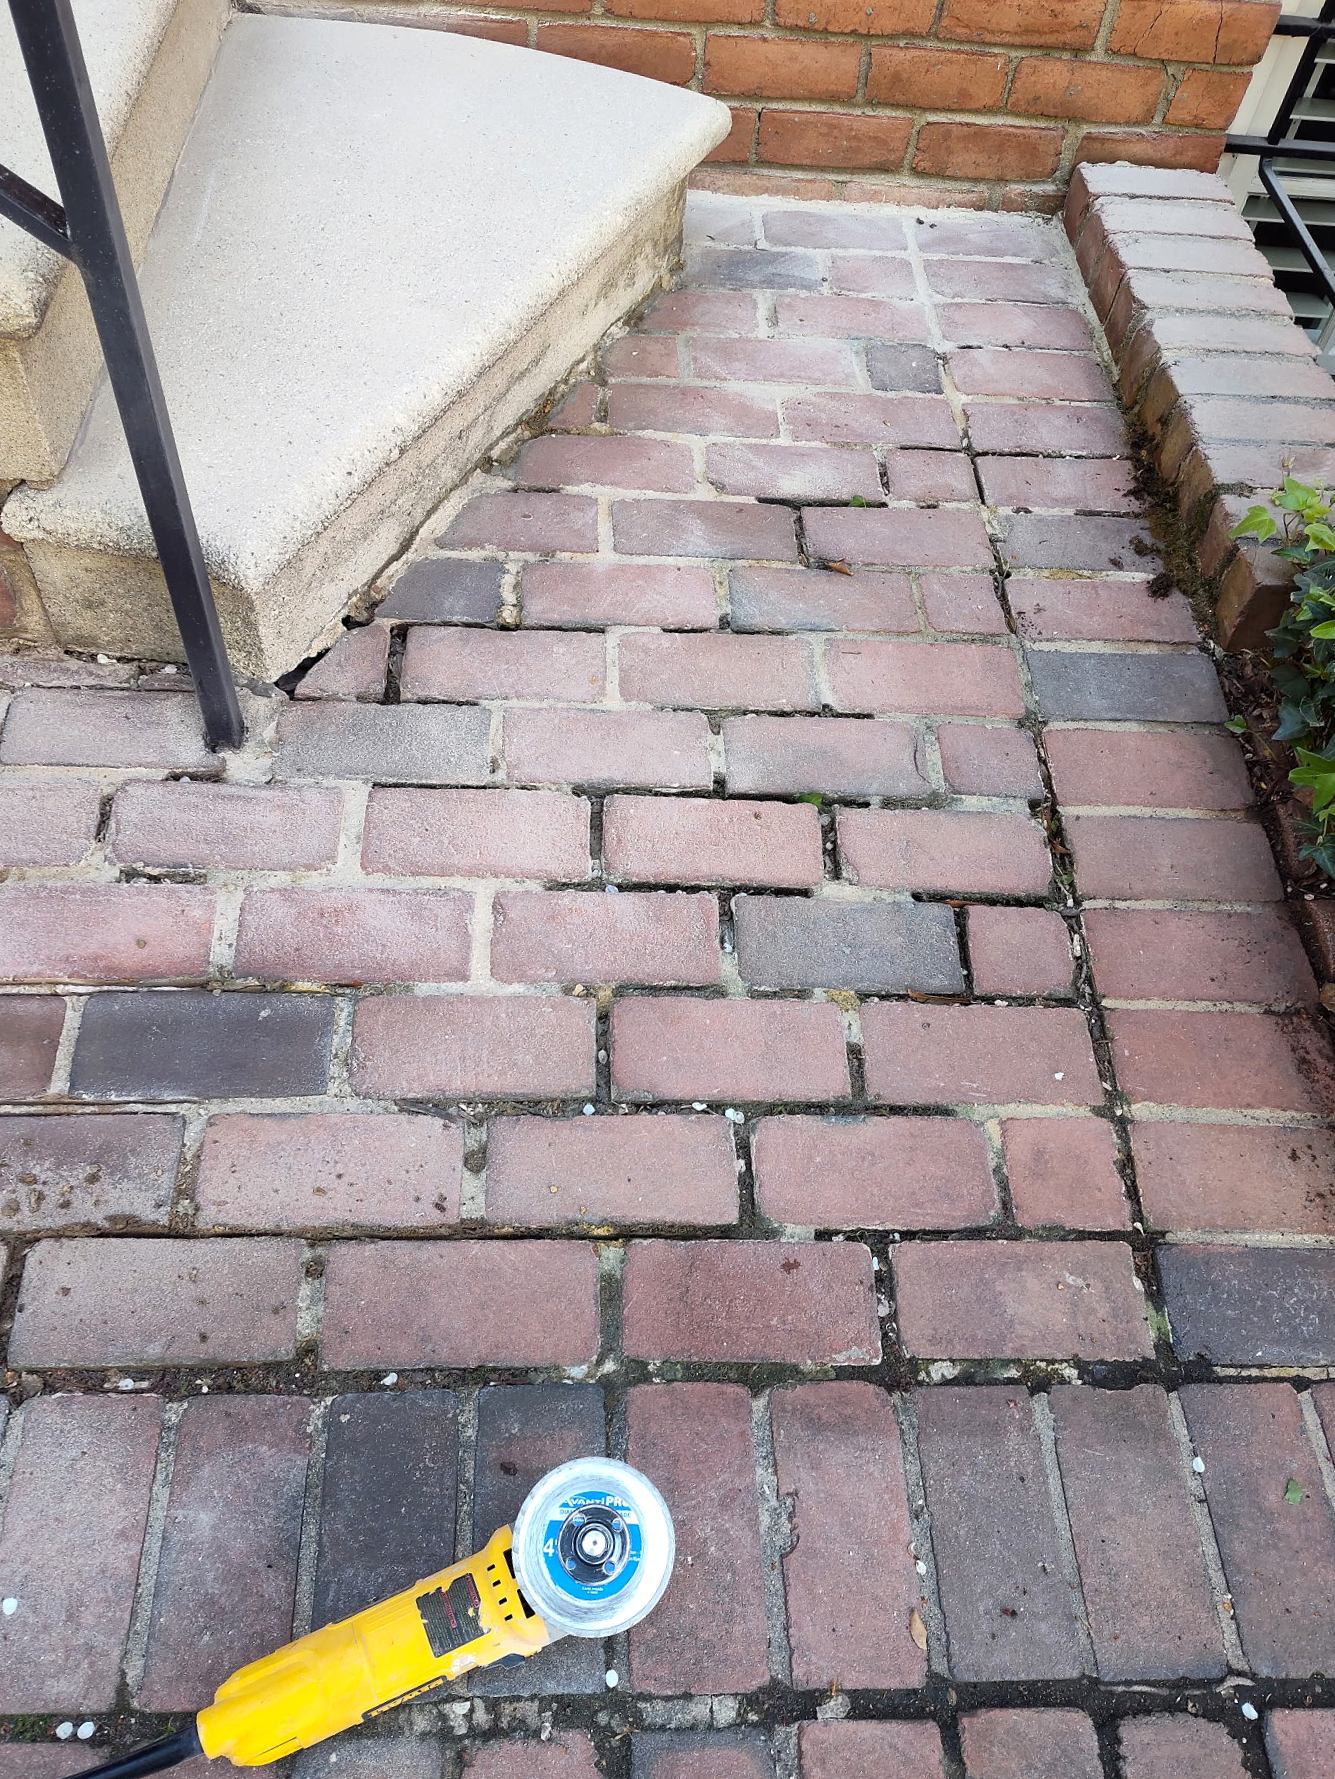
Mortar Joint Preparation
Deteriorated mortar was carefully removed from the existing brick joints to prepare the area for fresh mortar and ensure a clean, solid foundation for the restoration work.

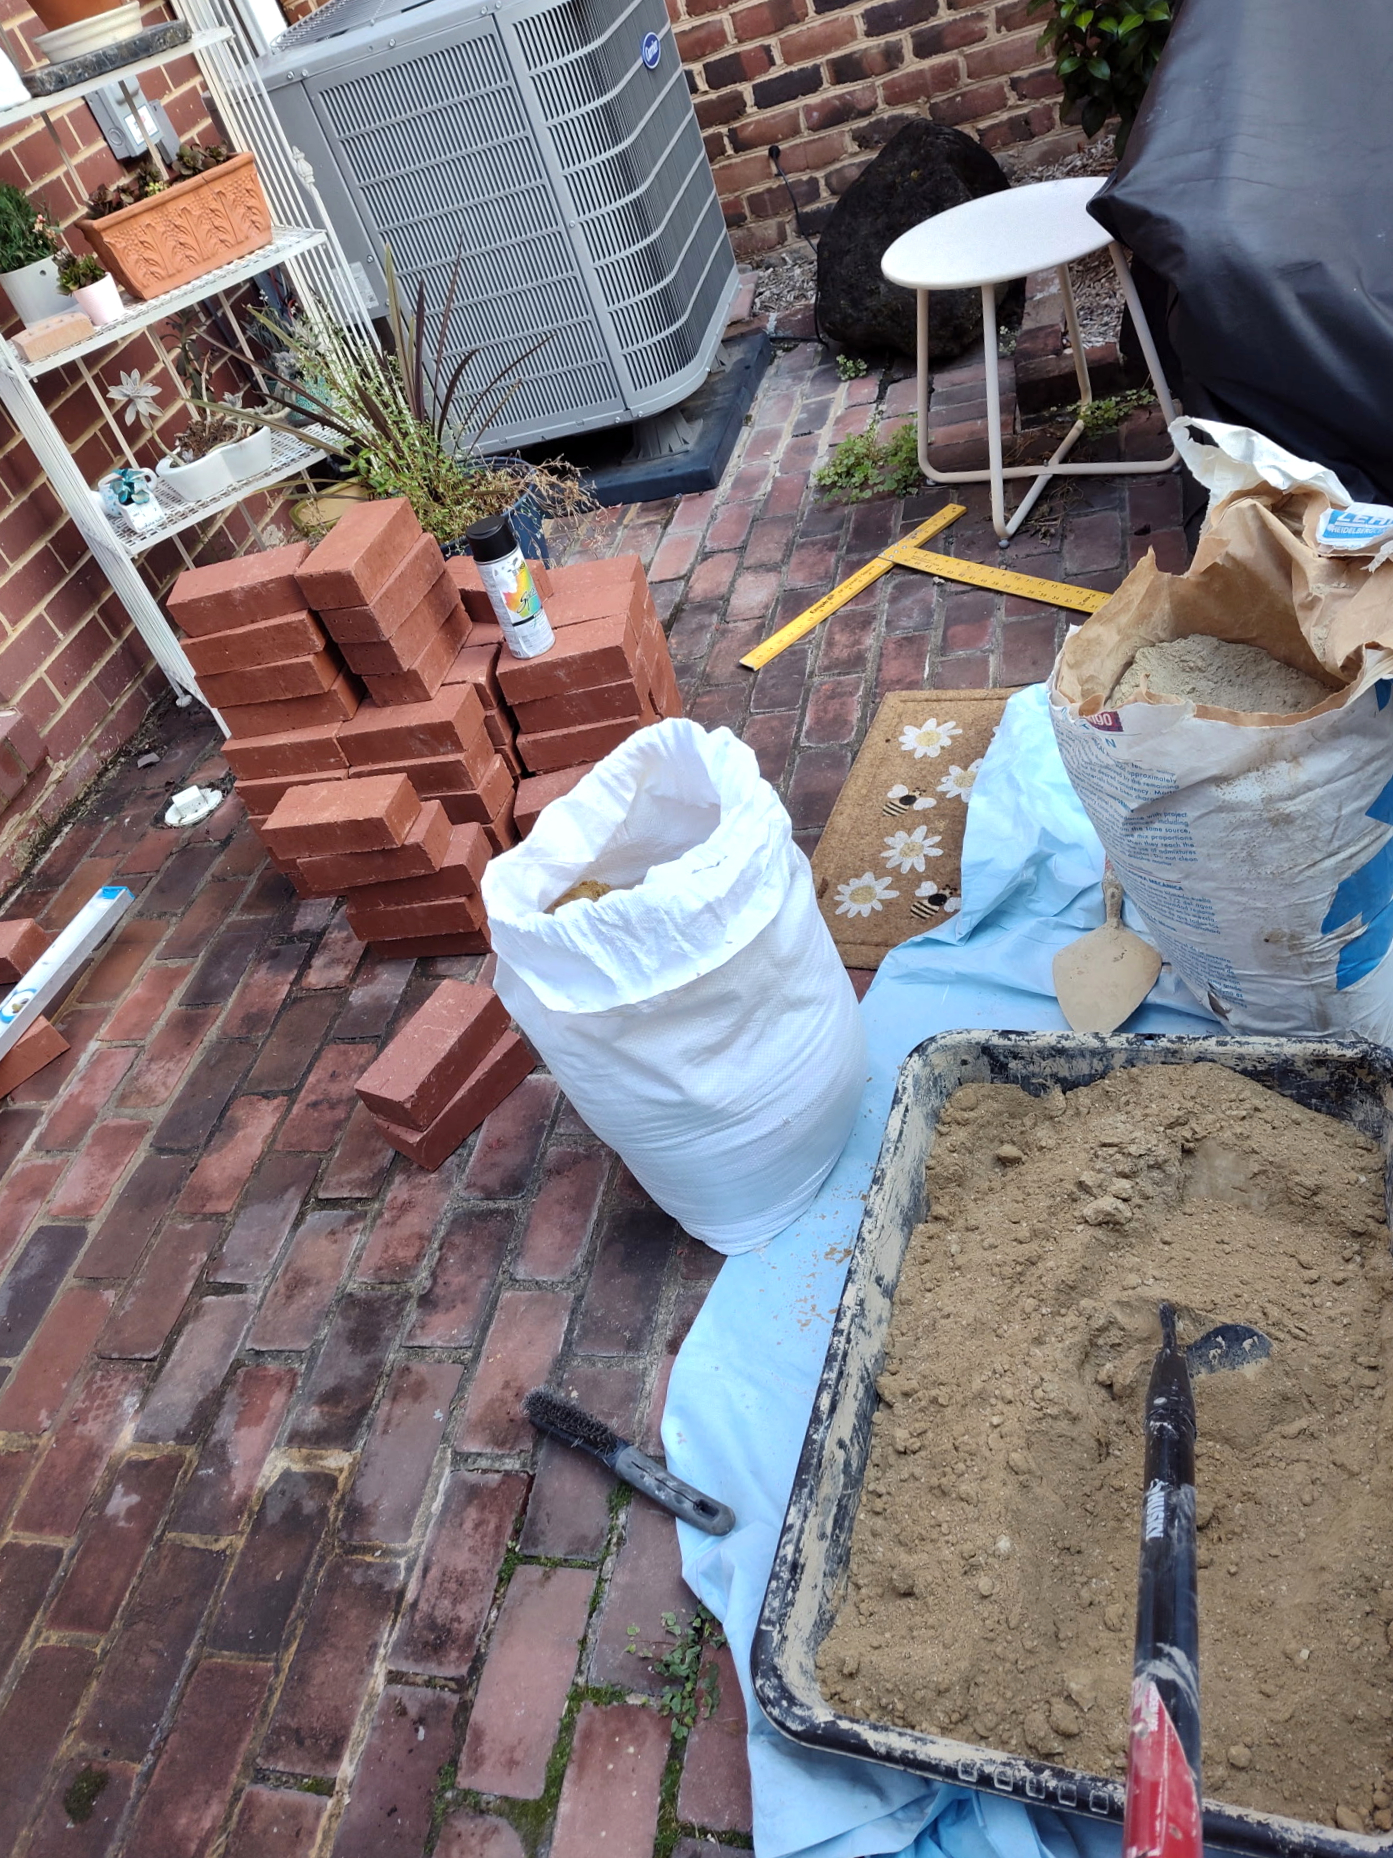
06
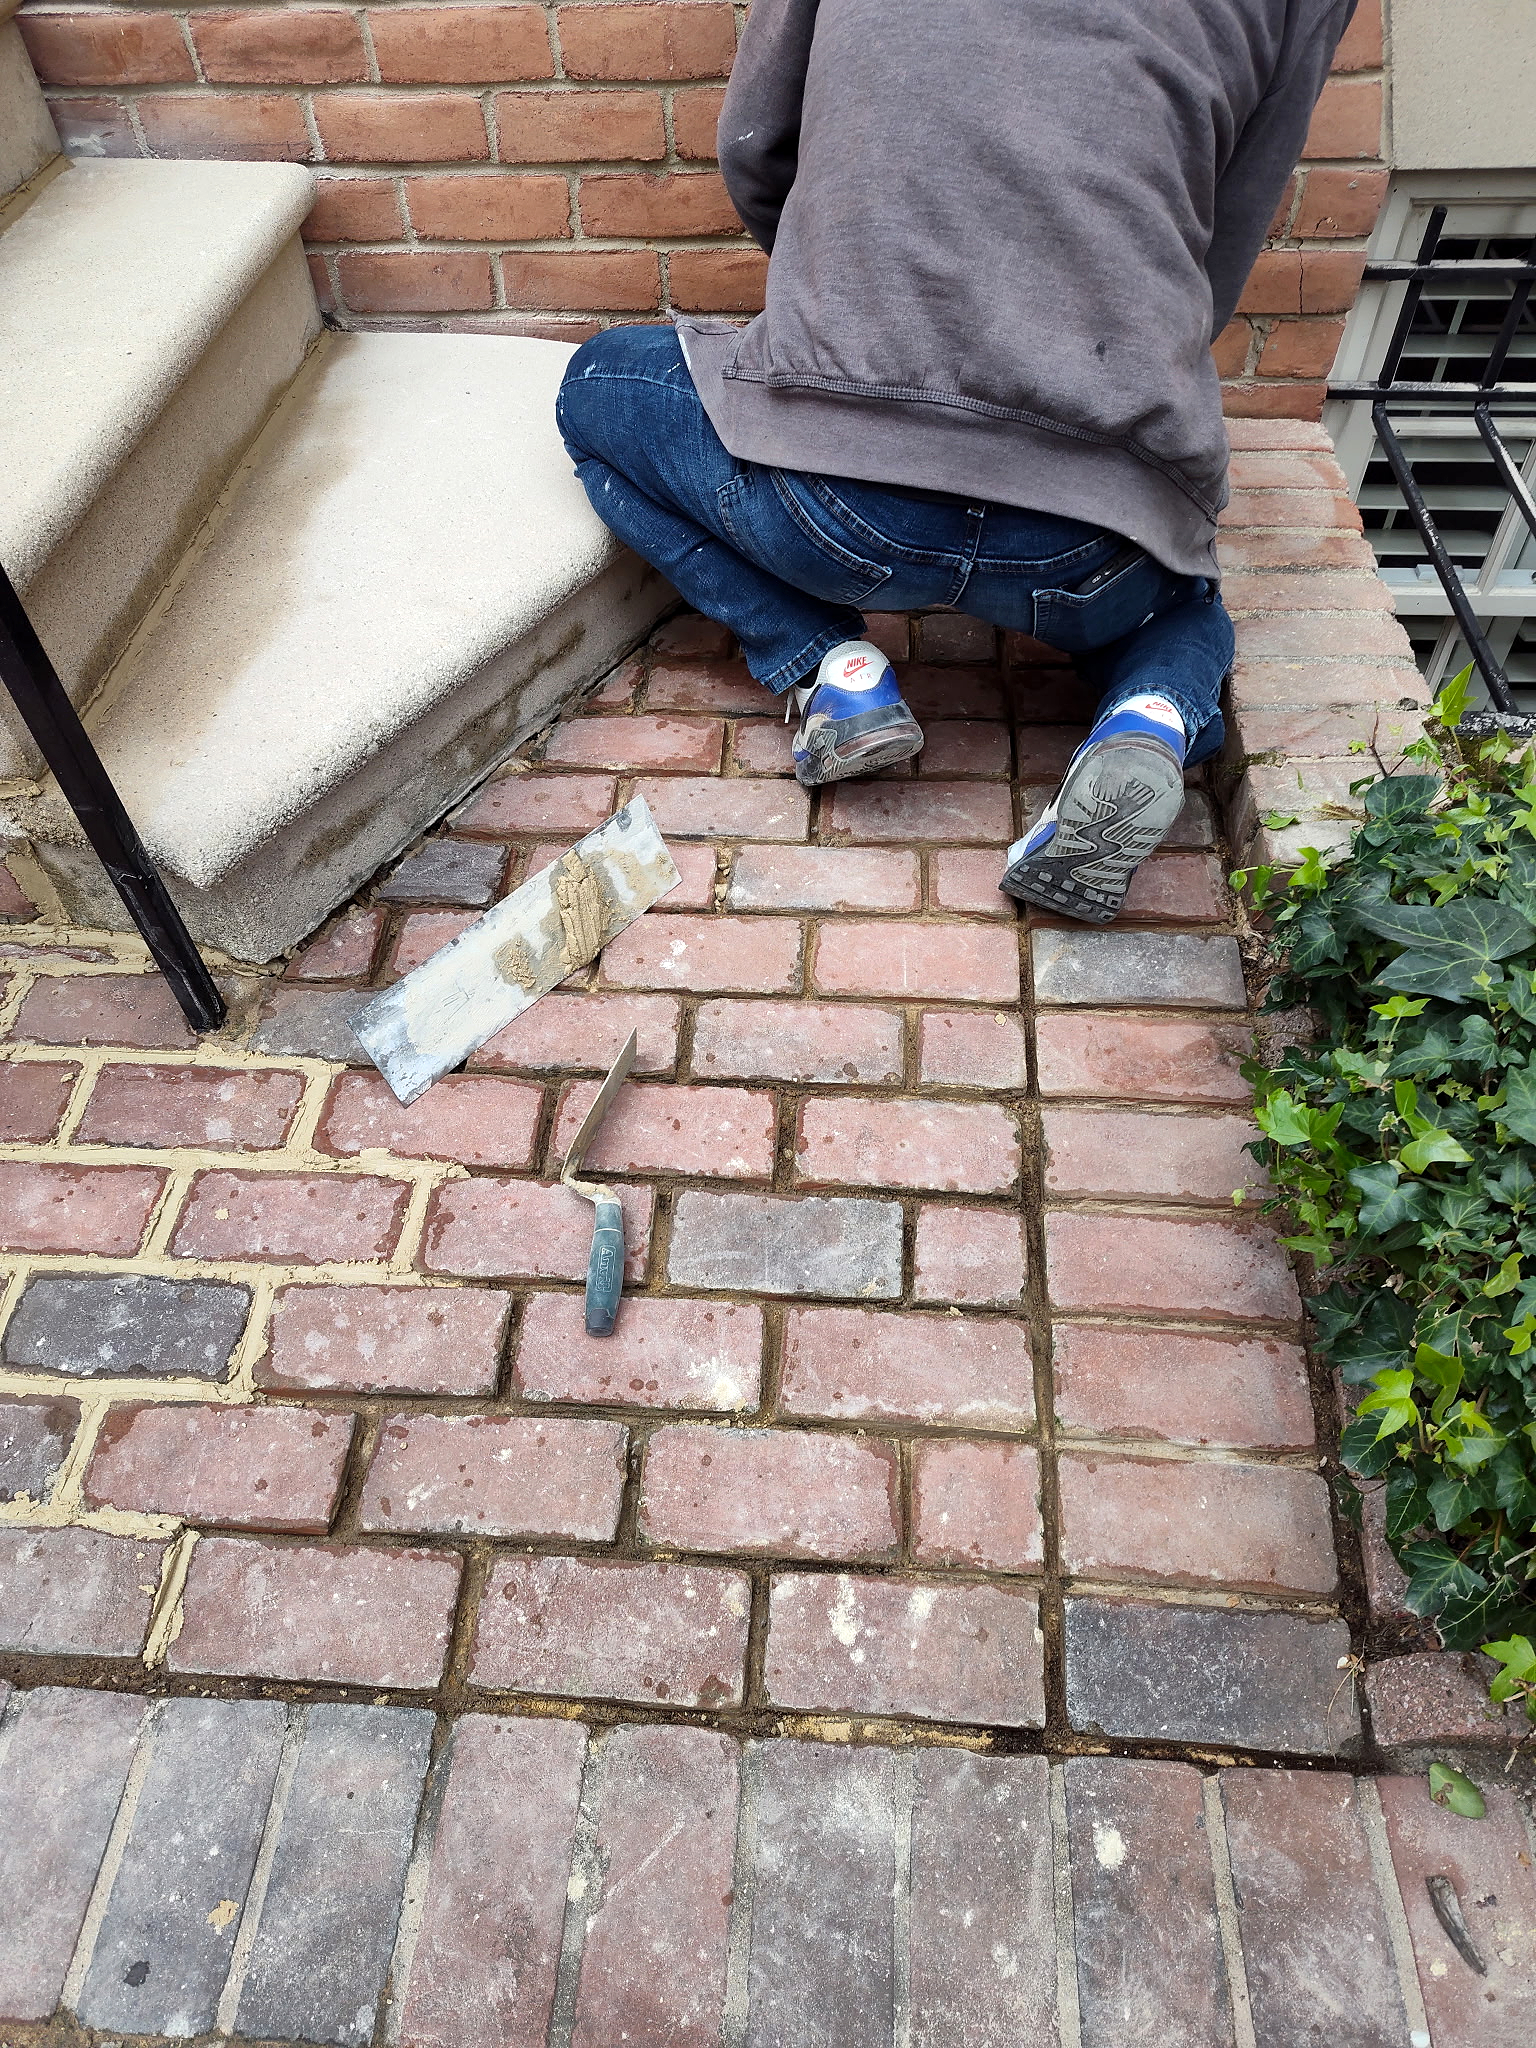
Prepping New Brickwork Installation
Materials were carefully prepared for the new brickwork, with mortar mixed to a consistent texture and composition to ensure proper application, spacing, and a uniform finished appearance.

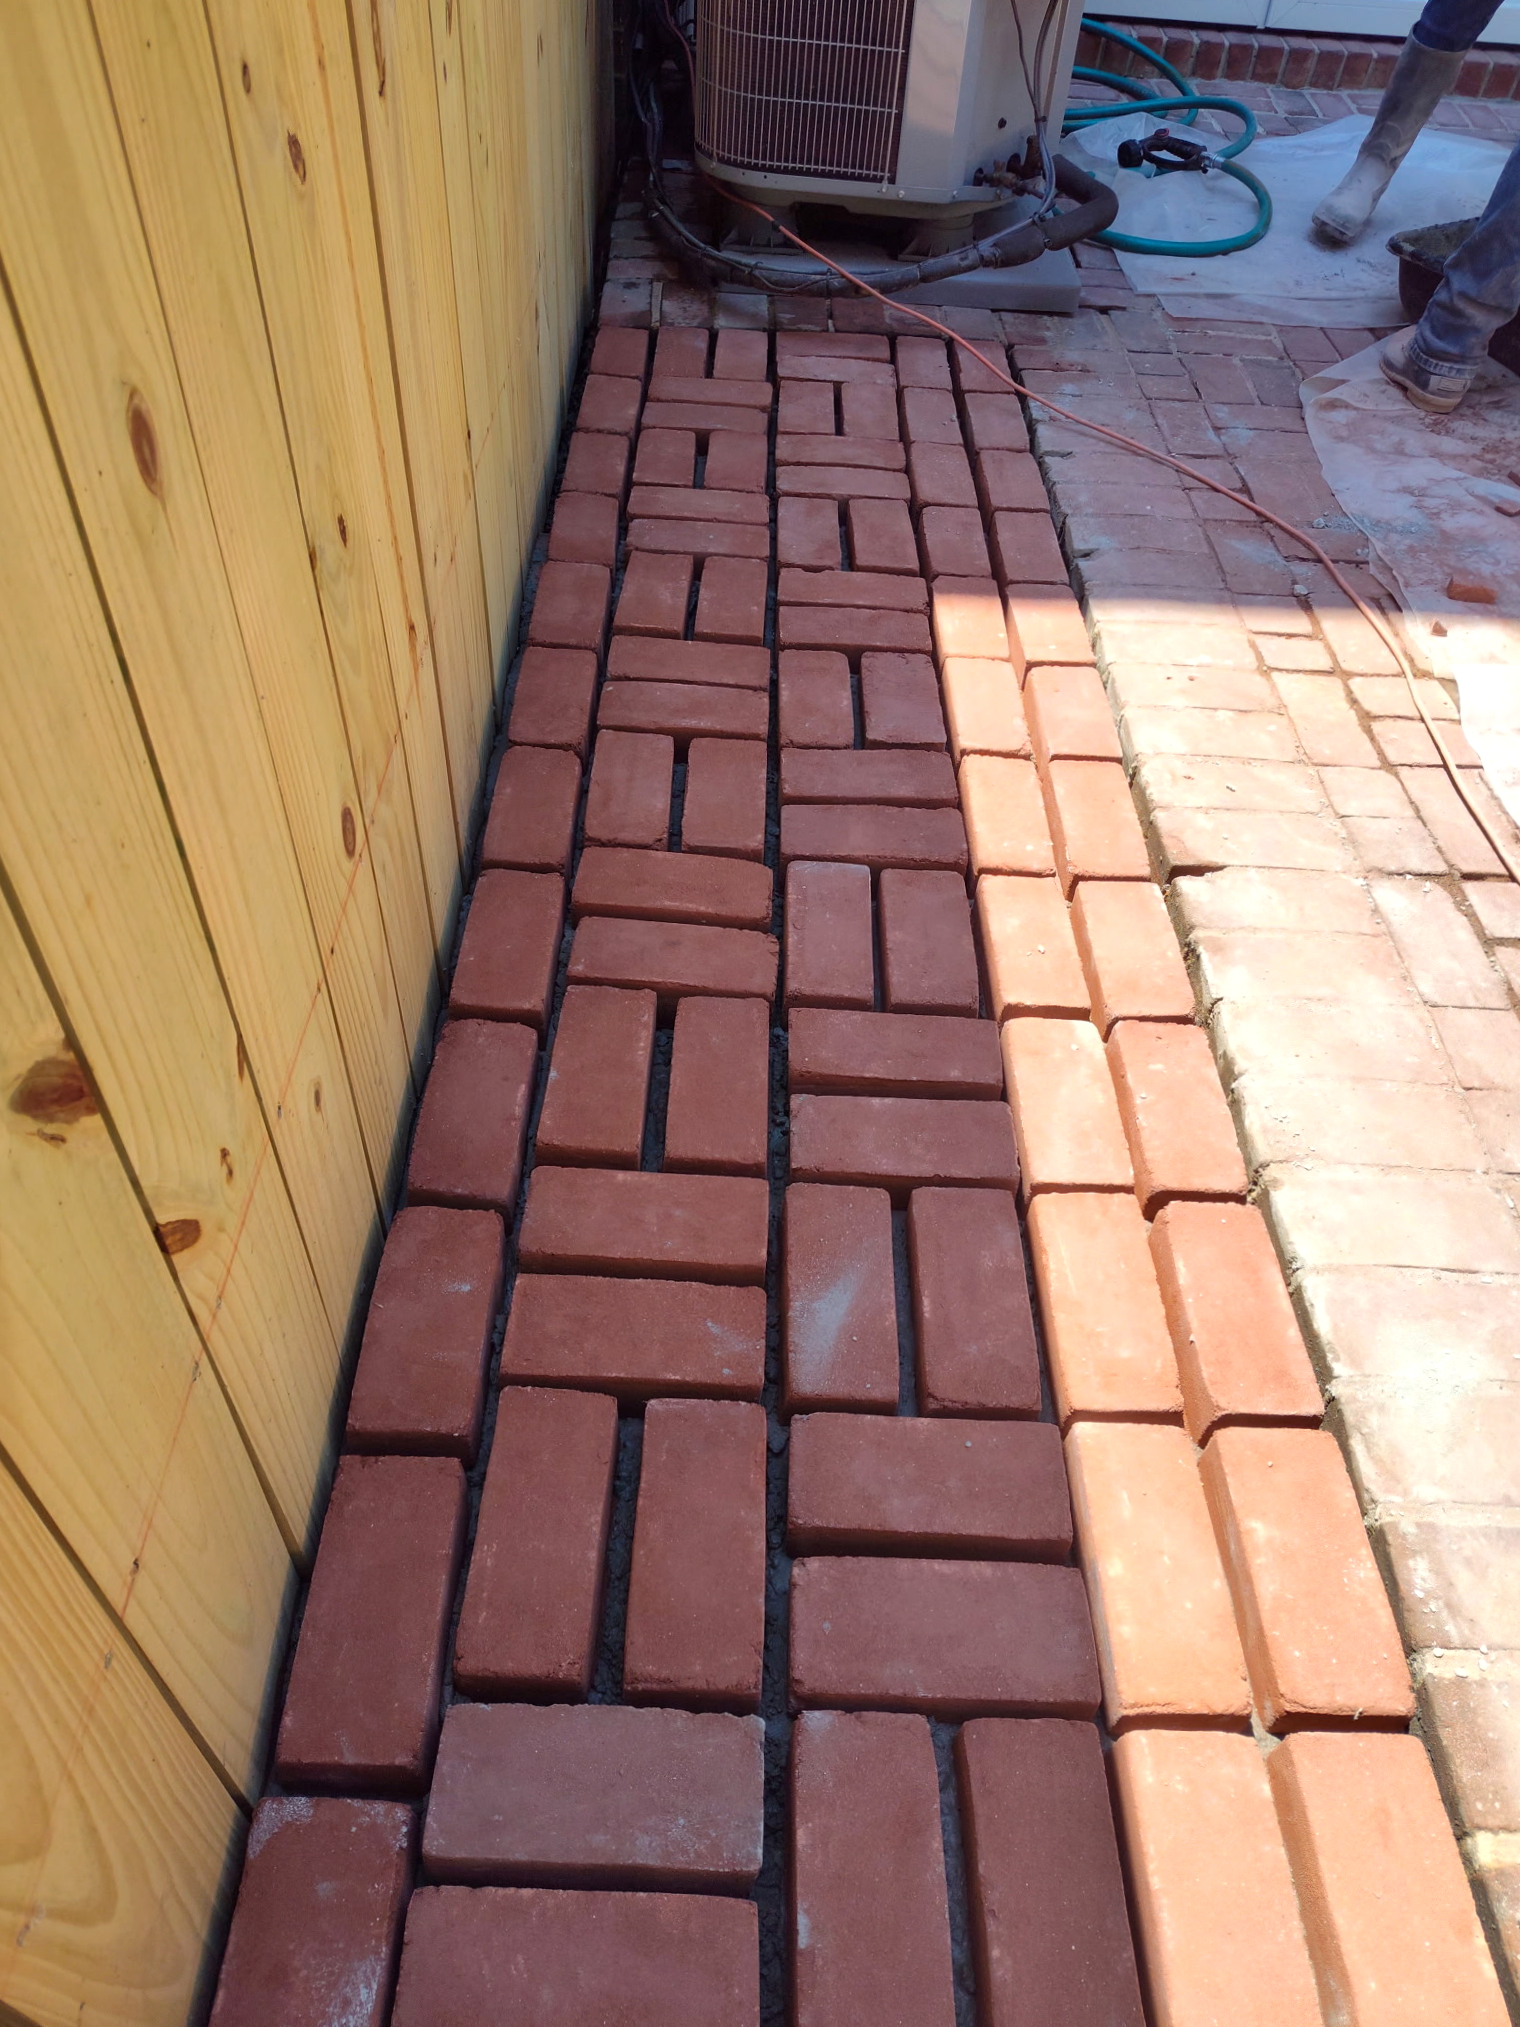
07
New Brickwork Installation
New brickwork was carefully laid to expand the existing backyard section, with attention to alignment, spacing, and consistency with the surrounding brickwork.

08
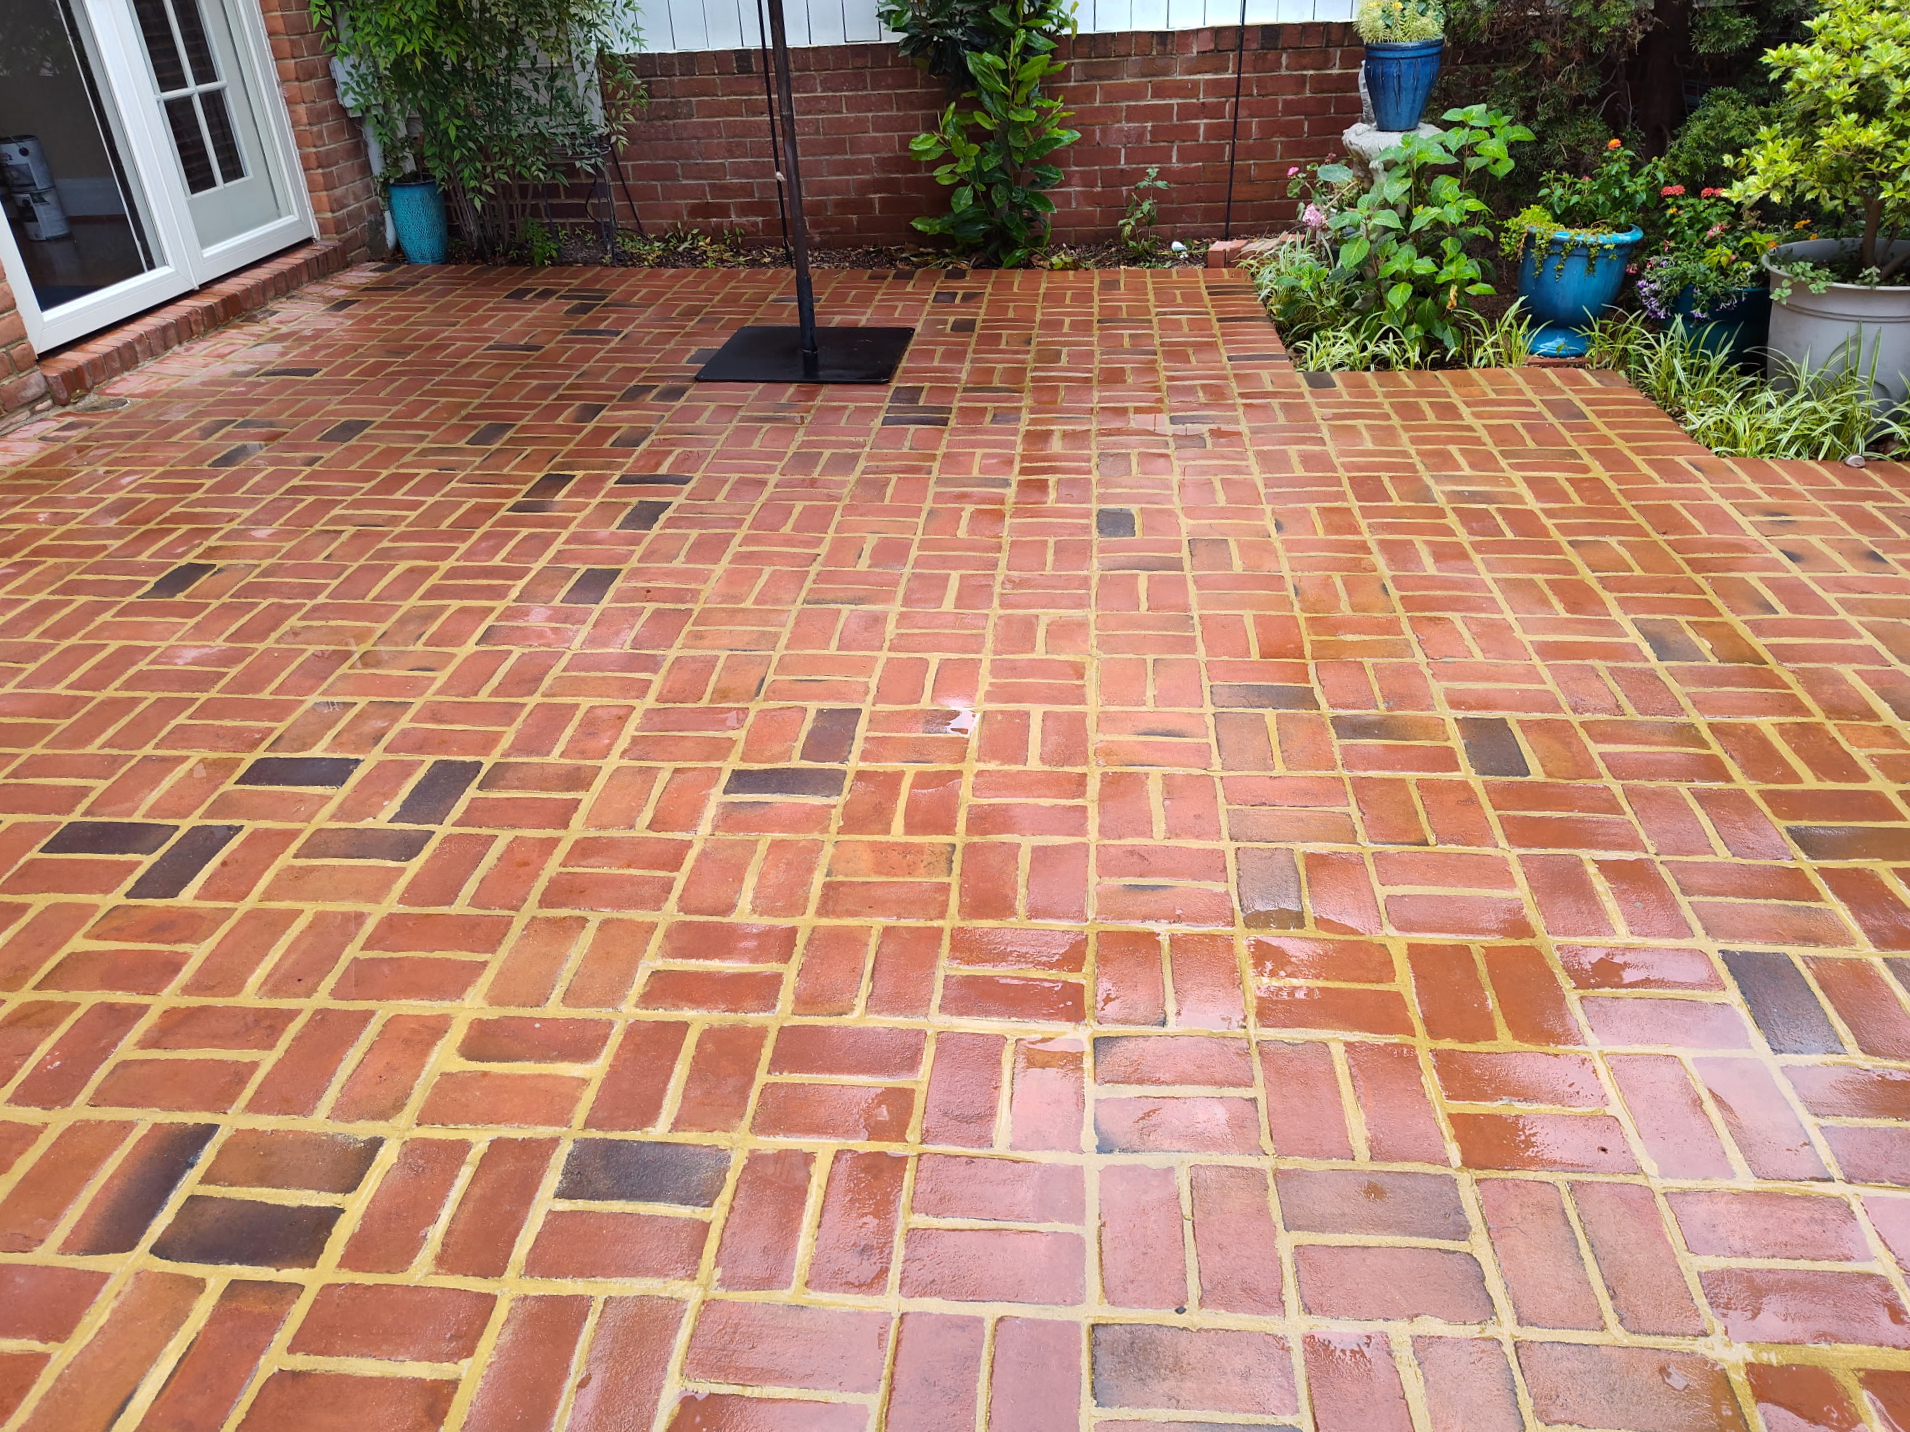
Completed Brickwork — Final Result
The completed project combines the restored existing brickwork with the new brick addition, creating a clean, cohesive finish that blends naturally with the existing backyard space.

09
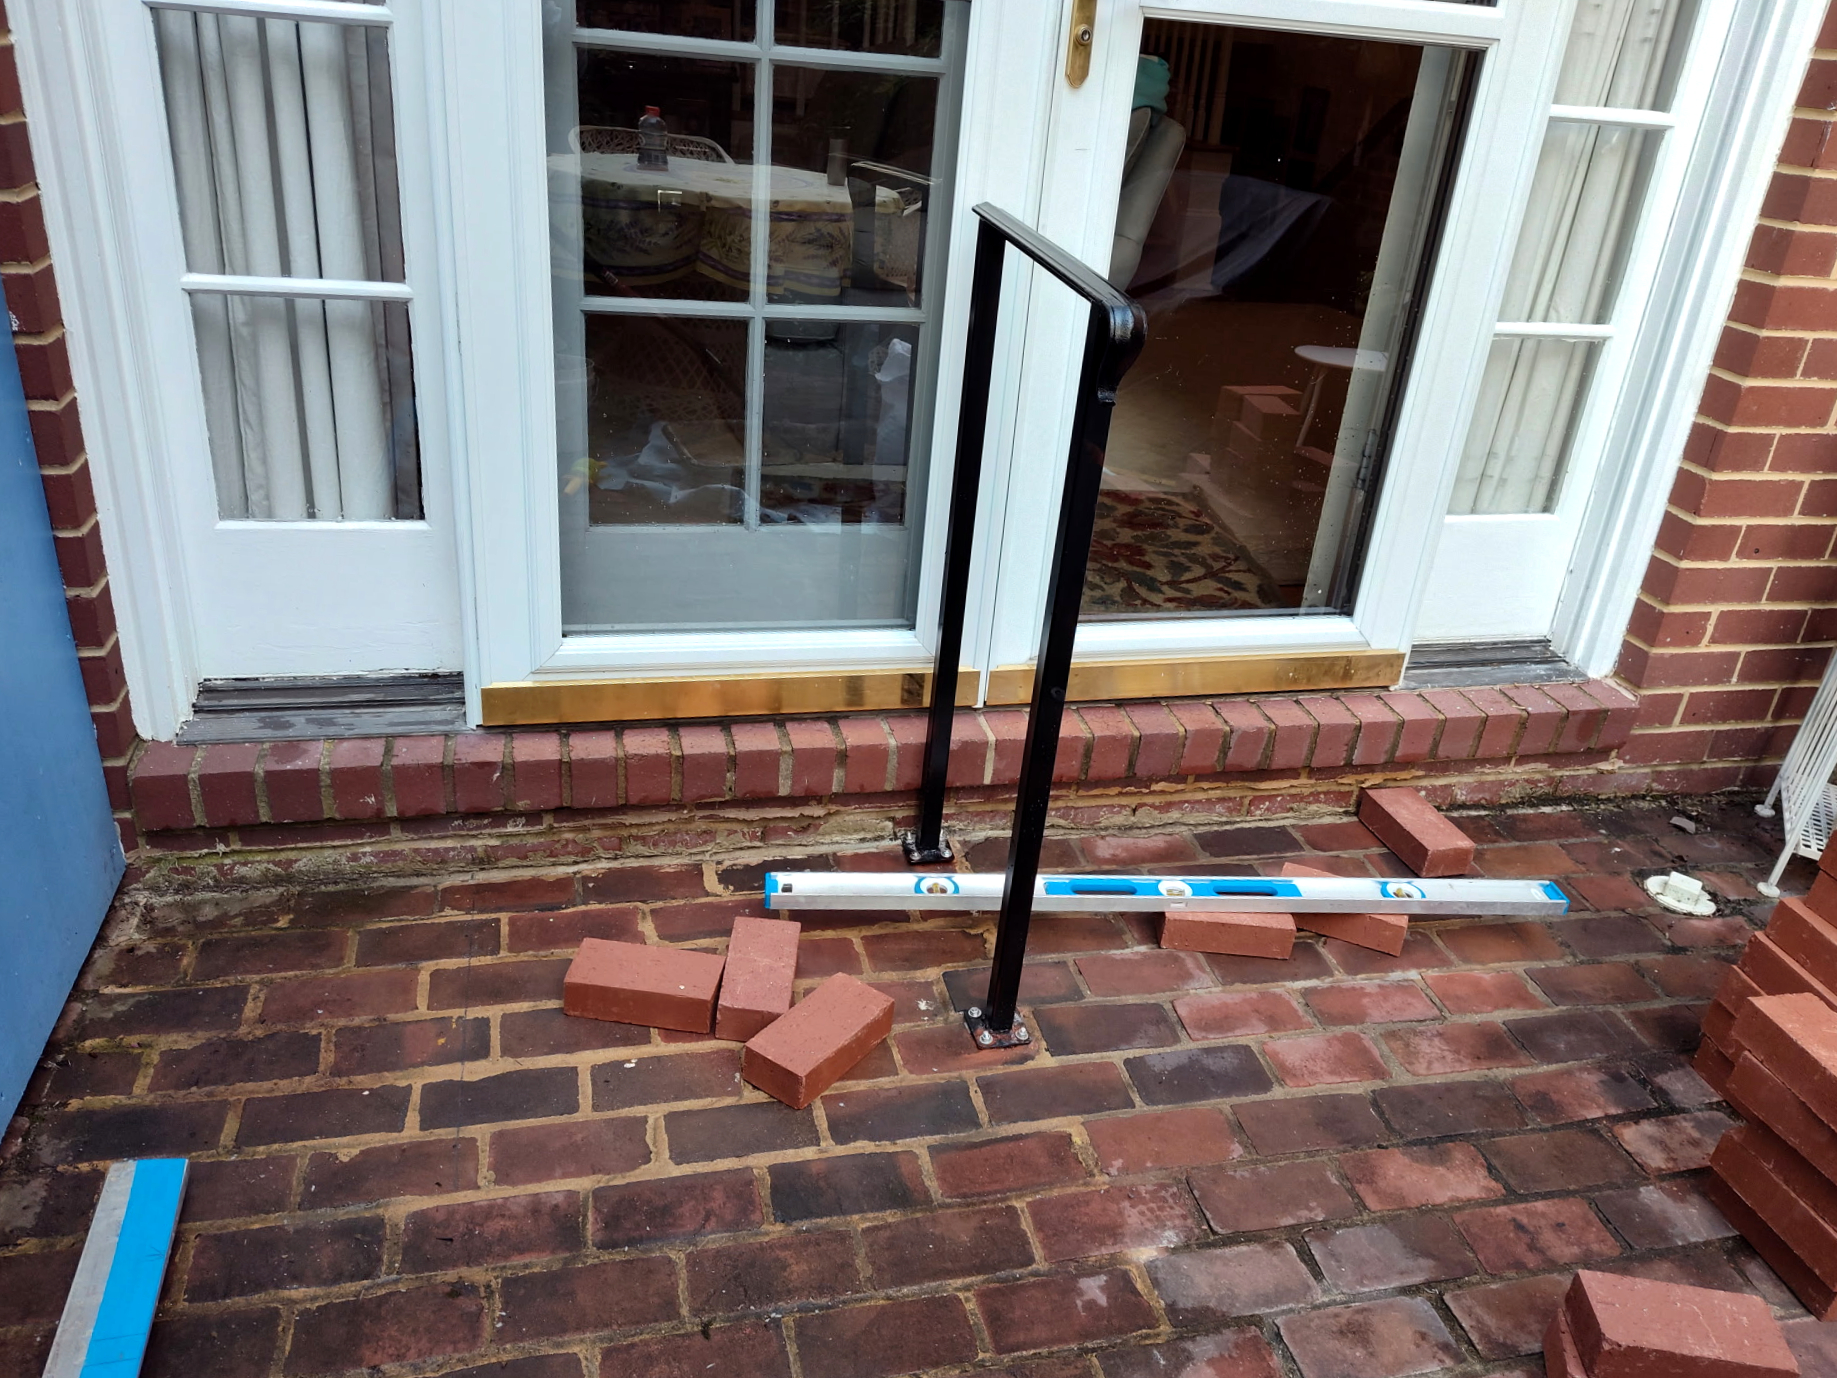
Custom Walkway Railing & Brick Installation
Prepping the installation of new brickwork to create a solid, finished base for the walkway railing.

10
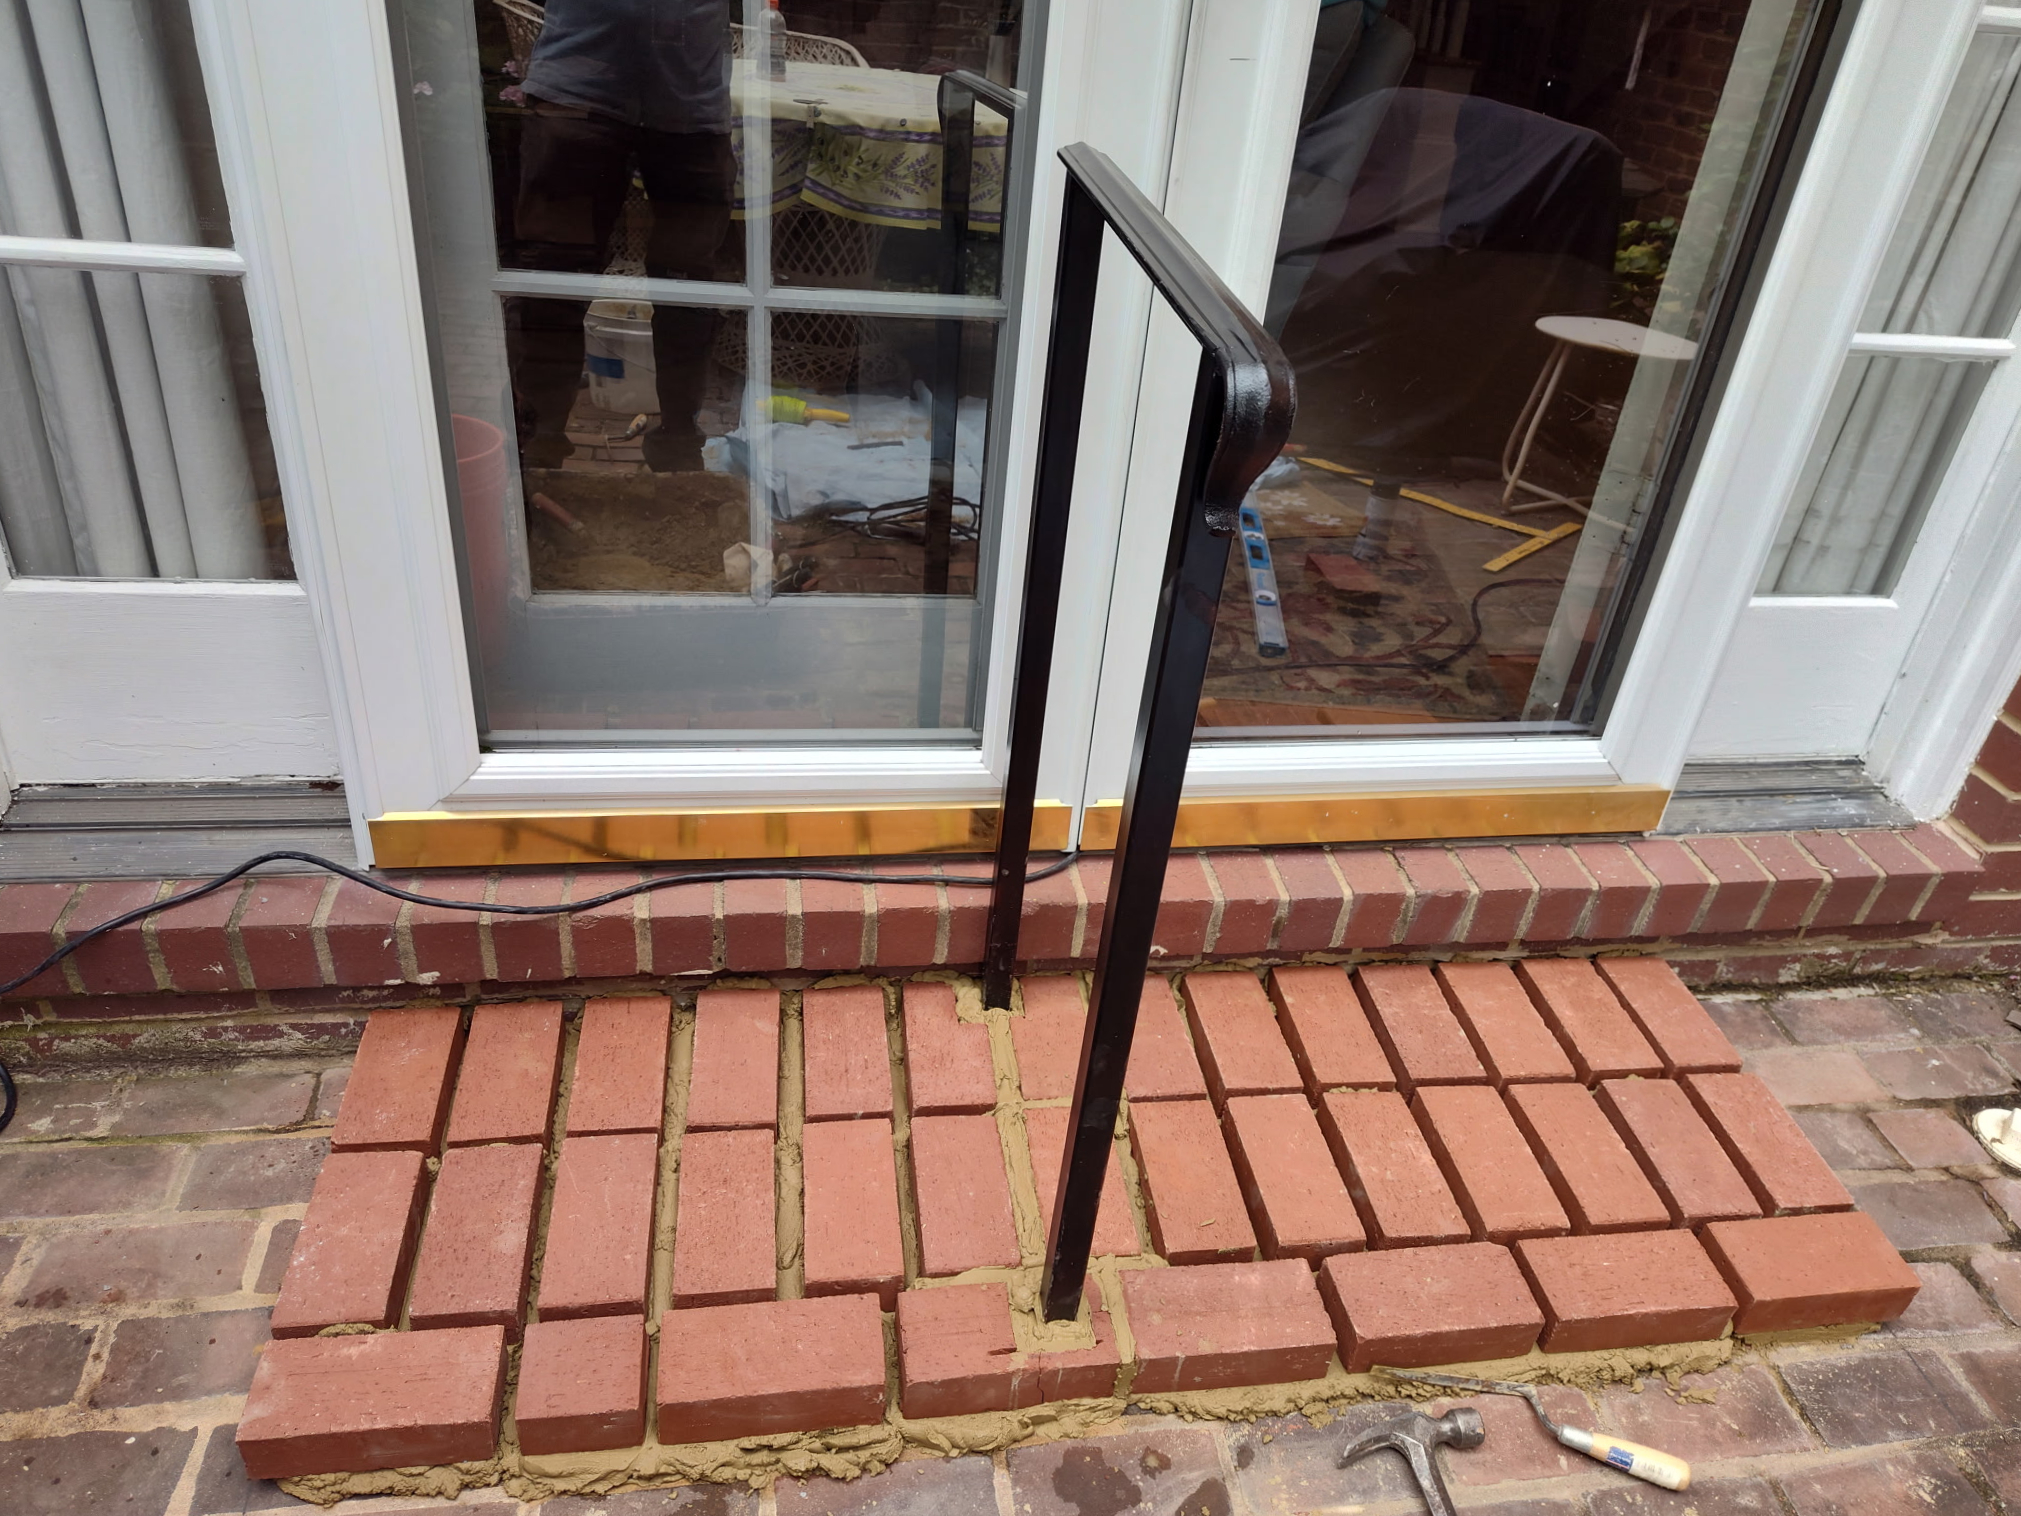
Custom Walkway Railing & Brick Installation
New brickwork was carefully installed to create a solid, finished base for the walkway railing.

11
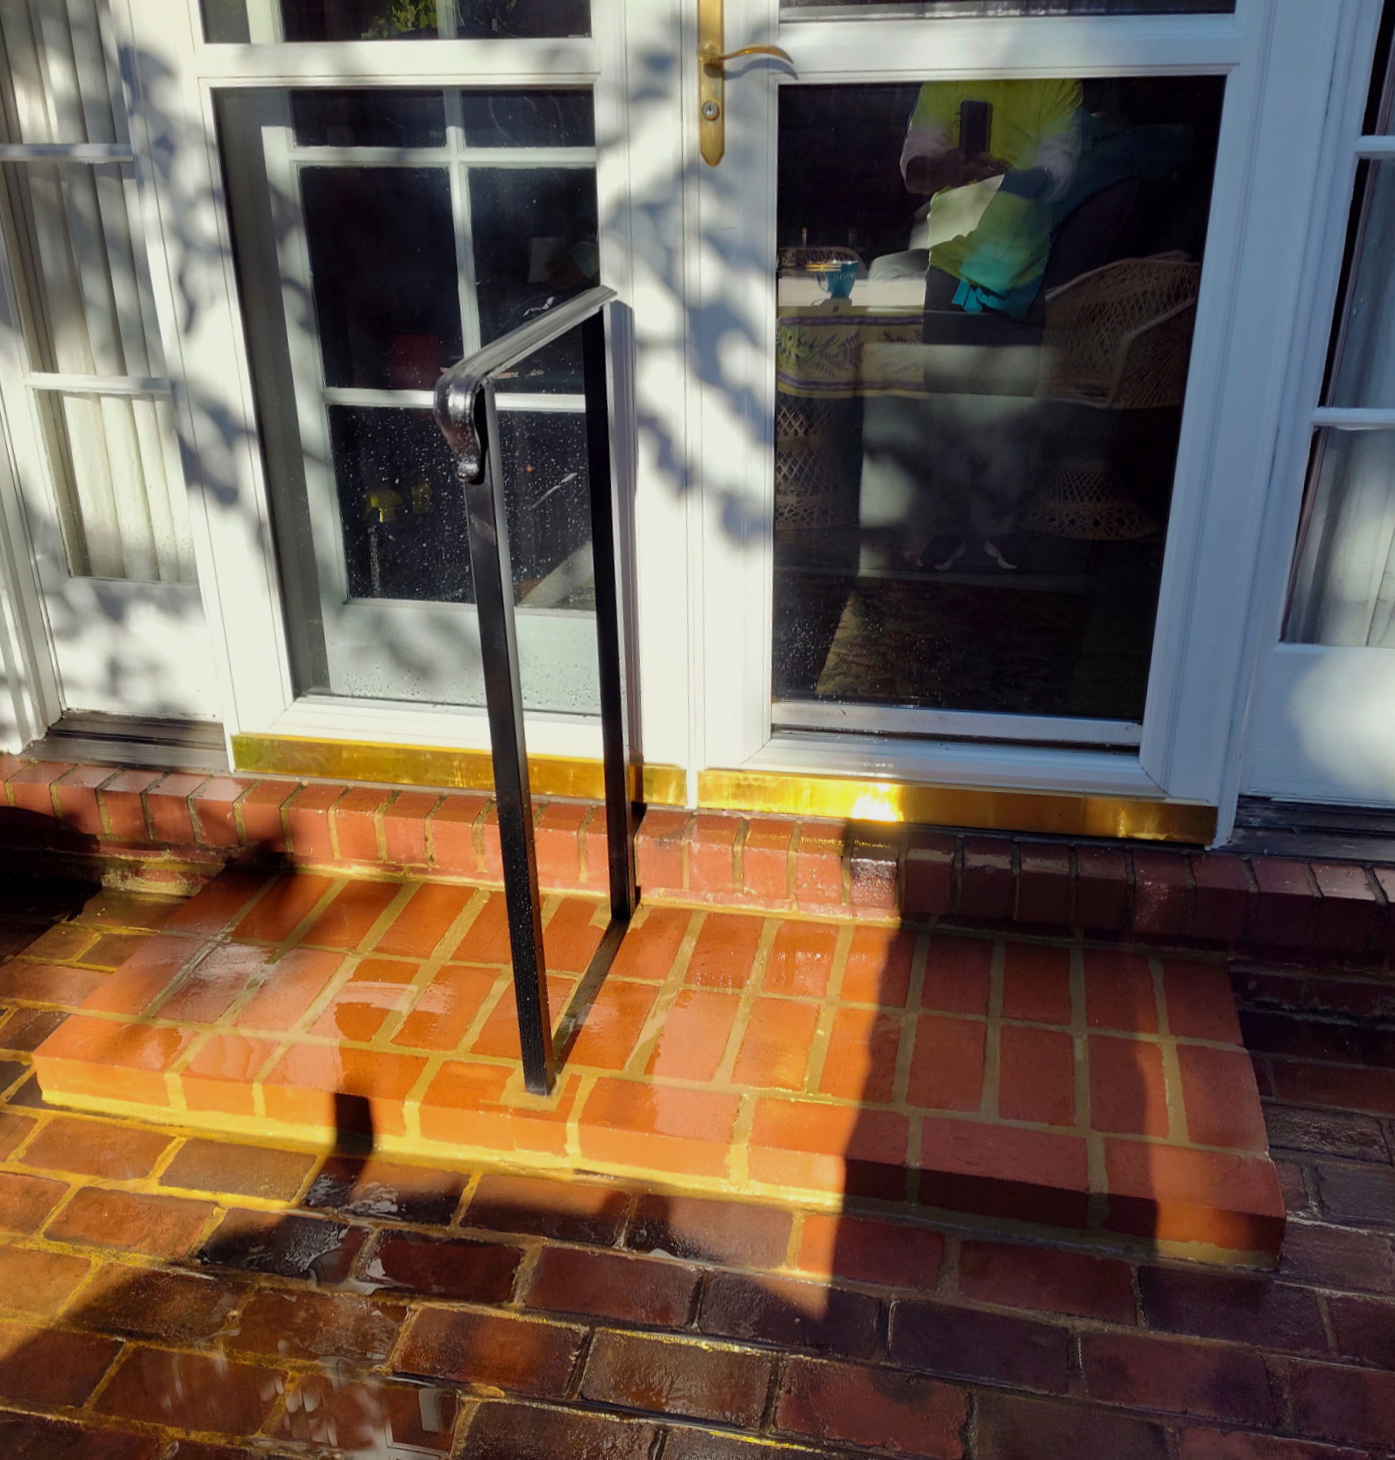
IMG_20240908_083707429_HDR_edited_edited_edited.jpg
New brickwork was carefully installed to create a solid, finished base for the walkway railing. A new railing was then installed at the homeowner's request, providing added safety, support, and a polished finish to the property's entrance.
.jpg)
12
Brick Repointing (Before Images)
Process of removing any deteriorated mortar from the joints between the bricks.
13
Brick Repointing-Finished Product
Once the deteriorated mortar was carefully removed from the joints between the bricks and replaced with fresh mortar. The joints were properly finished to restore the appearance, strength, and overall condition of the brickwork.

14
Stone Walkway Joint Preparation
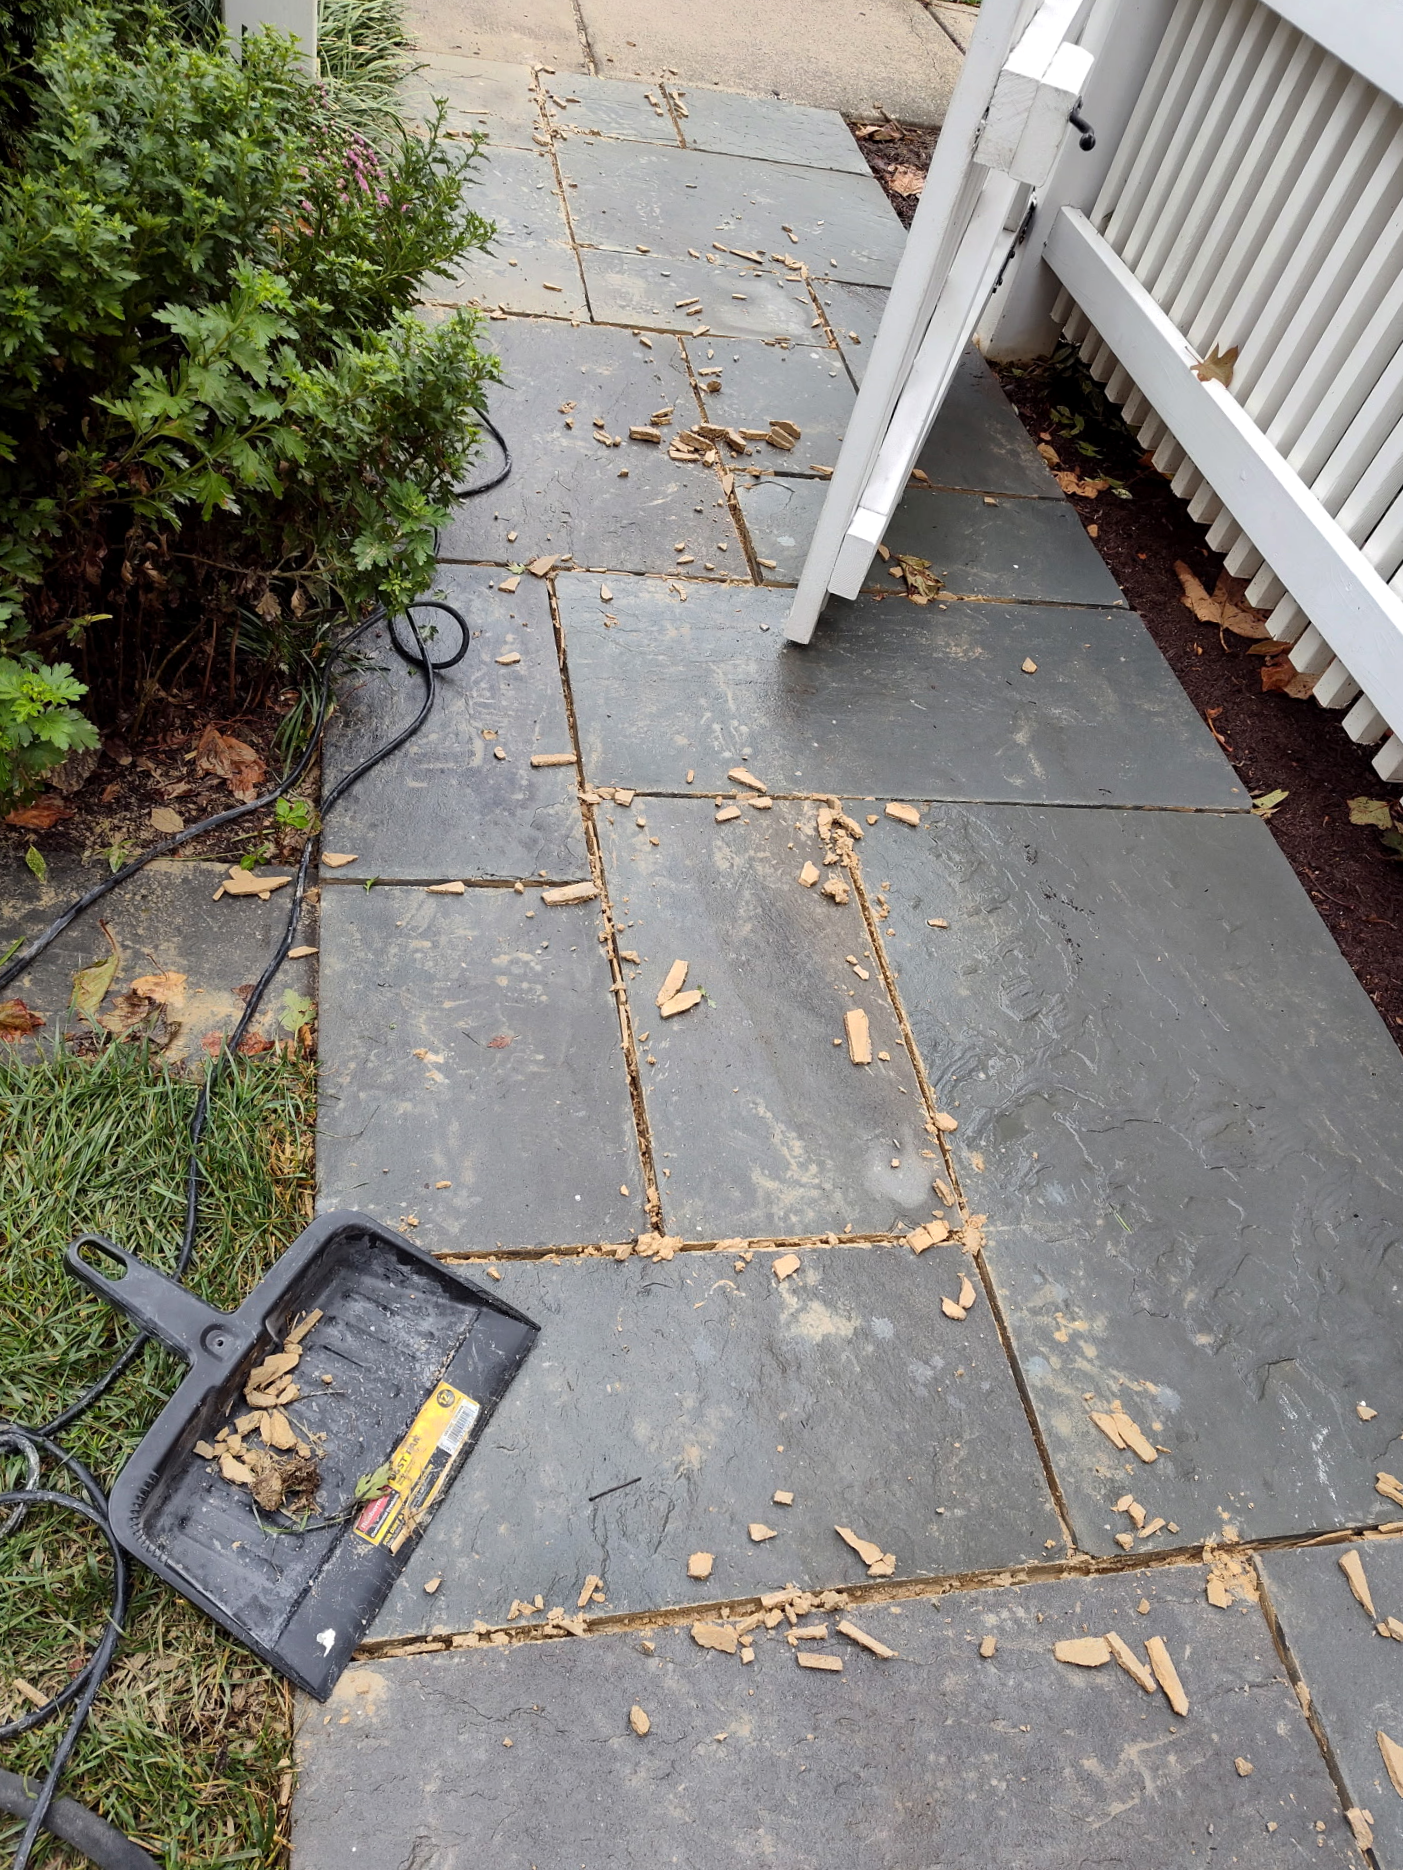
The deteriorated mortar joints between the existing stone walkway sections were carefully removed to prepare the surface for fresh joint mortar and proper restoration.

15
Stone Back Yard Joint Repair— Final Result
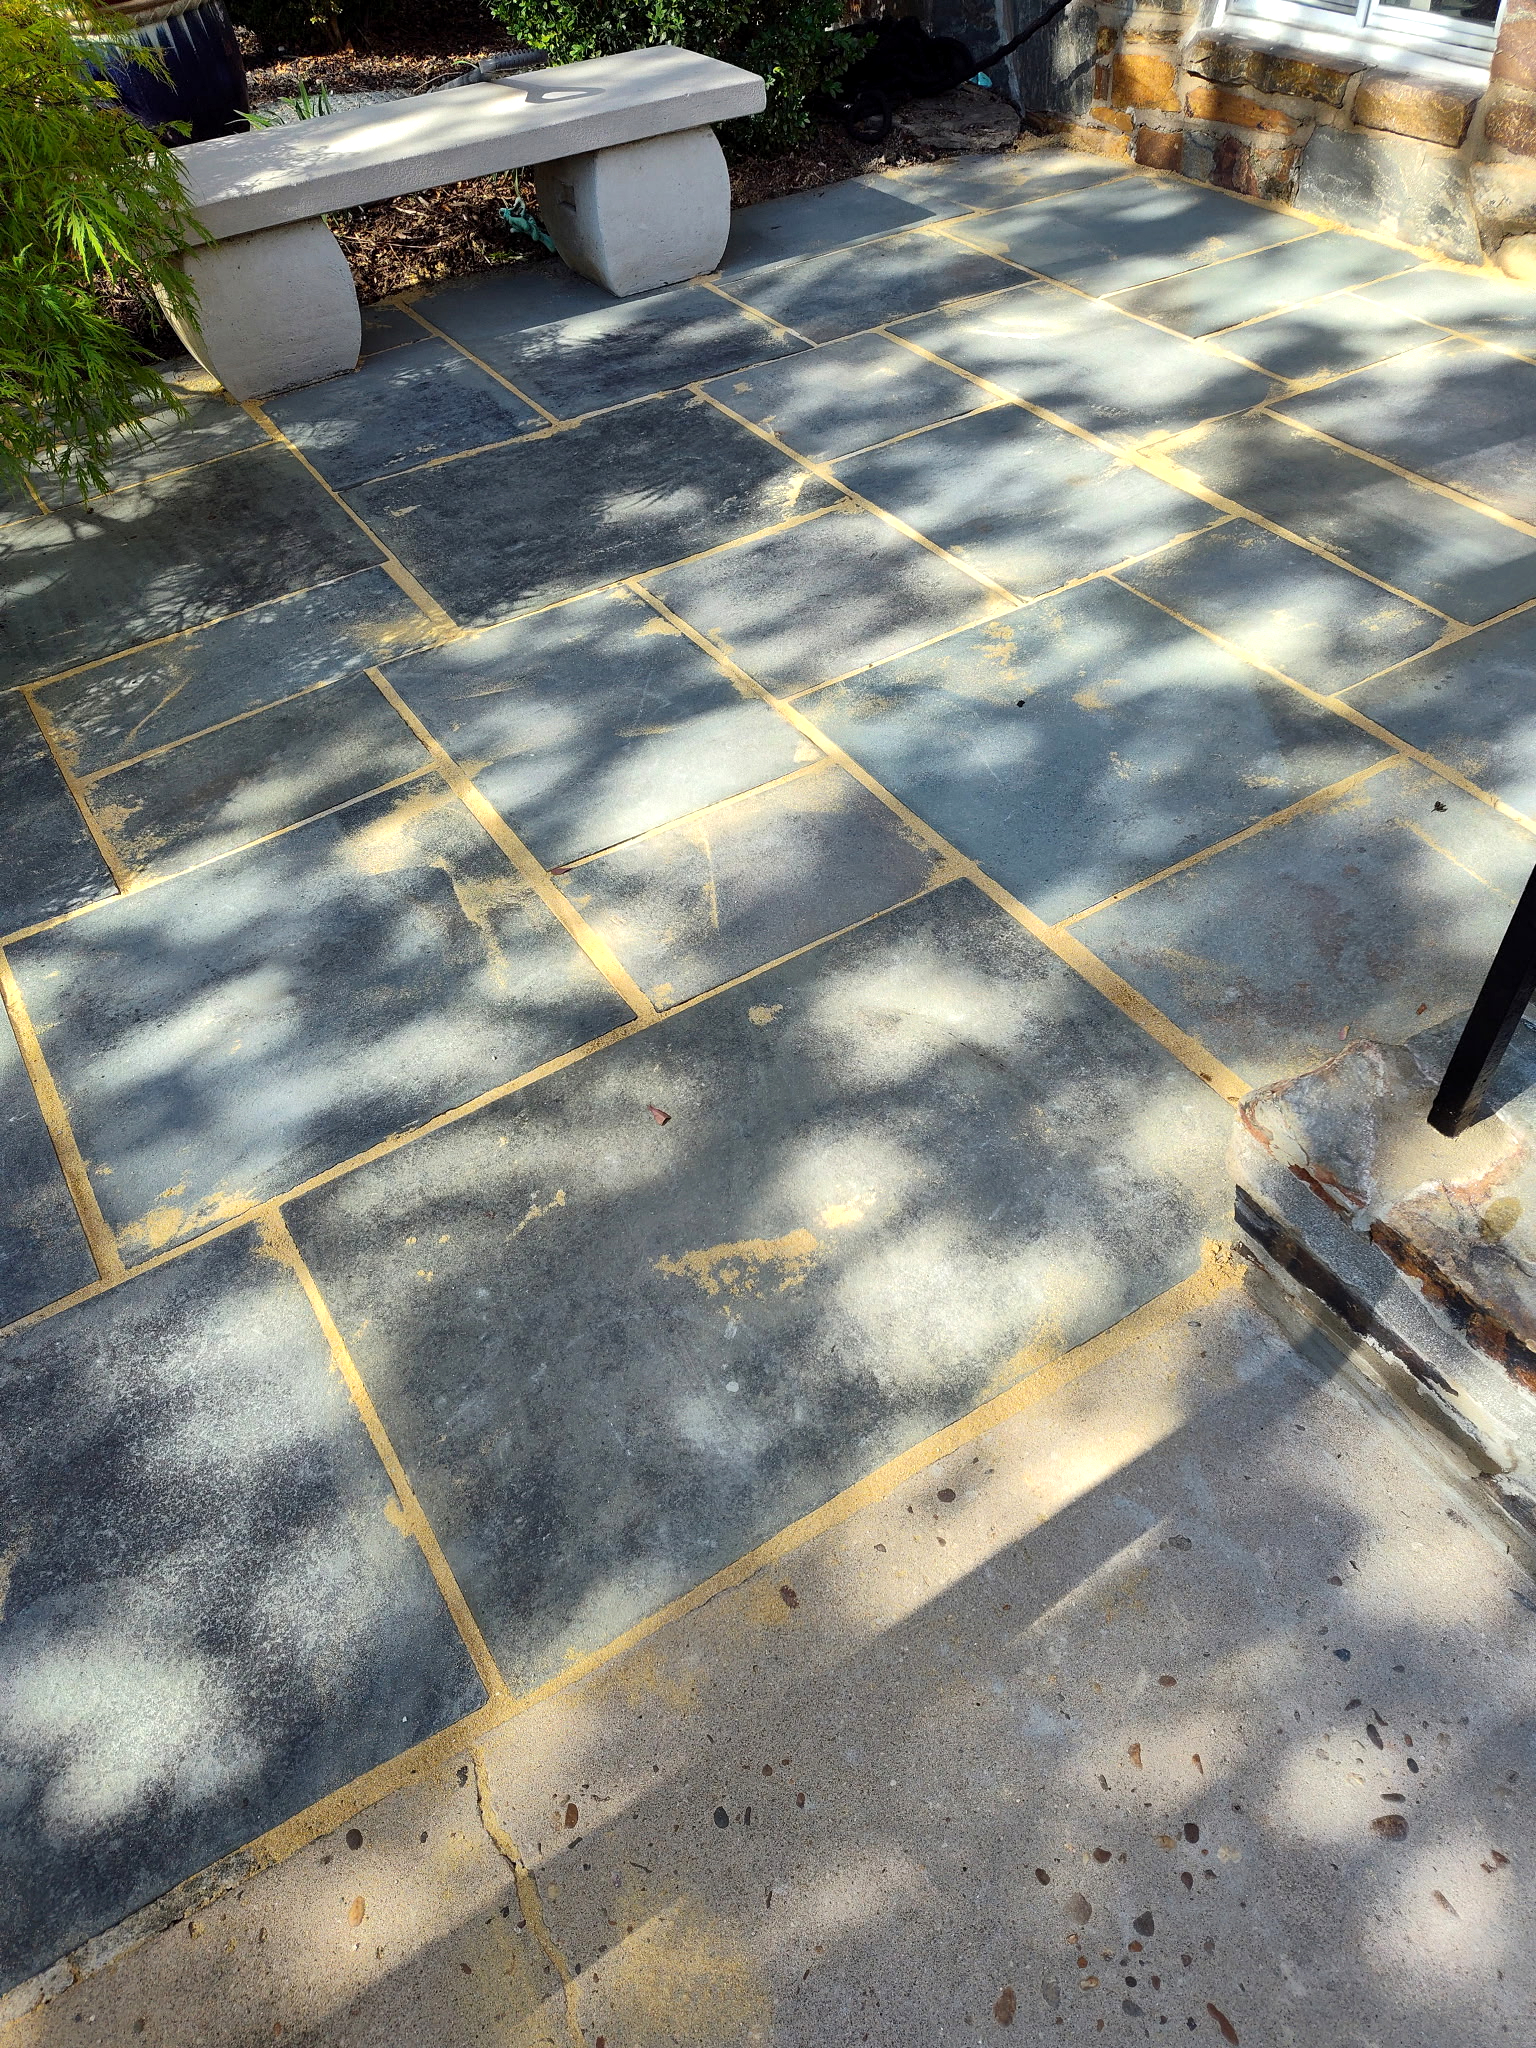
The deteriorated mortar joints between the existing stone sections were carefully removed to prepare the surface for fresh joint mortar and proper restoration. Any sand-like texture visible on the stones was part of the stones' original natural texture and design.

16
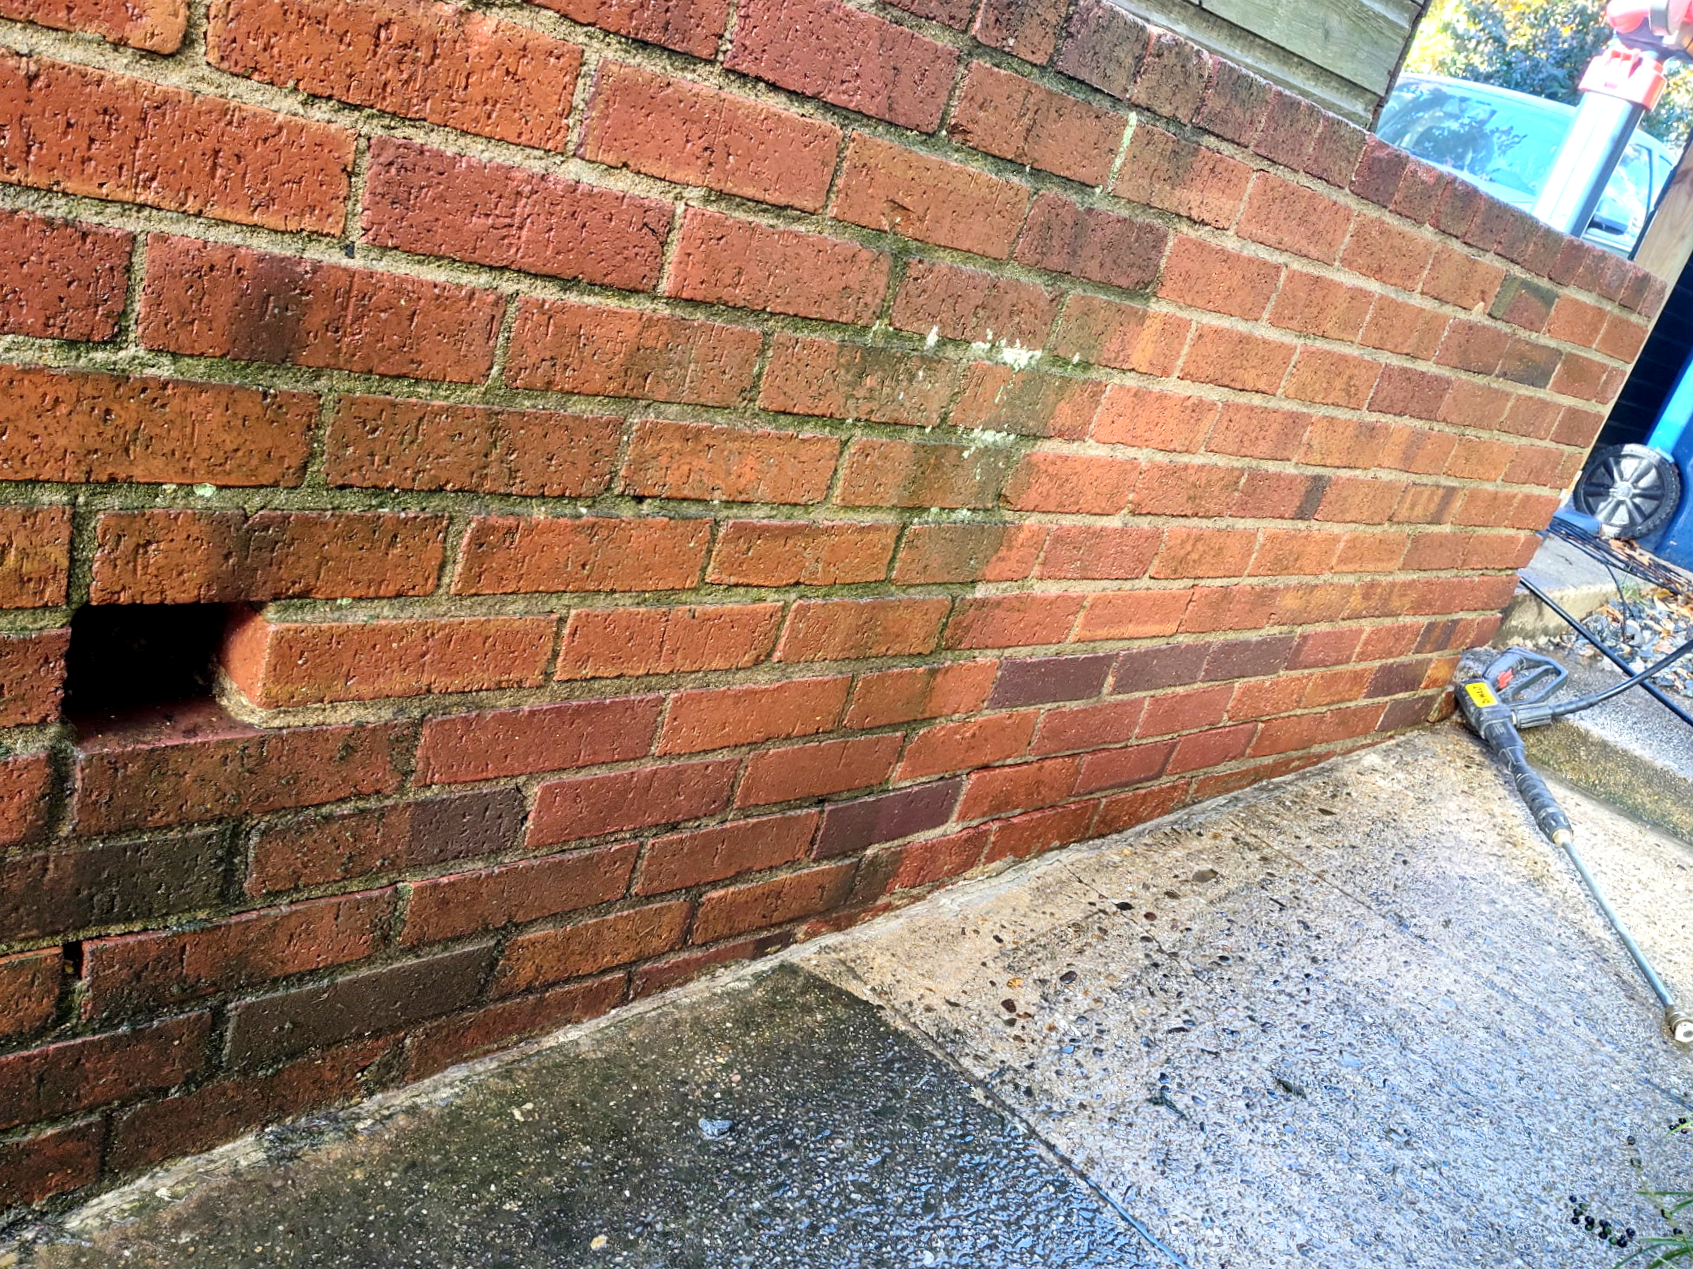
Driveway & Brick Wall Power Washing
The driveway and exterior wall surfaces were thoroughly power washed using carefully selected cleaning solutions designed to effectively remove dirt, buildup, and surface grime while being environmentally conscious and safe for the surrounding property when properly applied. The result was a noticeably cleaner and refreshed exterior.
01 / 16
Brick Repointing (Before Images)
Images of the project before any work
01
Brick Repointing (Before Images)
Images of the project before any work
02
Brick Repointing (Before Images)
Process of removing any deteriorated mortar from the joints between the bricks.
03
Brick Repointing-
Finished Product
Once the deteriorated mortar was carefully removed from the joints between the bricks and replaced with fresh mortar. The joints were properly finished to restore the appearance, strength, and overall condition of the brickwork.
04
Existing Brickwork — Power Washing & Cleaning
The existing brickwork was thoroughly power washed to remove dirt, buildup, and surface grime, providing a clean surface for the restoration and new brickwork.
05
Mortar Joint Preparation
Deteriorated mortar was carefully removed from the existing brick joints to prepare the area for fresh mortar and ensure a clean, solid foundation for the restoration work.
06
Prepping New Brickwork Installation
Materials were carefully prepared for the new brickwork, with mortar mixed to a consistent texture and composition to ensure proper application, spacing, and a uniform finished appearance.
07
New Brickwork Installation
New brickwork was carefully laid to expand the existing backyard section, with attention to alignment, spacing, and consistency with the surrounding brickwork.
08
Completed Brickwork — Final Result
The completed project combines the restored existing brickwork with the new brick addition, creating a clean, cohesive finish that blends naturally with the existing backyard space.
09
Custom Walkway Railing & Brick Installation
Prepping the installation of new brickwork to create a solid, finished base for the walkway railing.
10
Custom Walkway Railing & Brick Installation
New brickwork was carefully installed to create a solid, finished base for the walkway railing.
11
IMG_20240908_083707429_HDR_edited_edited_edited.jpg
New brickwork was carefully installed to create a solid, finished base for the walkway railing. A new railing was then installed at the homeowner's request, providing added safety, support, and a polished finish to the property's entrance.
12
Brick Repointing (Before Images)
Process of removing any deteriorated mortar from the joints between the bricks.
13
Brick Repointing-Finished Product
Once the deteriorated mortar was carefully removed from the joints between the bricks and replaced with fresh mortar. The joints were properly finished to restore the appearance, strength, and overall condition of the brickwork.
14
Stone Walkway Joint Preparation
The deteriorated mortar joints between the existing stone walkway sections were carefully removed to prepare the surface for fresh joint mortar and proper restoration.
15
Stone Back Yard Joint Repair— Final Result
The deteriorated mortar joints between the existing stone sections were carefully removed to prepare the surface for fresh joint mortar and proper restoration. Any sand-like texture visible on the stones was part of the stones' original natural texture and design.
16
Driveway & Brick Wall Power Washing
The driveway and exterior wall surfaces were thoroughly power washed using carefully selected cleaning solutions designed to effectively remove dirt, buildup, and surface grime while being environmentally conscious and safe for the surrounding property when properly applied. The result was a noticeably cleaner and refreshed exterior.
Interior Projects

01
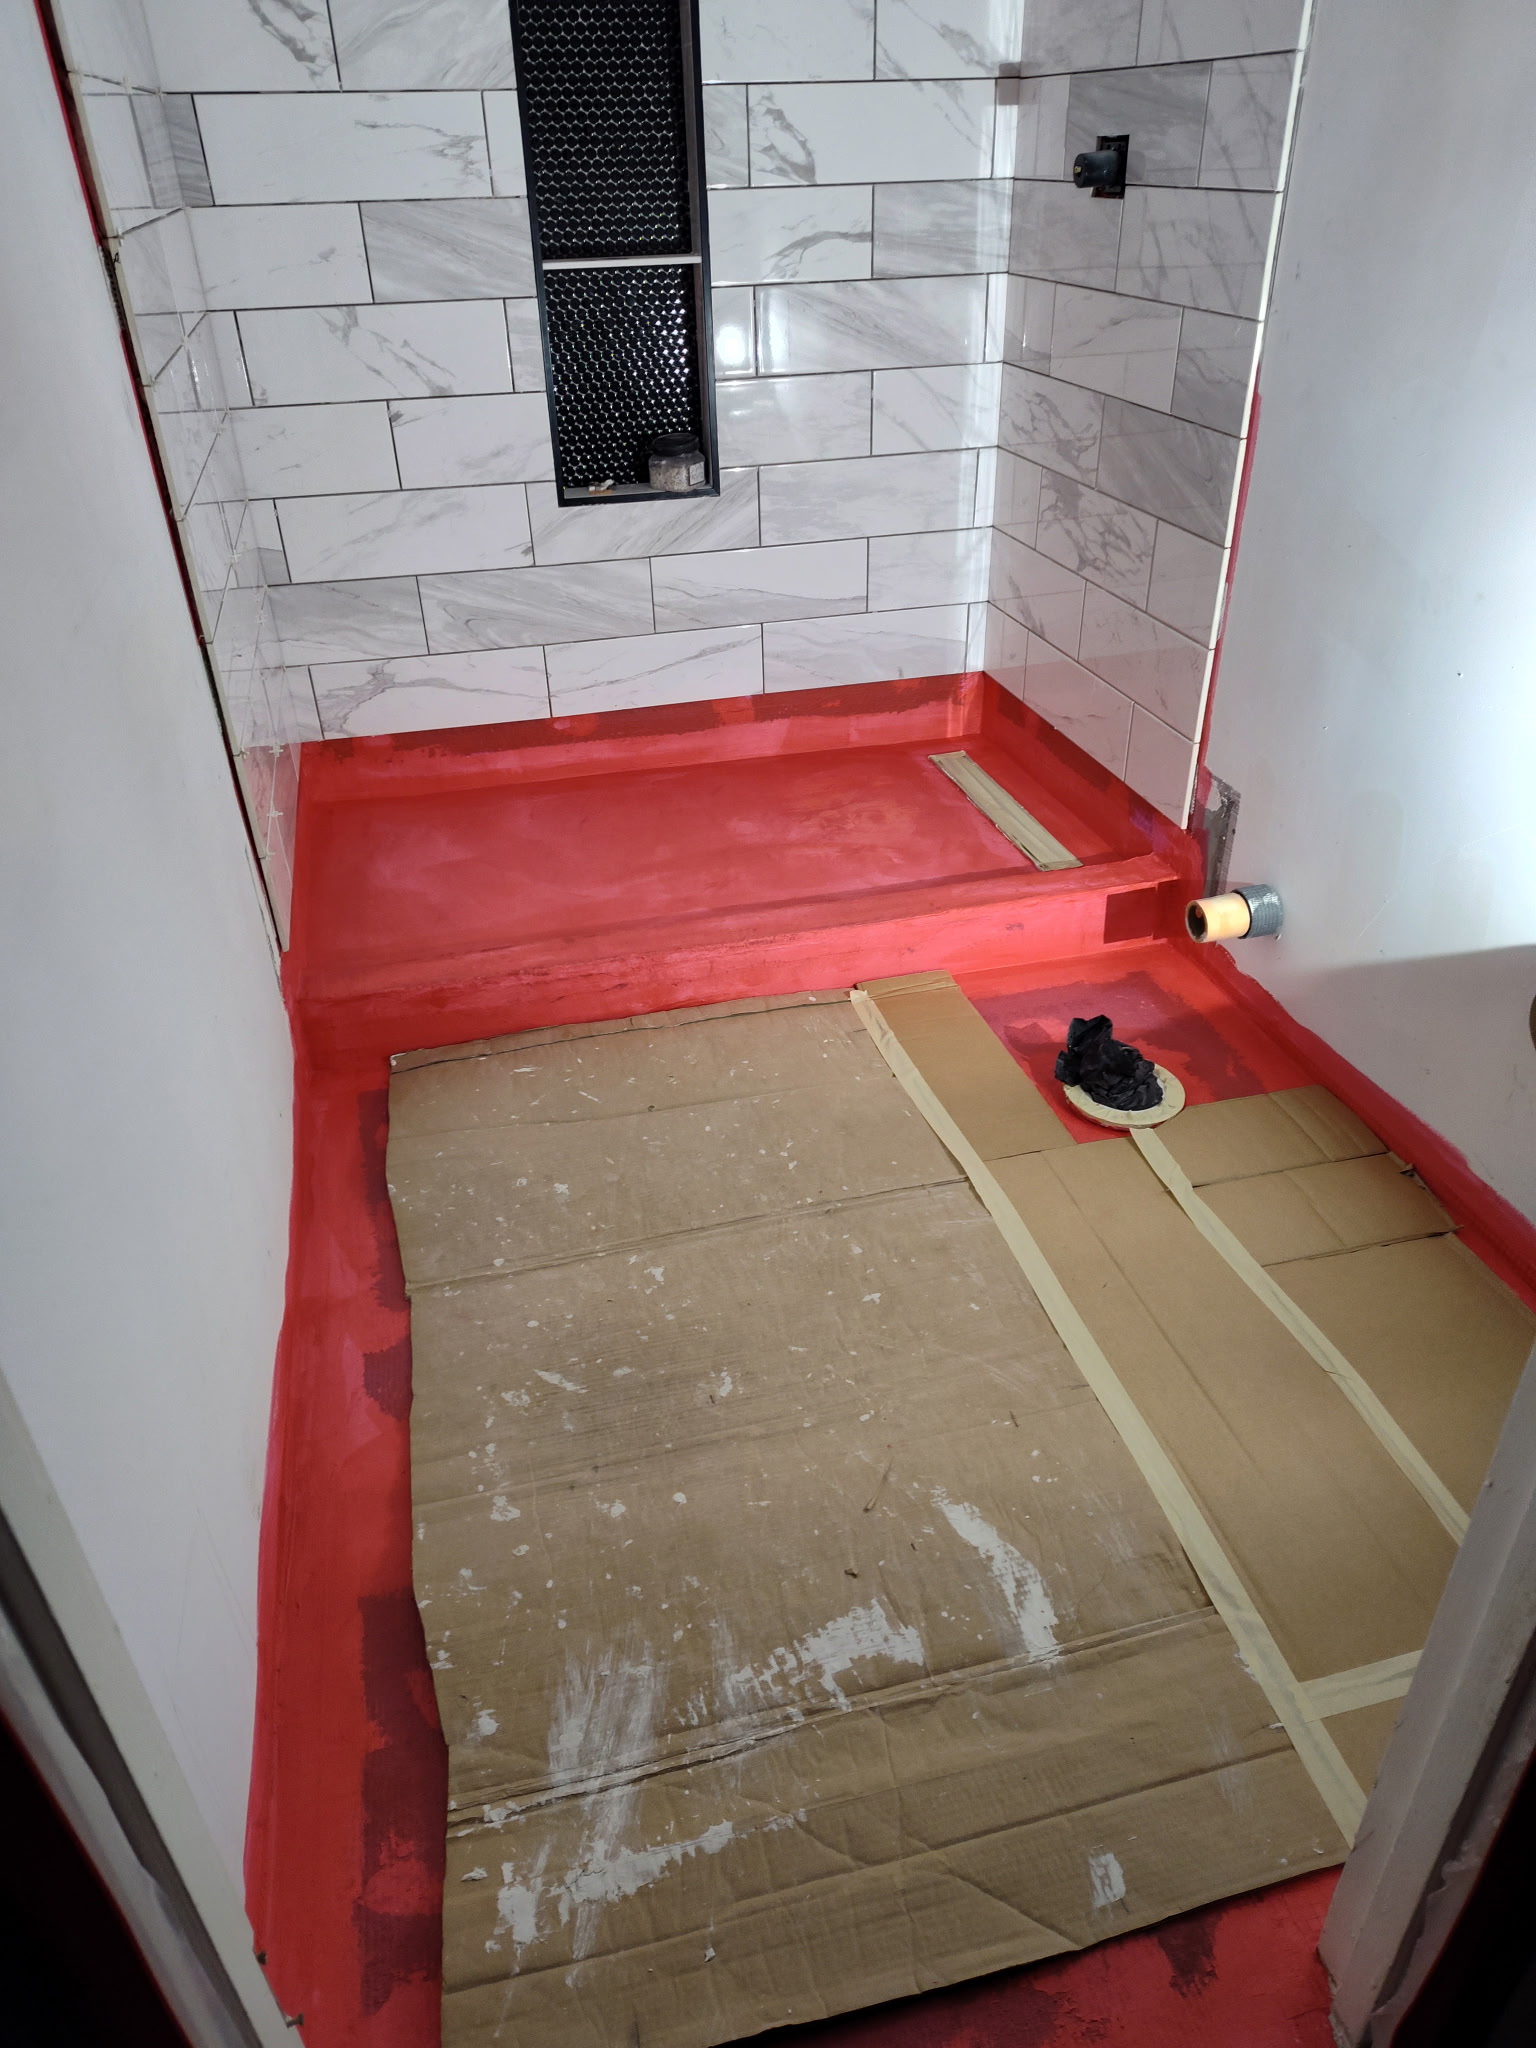
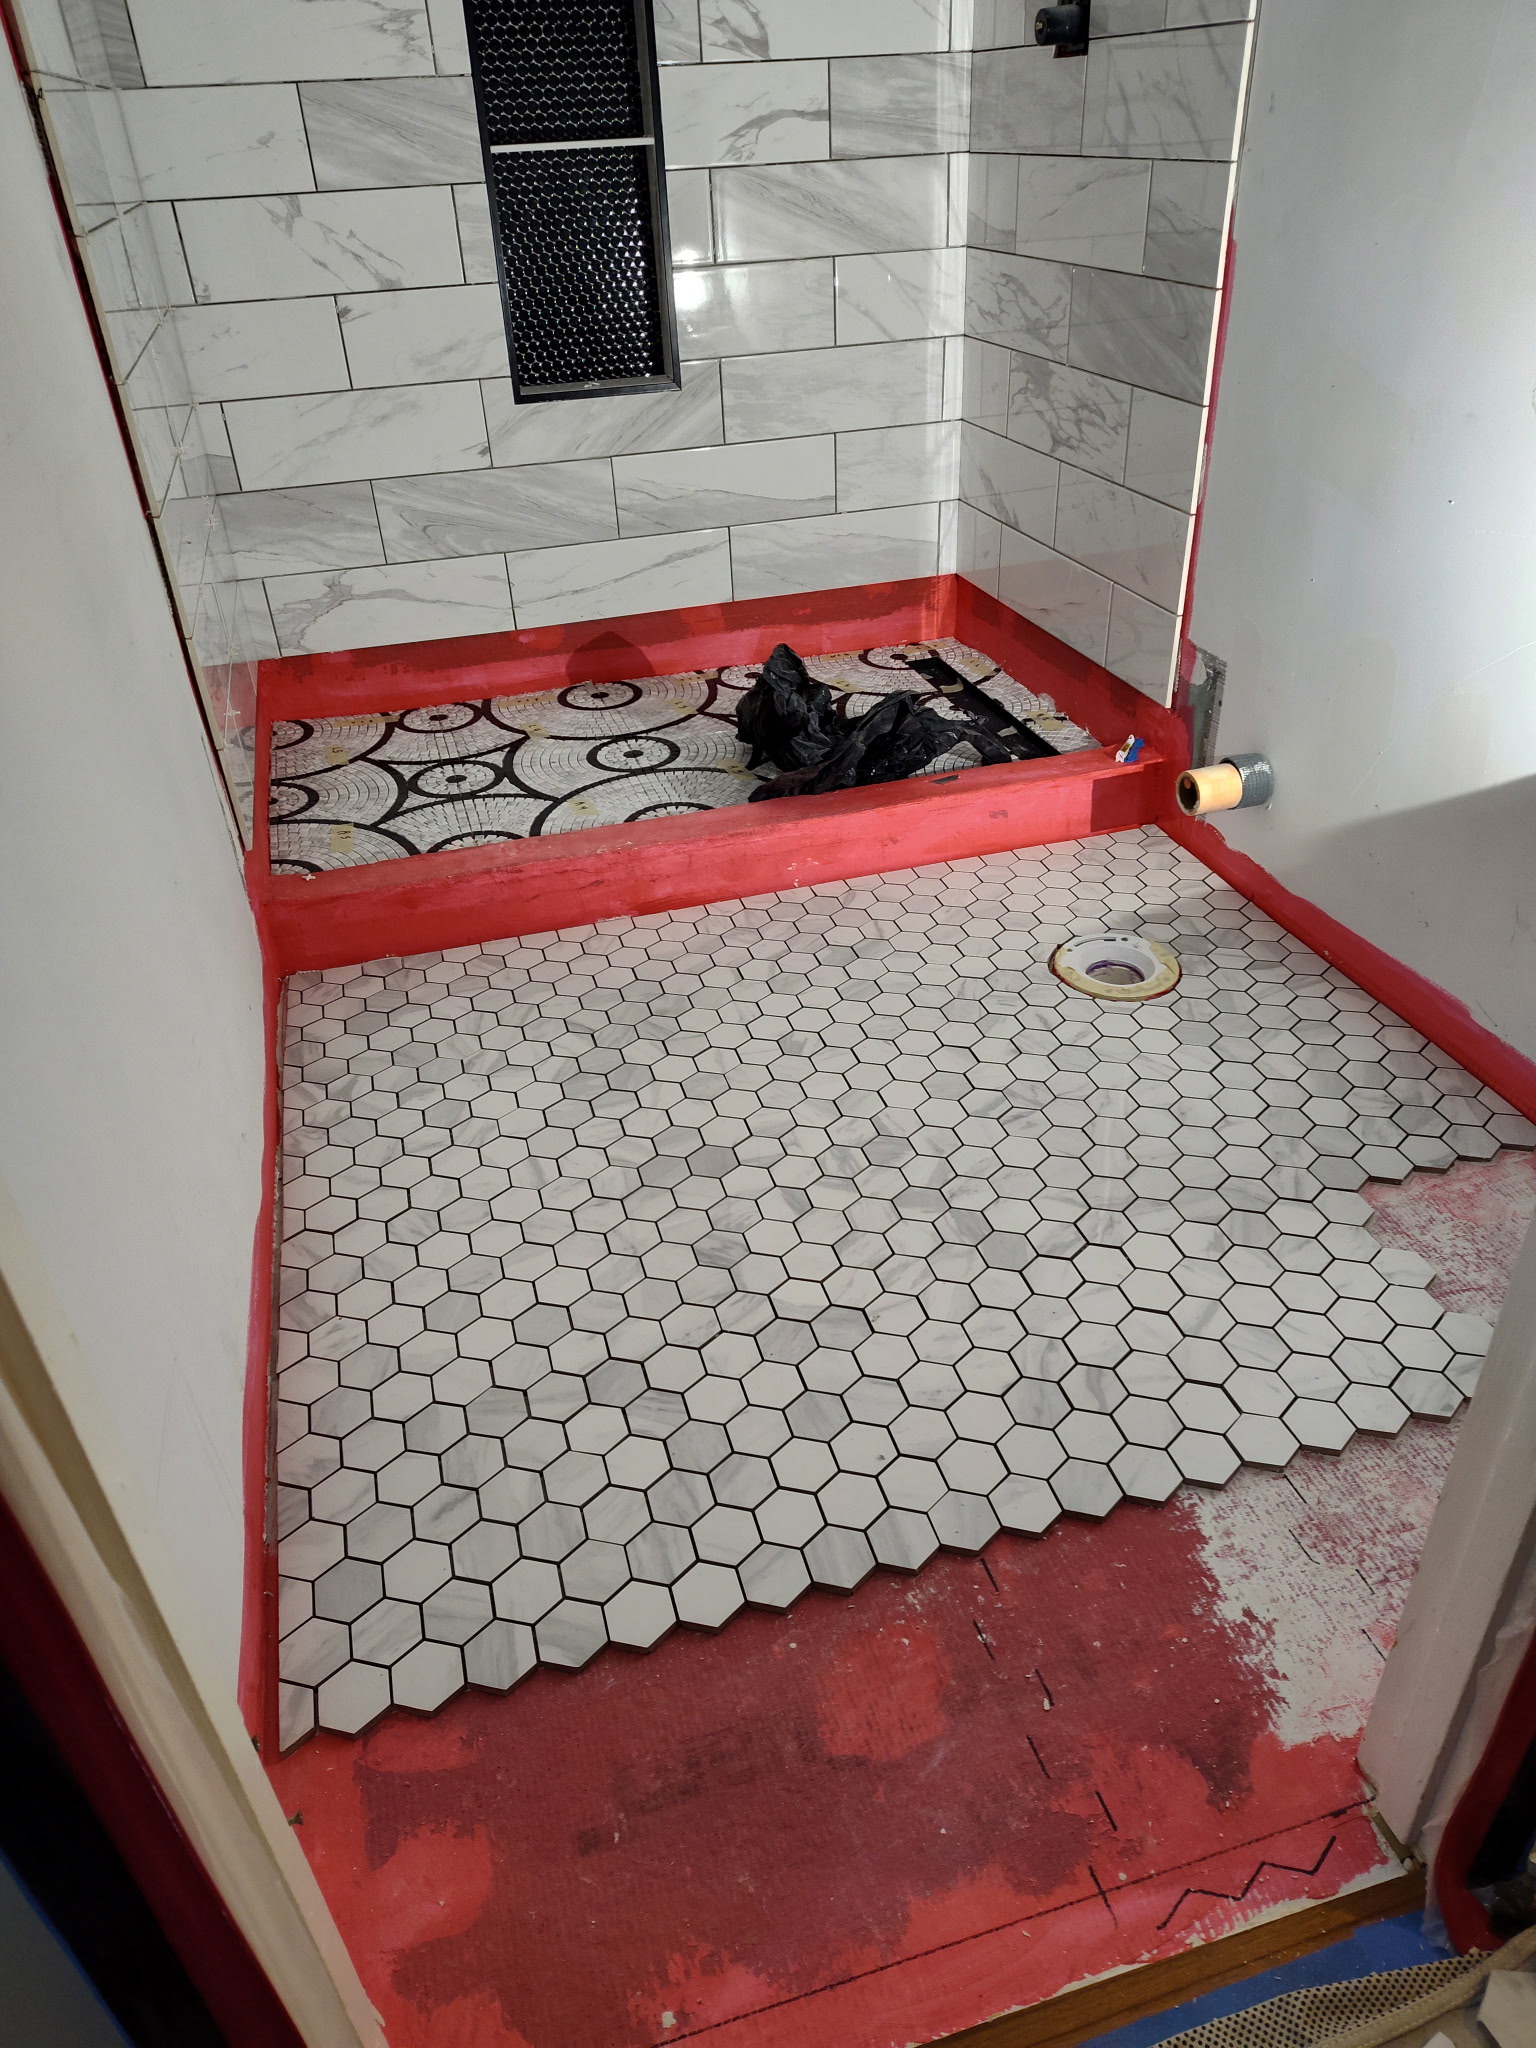
Bathroom Floor Preparation for Tile Installation
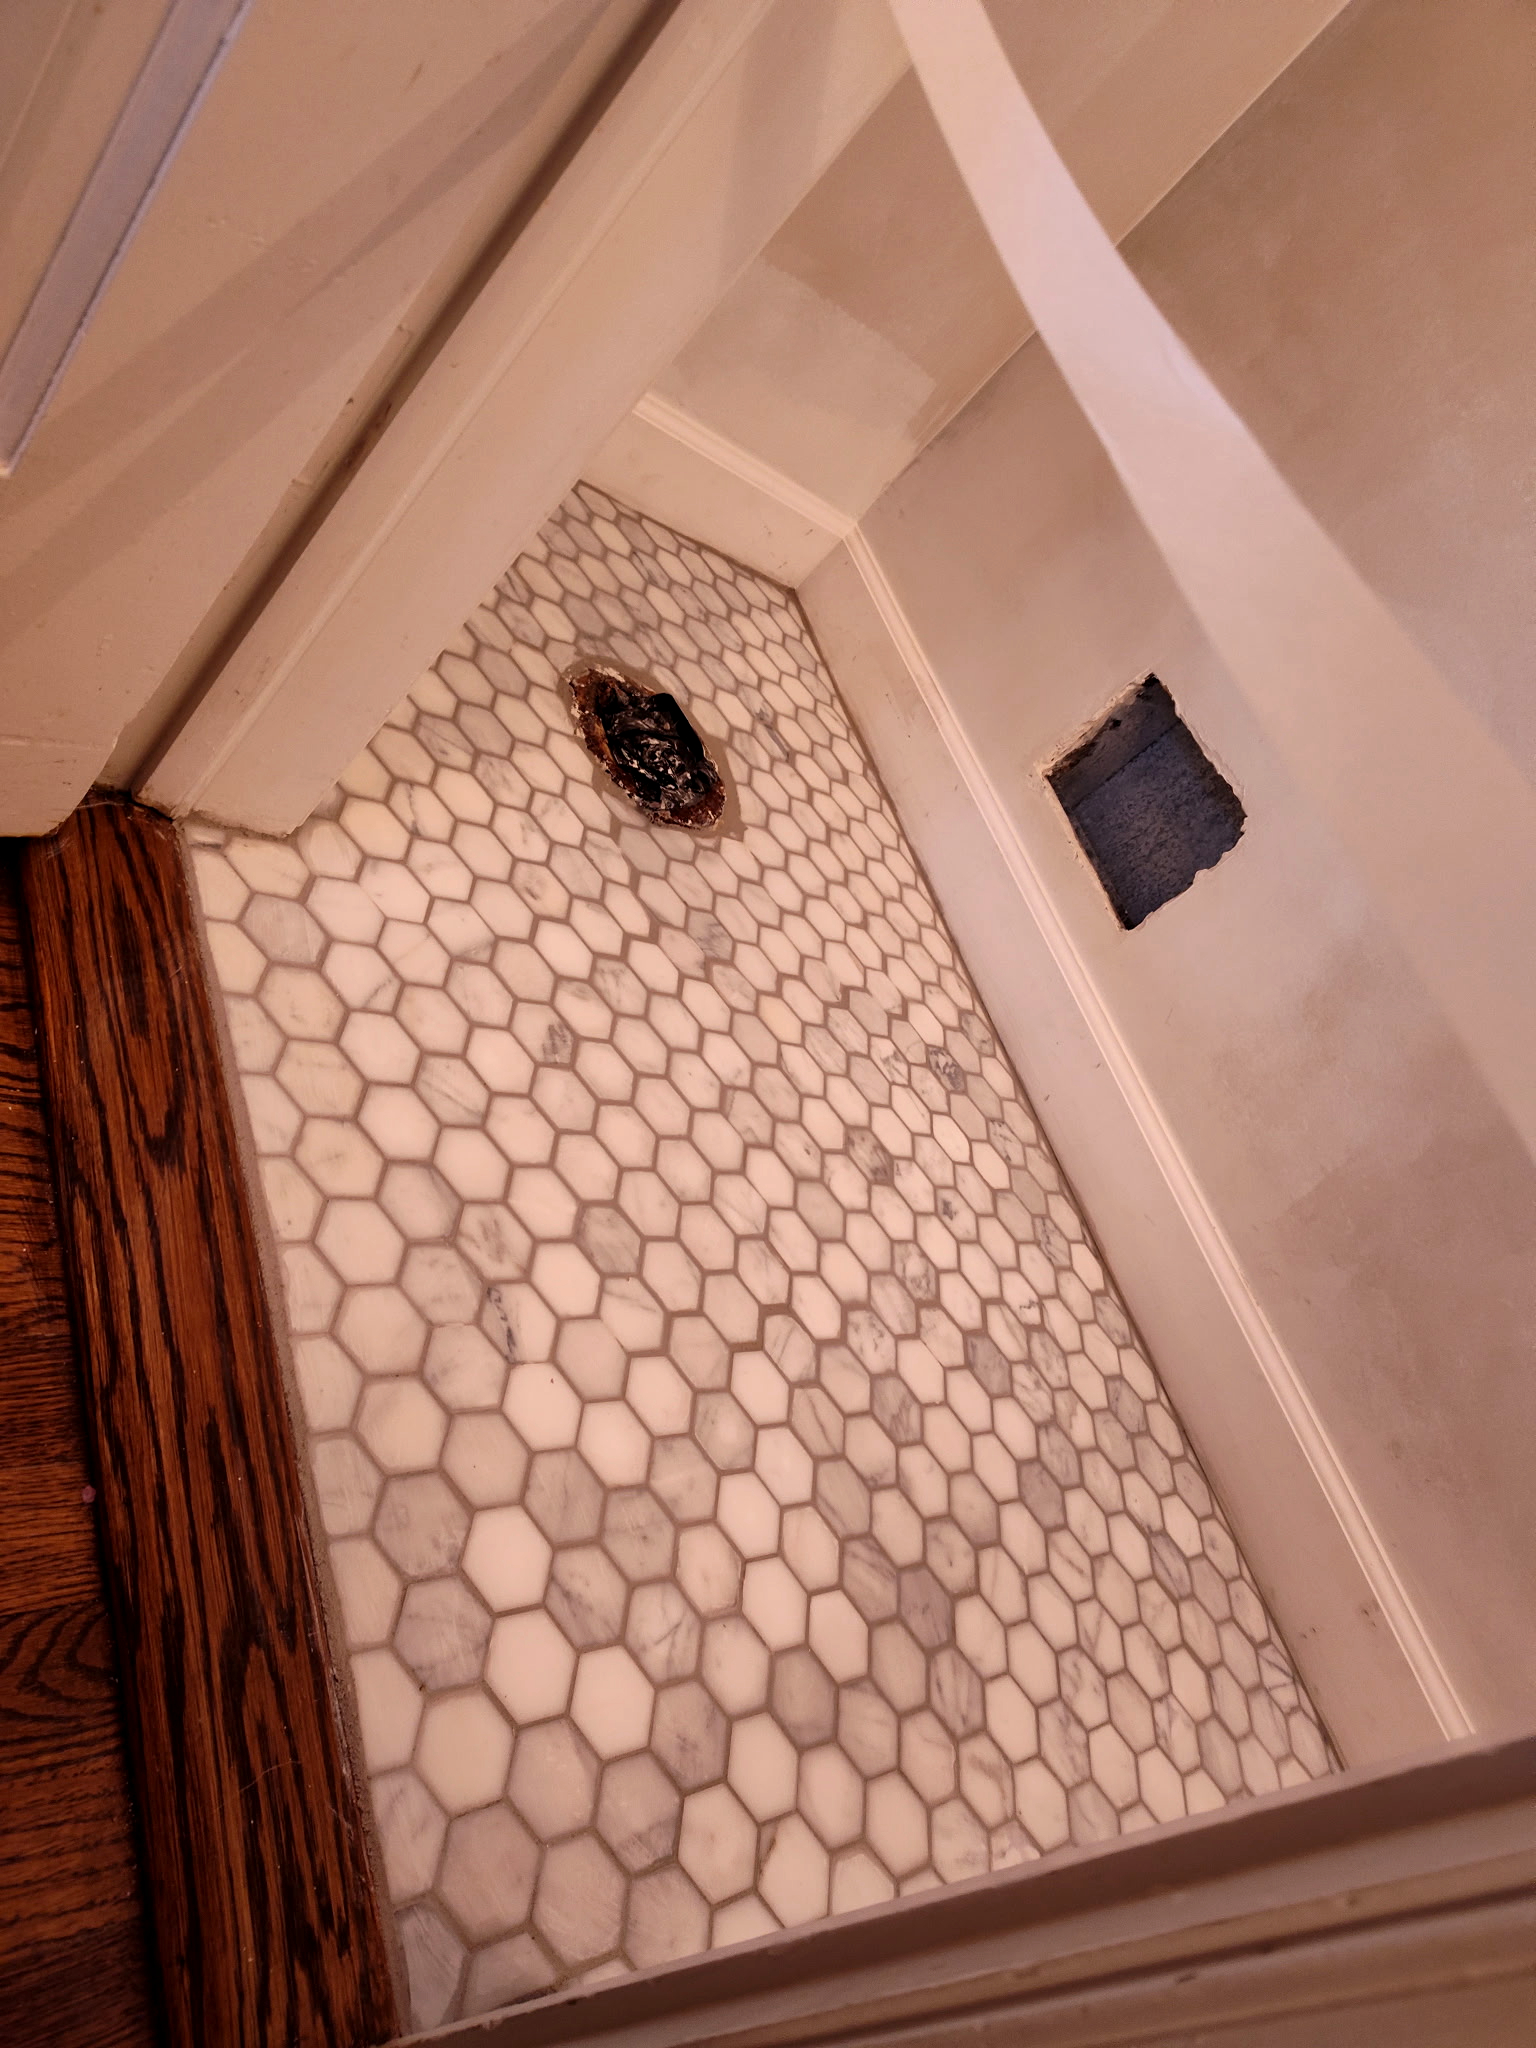
The bathroom floor, including both the shower area and the surrounding floor, was carefully prepared for new tile installation. The surfaces were properly leveled and prepared to provide a solid, uniform base for the new tile finish.

02
Bathroom Shower Tile Installation
New tile was installed throughout the interior of the shower. The tile was carefully placed to create a clean, cohesive, and finished appearance across the shower.

03
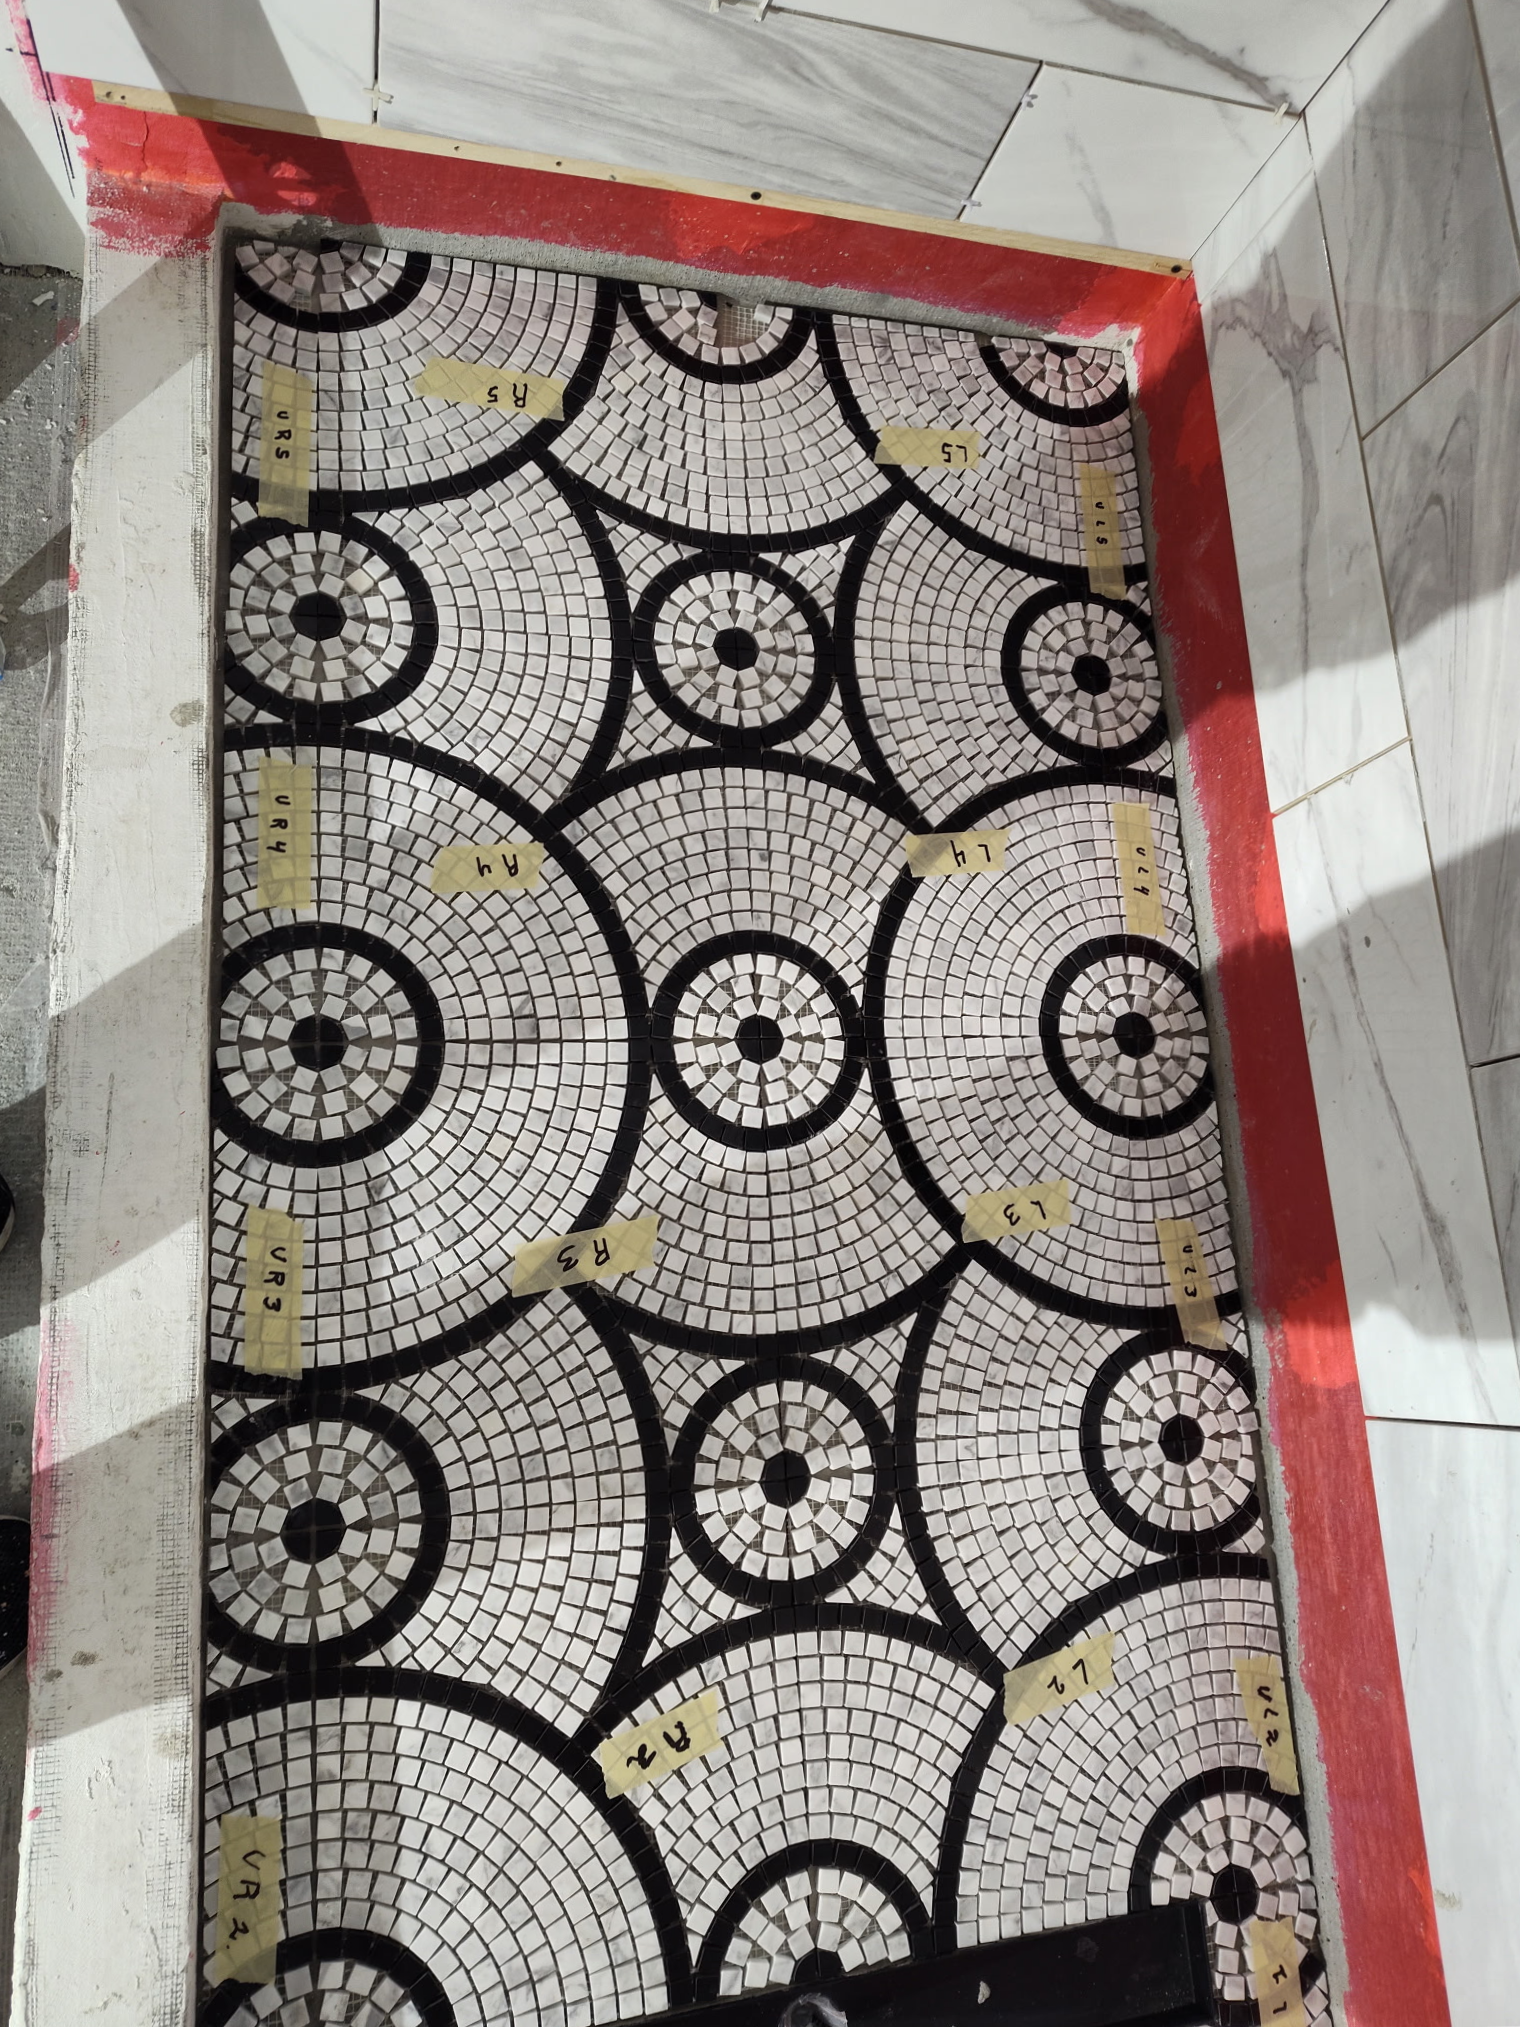
Bathroom Floor Tile Installation
New tile was installed throughout both the interior of the shower and the surrounding bathroom floor area. The tile was carefully placed to create a clean, cohesive, and finished appearance across the shower and bathroom floor.

04
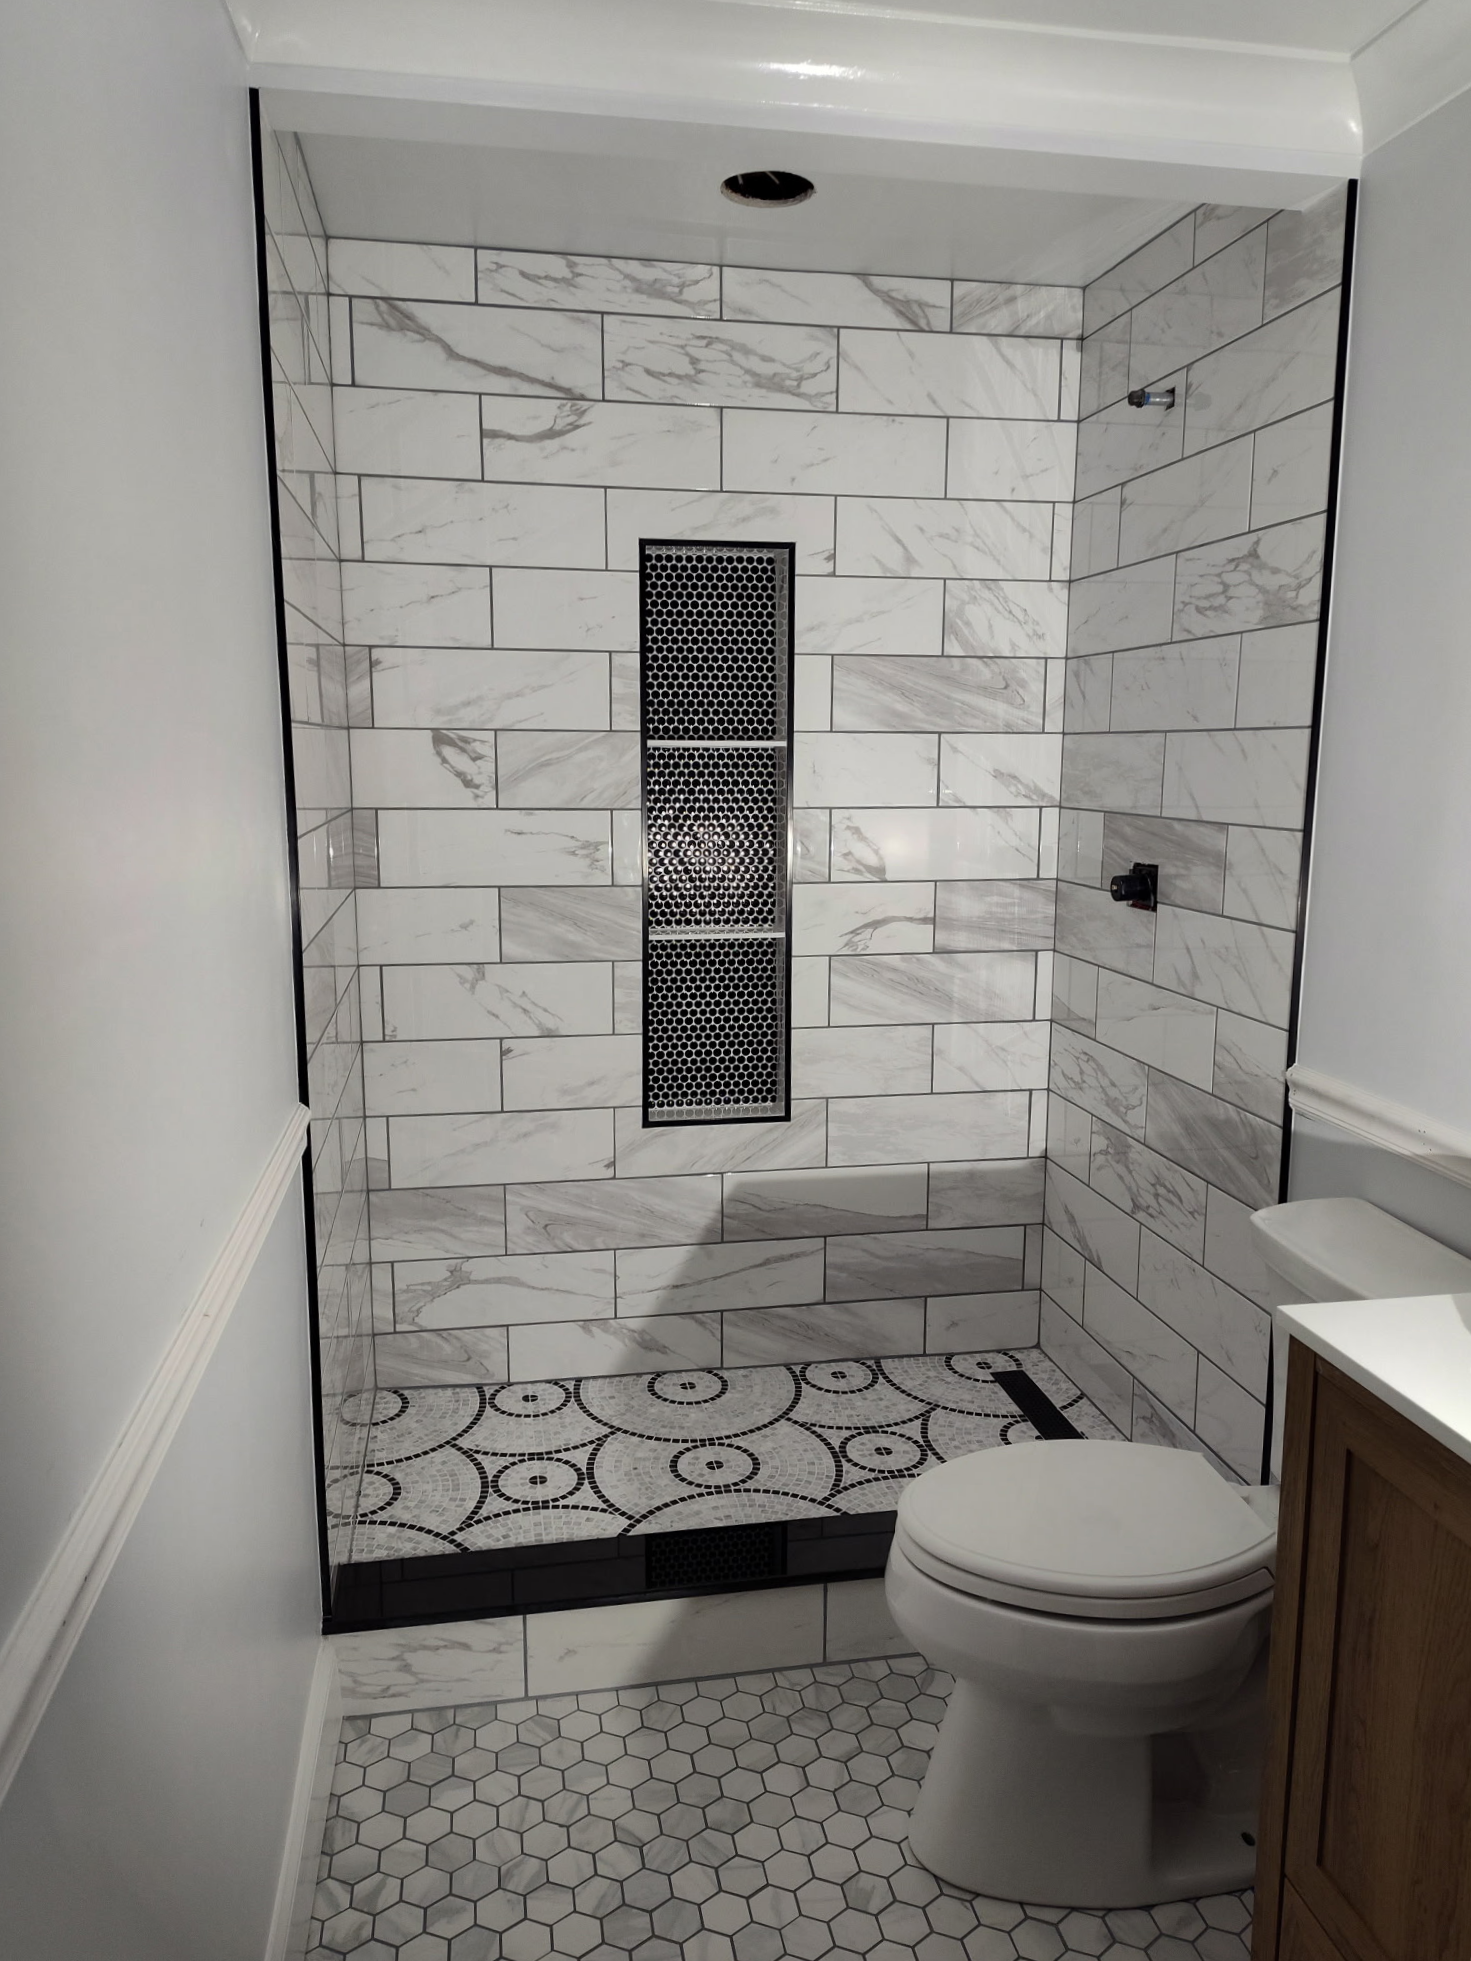
Finished Bathroom Renovation
A complete bathroom renovation from top to bottom, featuring new tile installation, a new vanity and toilet, fresh paint, and custom additions throughout the space. The renovation transformed the bathroom into a refreshed, functional, and updated space.

05
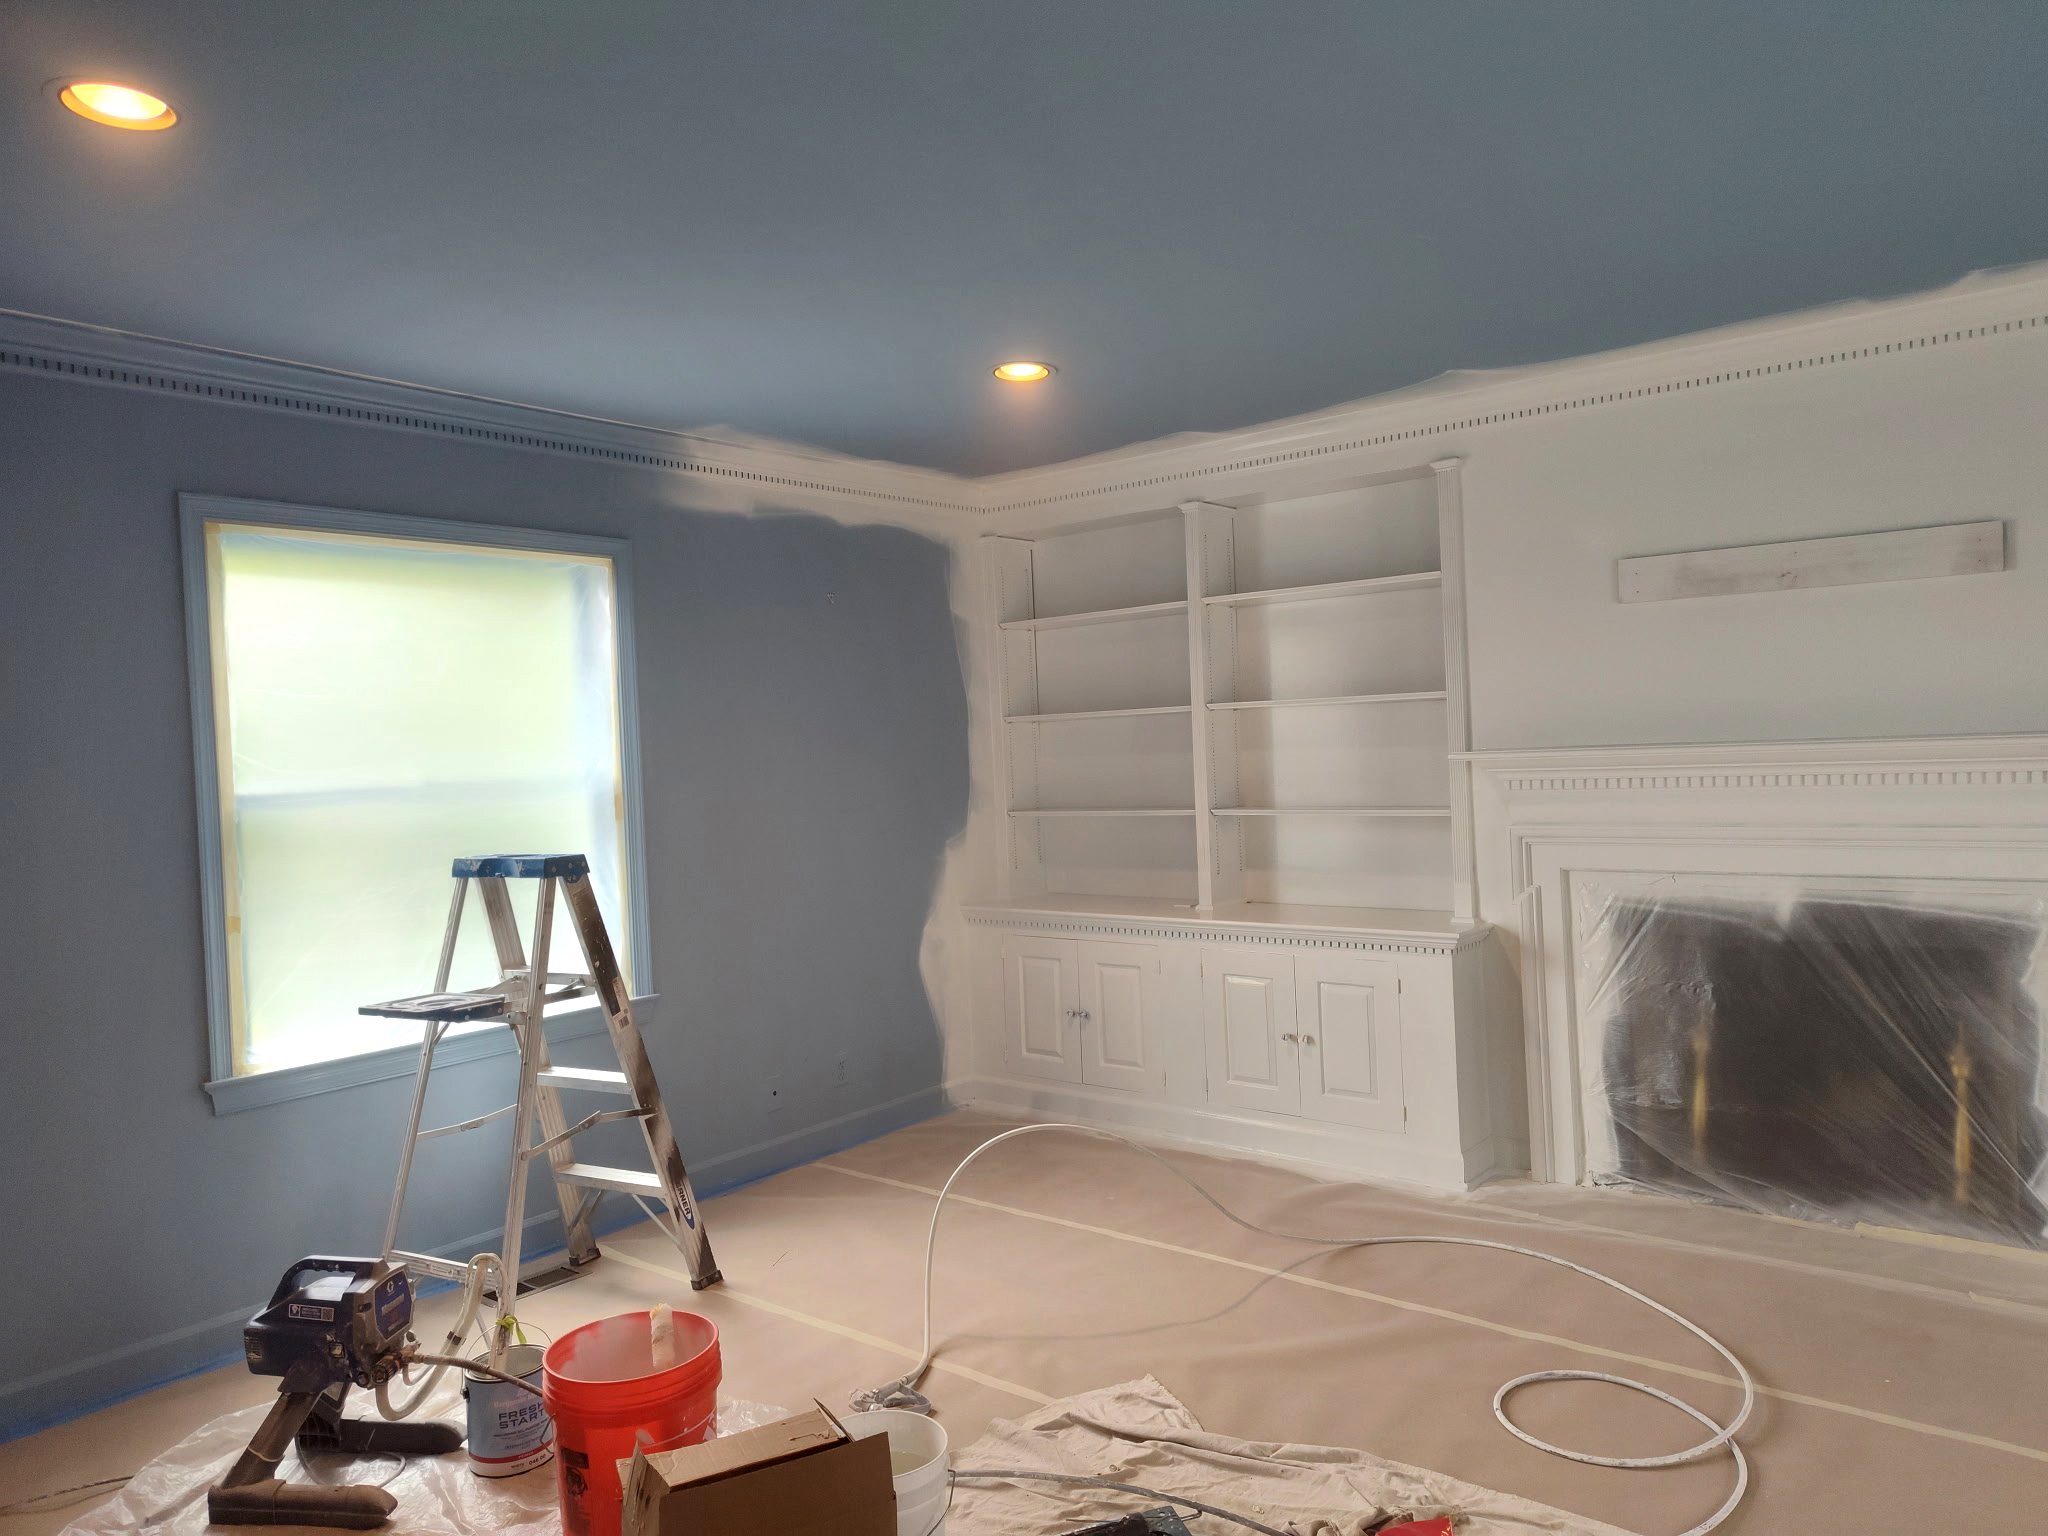
Full Living Room Preparation-Before
The living room was carefully prepared for painting by protecting all necessary surfaces and areas. Any damaged areas of the walls were repaired and prepared as needed before painting. The entire room was then painted from top to bottom, including the walls, ceiling, window areas, trim, and other interior surfaces, creating a clean and refreshed finished look.

06
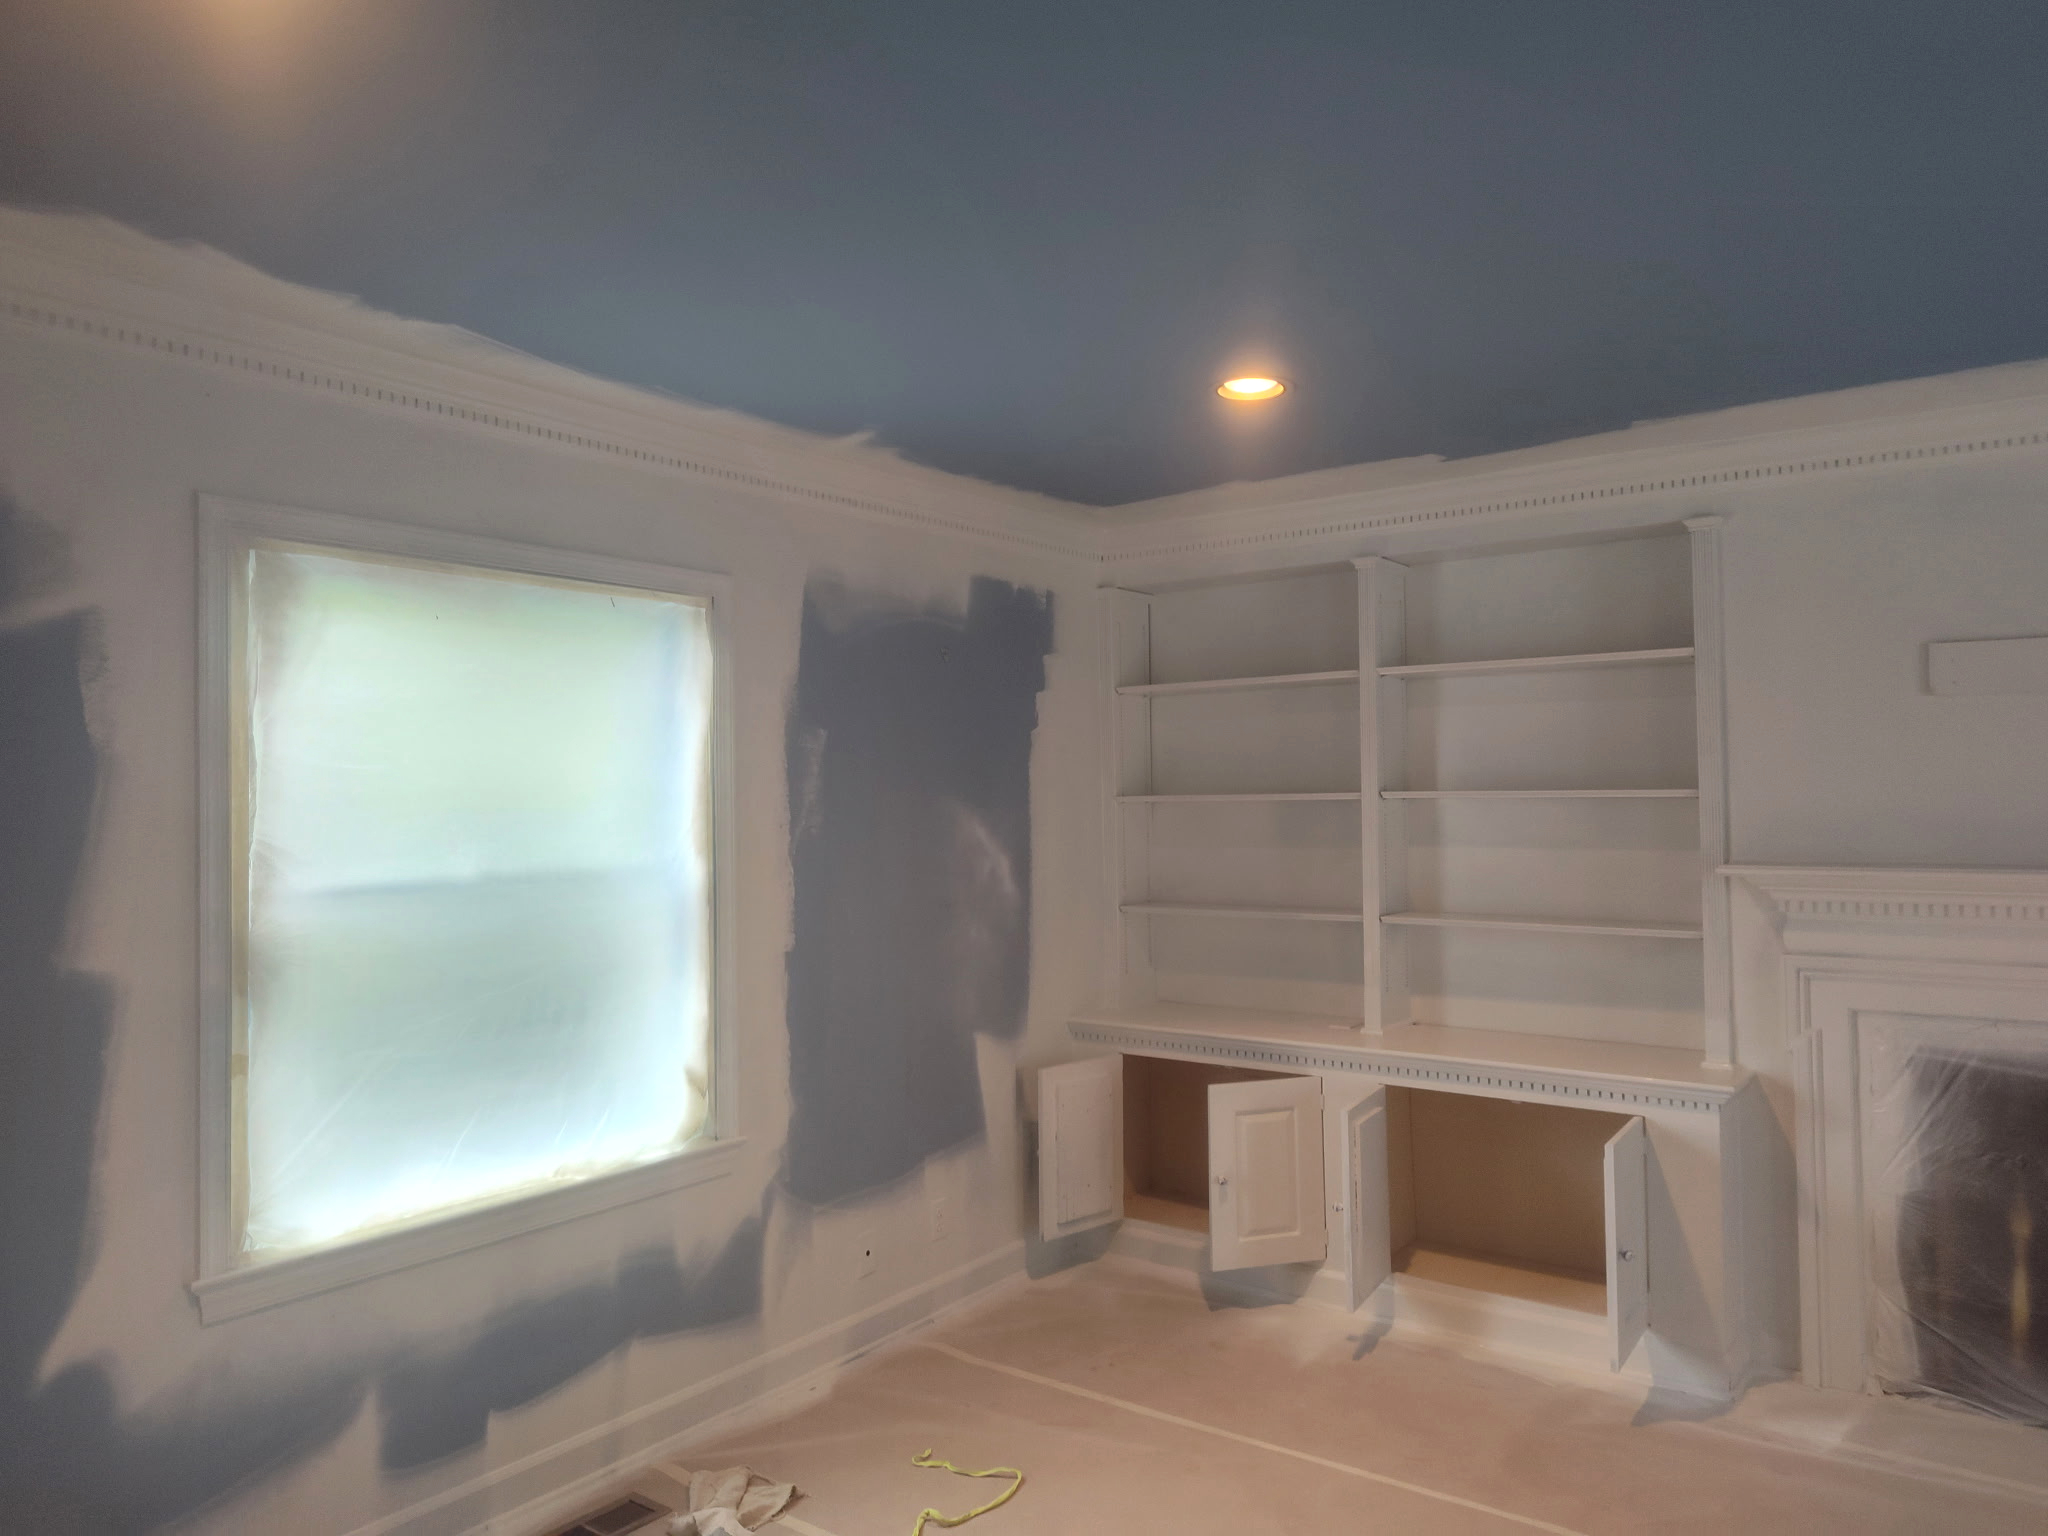
Full Living Room Preparation & Painting
Any damaged areas of the walls were repaired and prepared as needed before painting. The entire room was then painted from top to bottom, including the walls, ceiling, window areas, trim, and other interior surfaces, creating a clean and refreshed finished look.

07
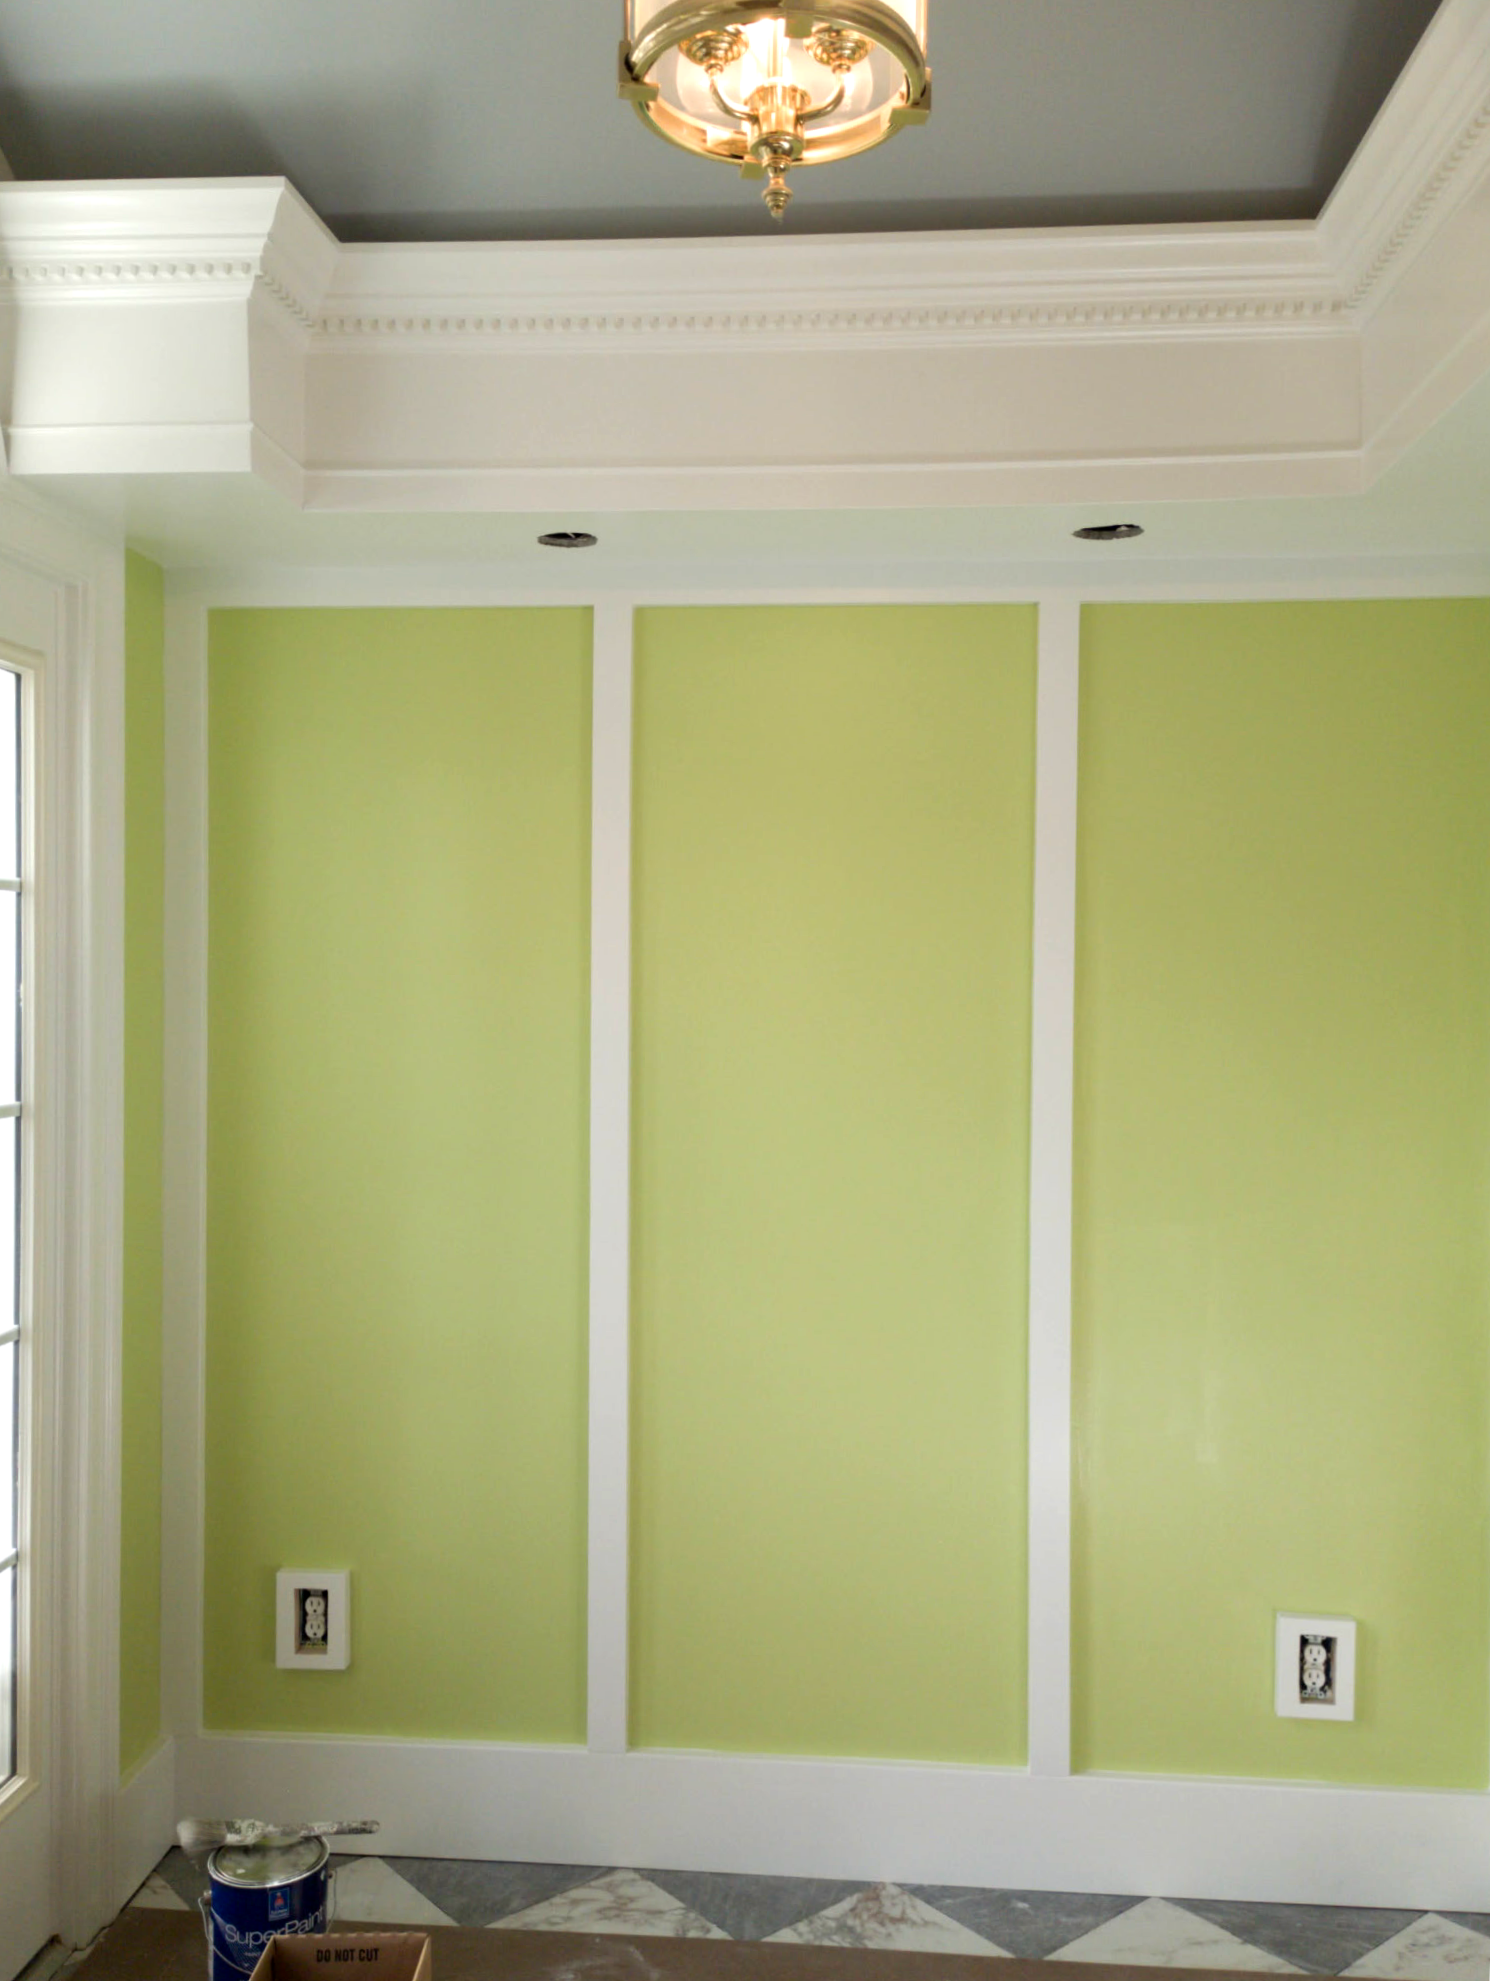
Wall Painting
The wall section was first prepared and painted to create a clean, finished surface.

08
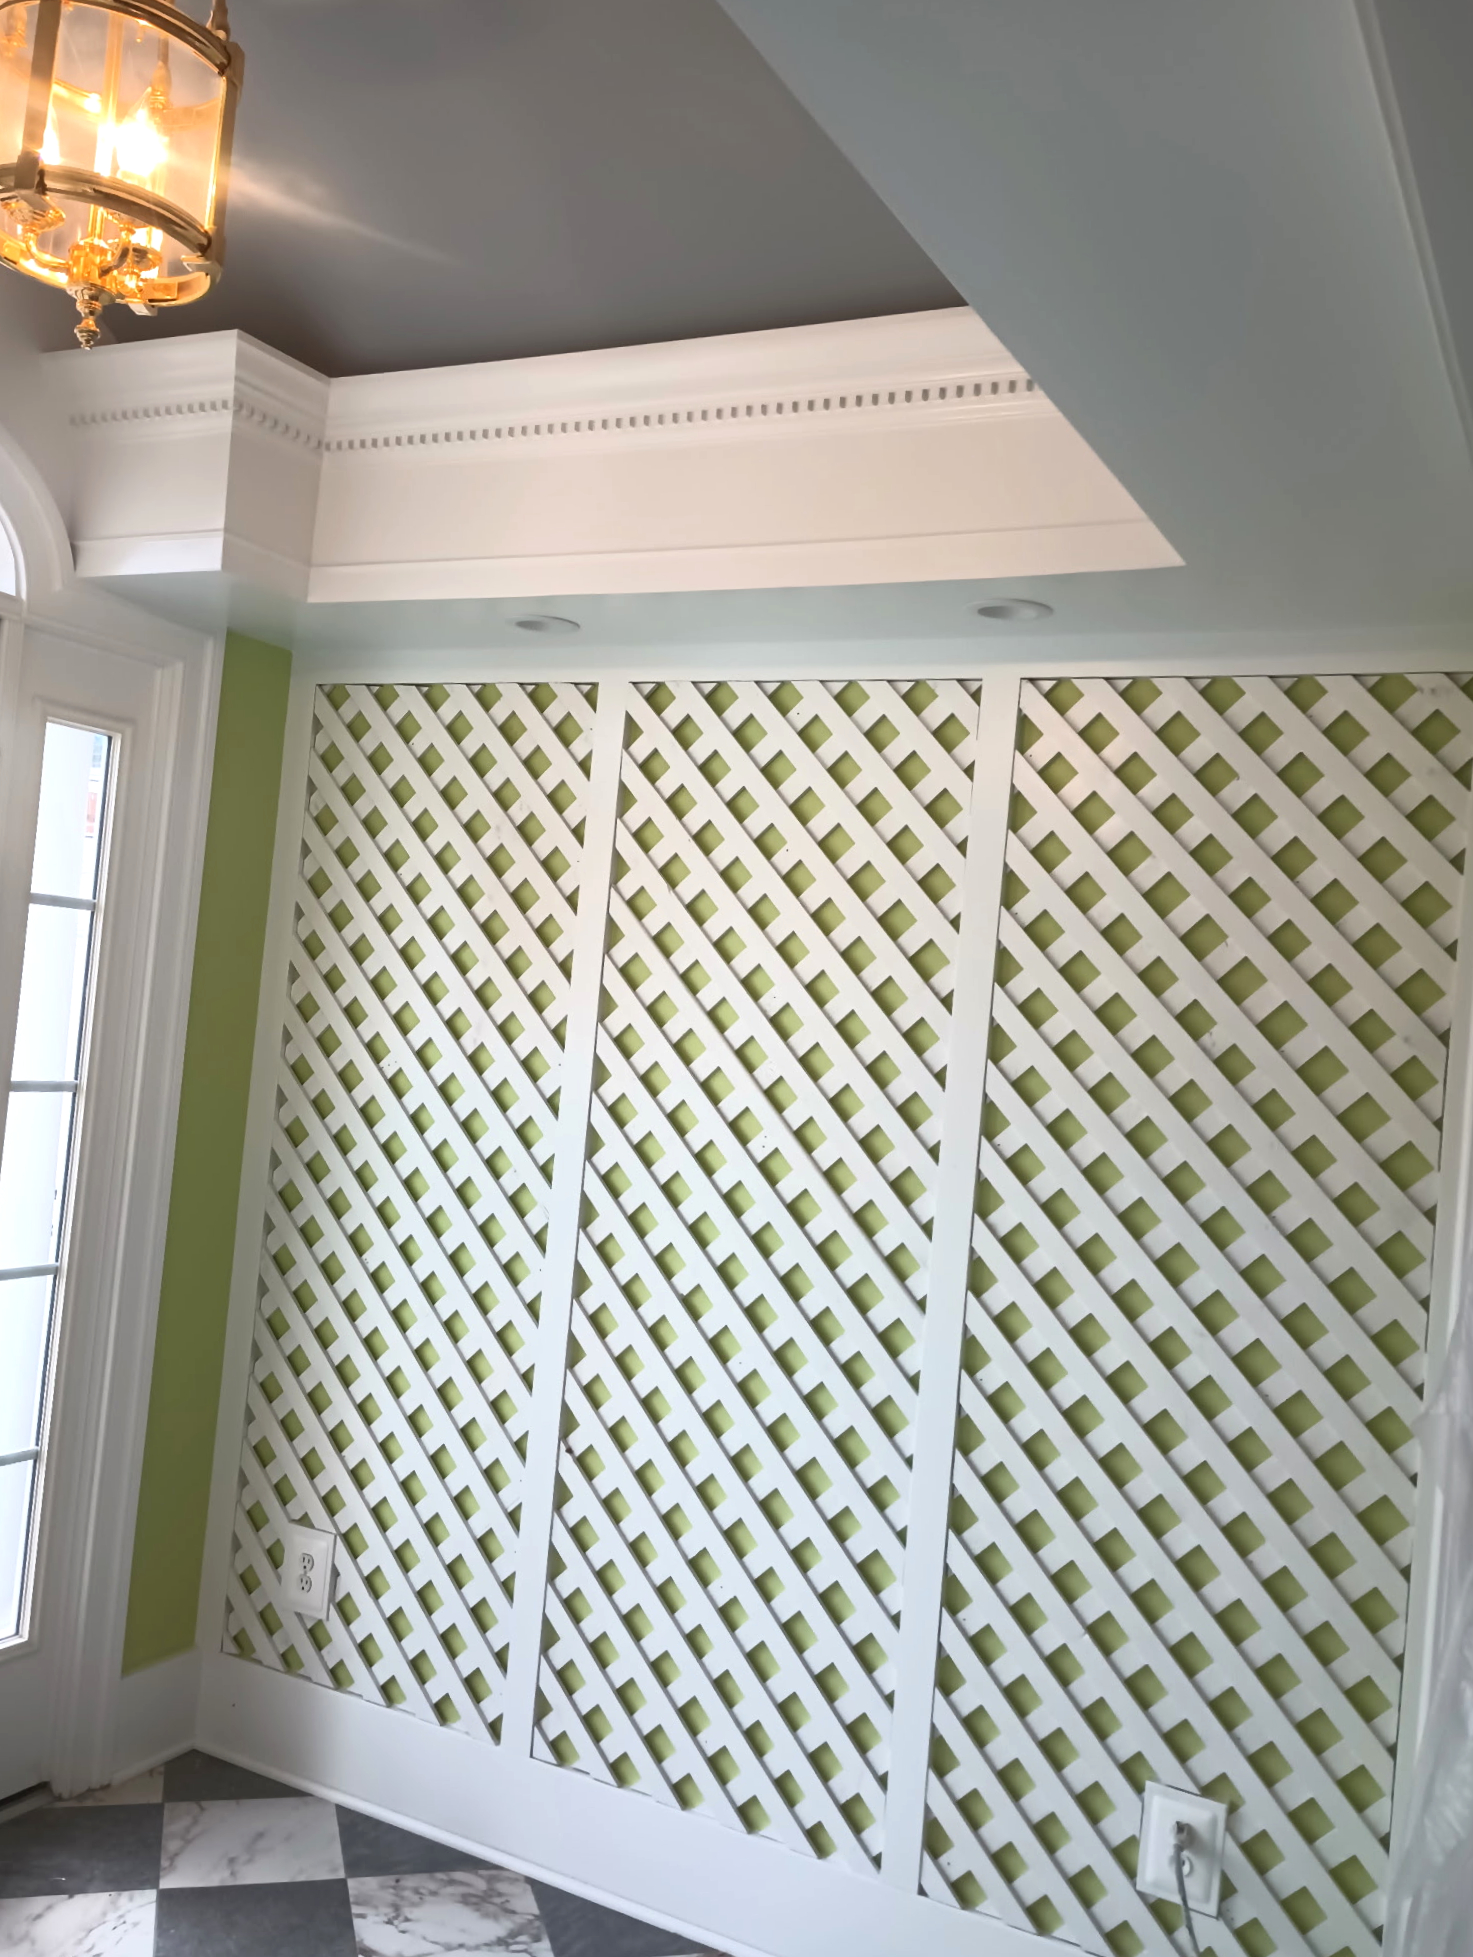
Decorative Wood Design
The wall section was first prepared and painted to create a clean, finished surface. Once the painting was completed, a decorative wood design was carefully installed over the front of the wall, adding dimension and a custom accent to the space.

09
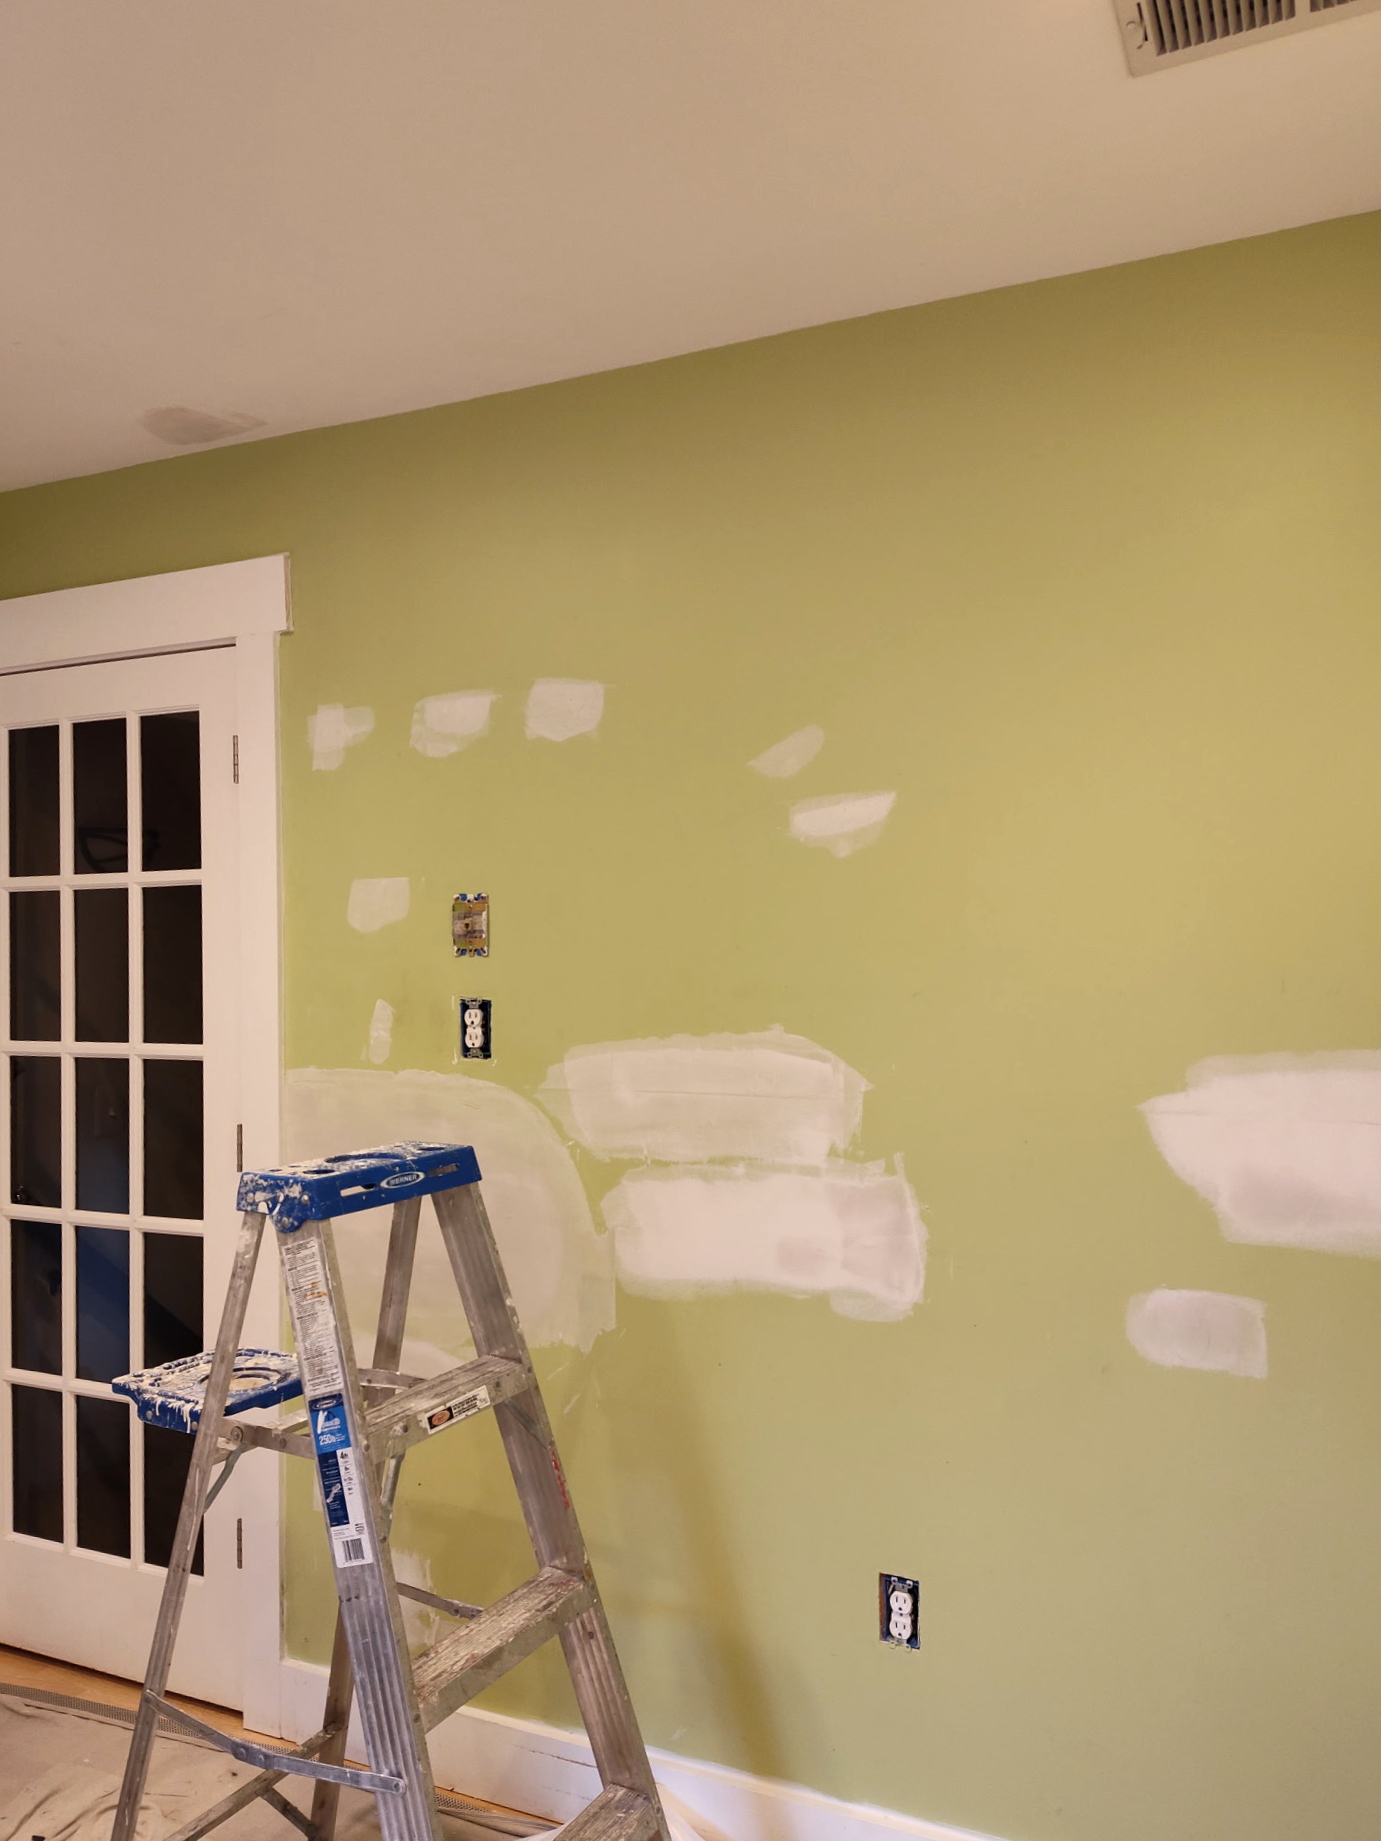
Wall Repair, Priming & Painting
Damaged and uneven areas of the walls were repaired using Easy Sand to create a smooth, uniform surface. The walls were then fully prepared, primed, and painted to provide a clean and refreshed finished appearance.

10
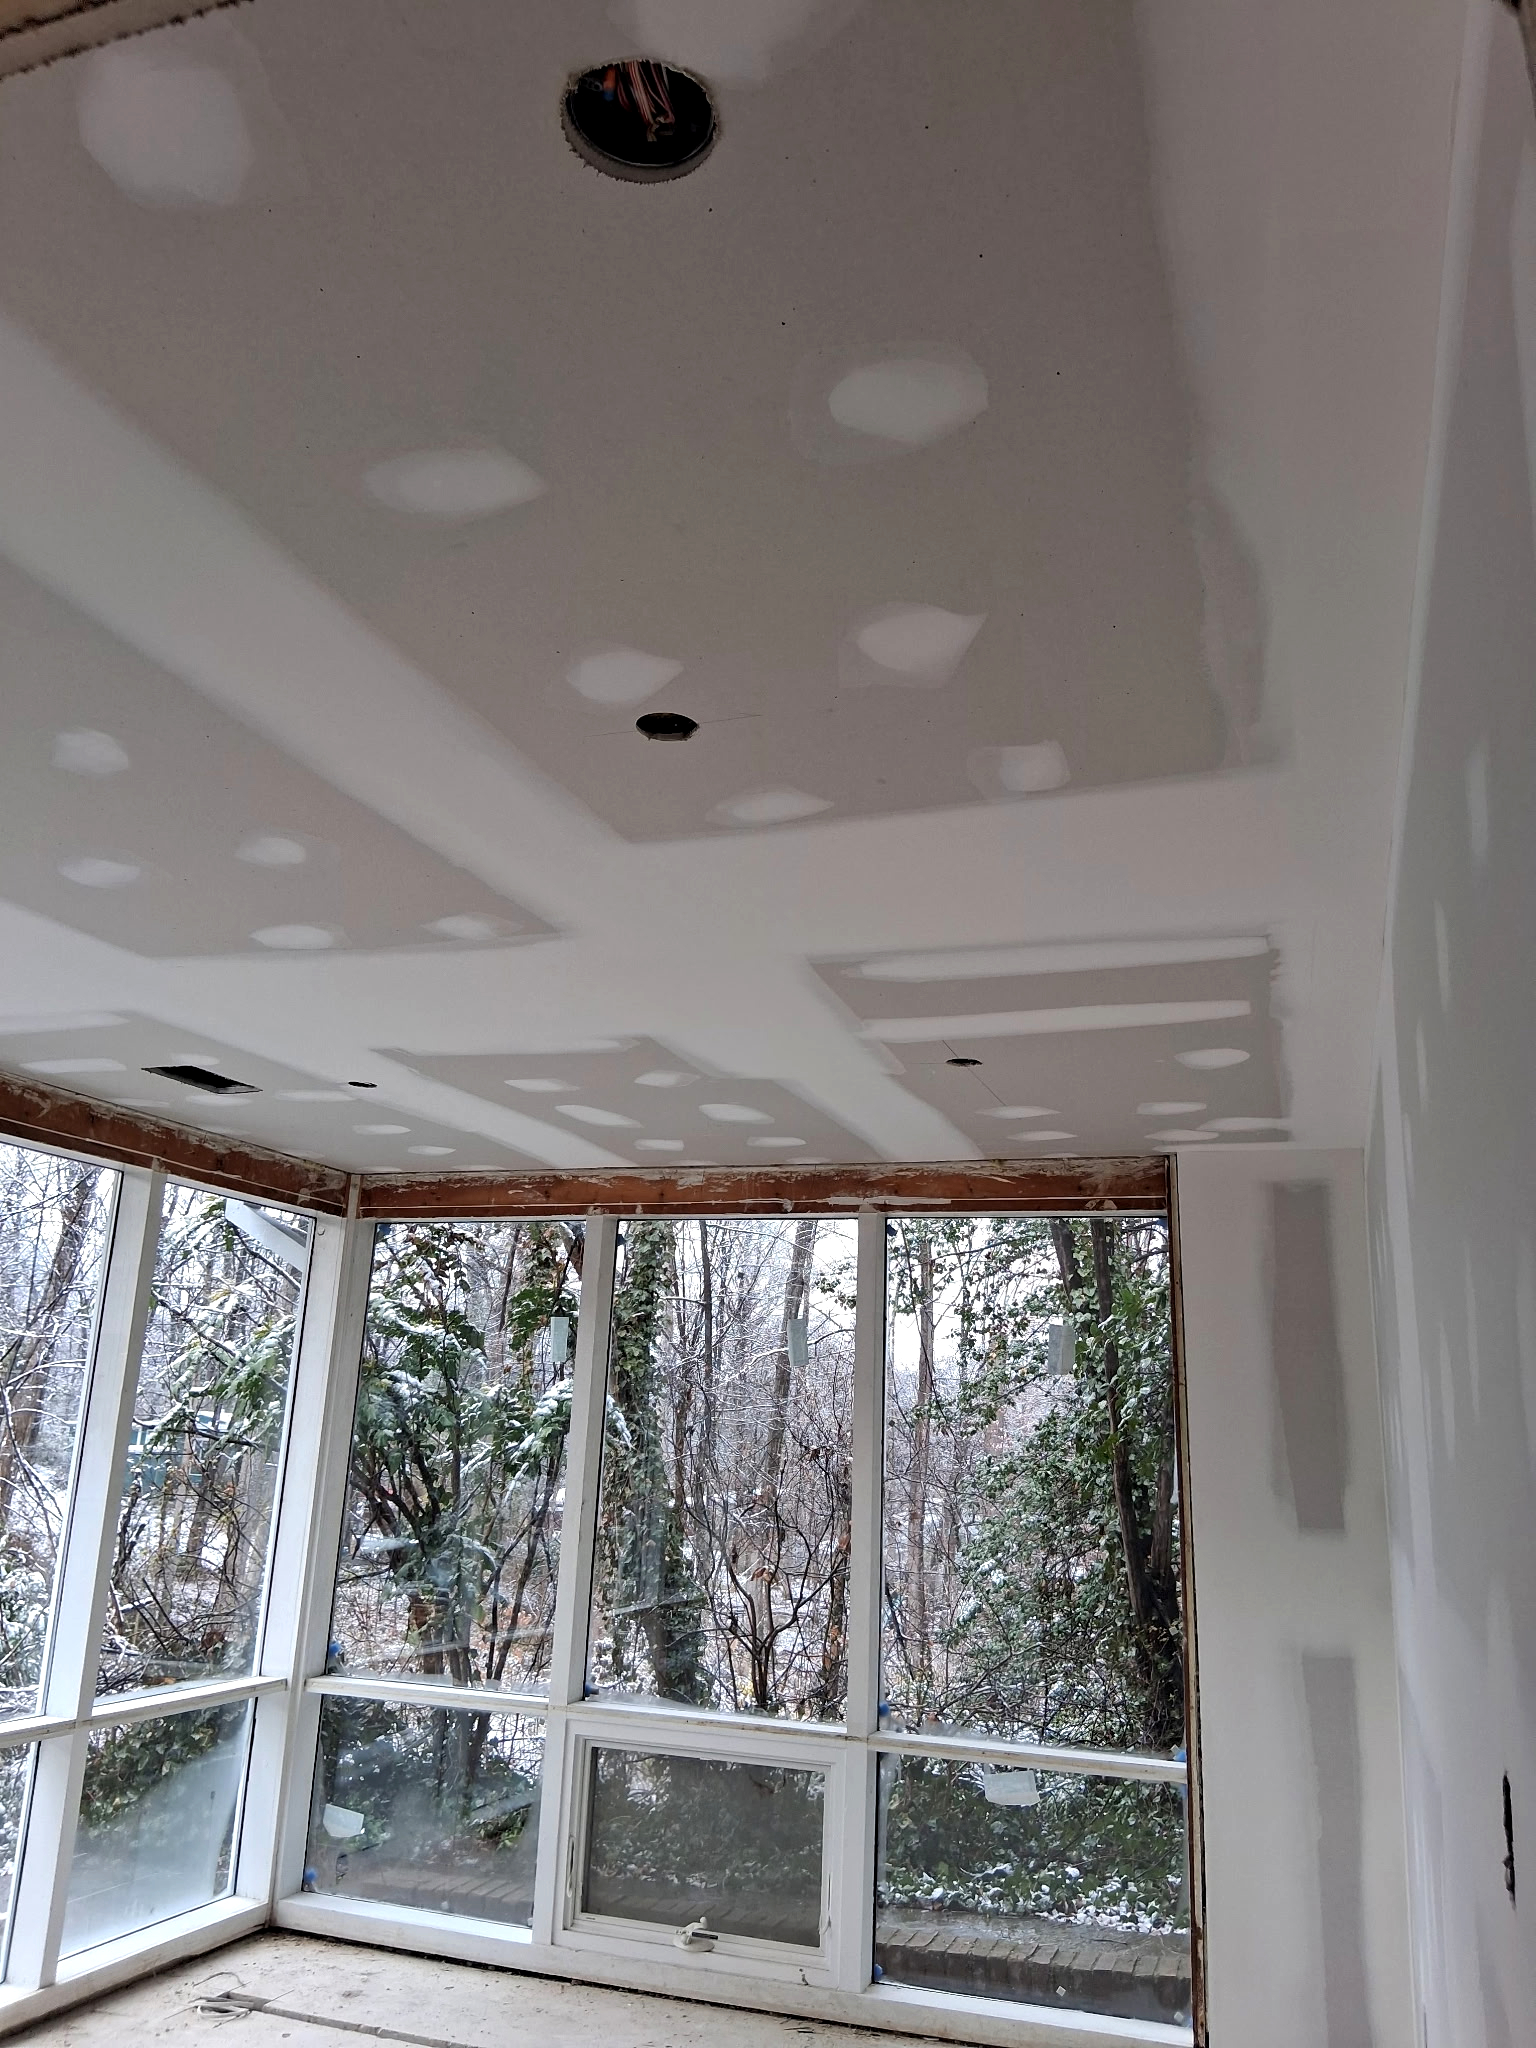
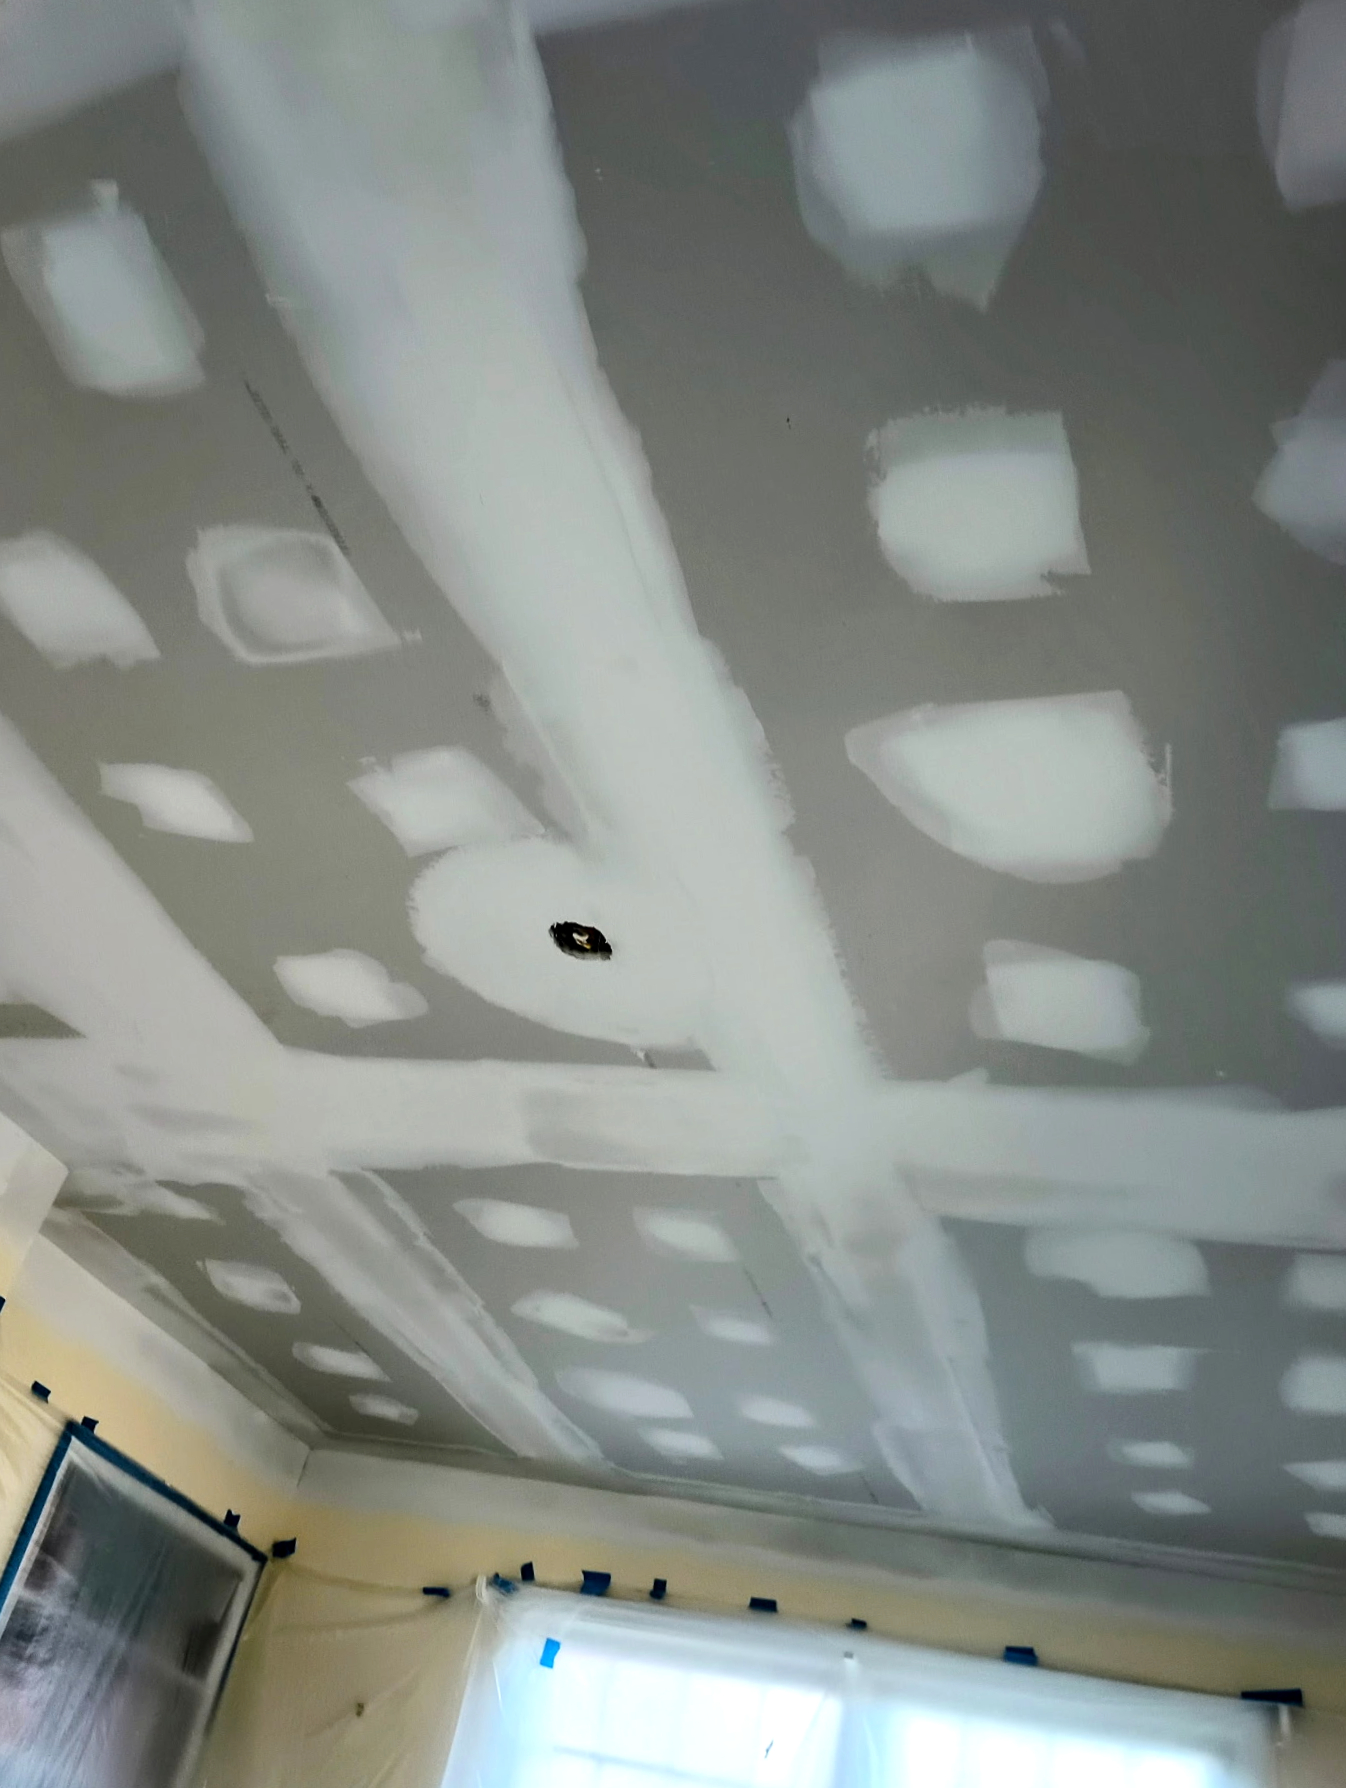
New Drywall Installation & Preparation
New drywall was installed on sections of both the wall and ceiling to repair and restore the affected areas. The newly installed drywall was then properly secured, awaiting to be finished, and prepared to create smooth, uniform surfaces ready for priming and painting.

11
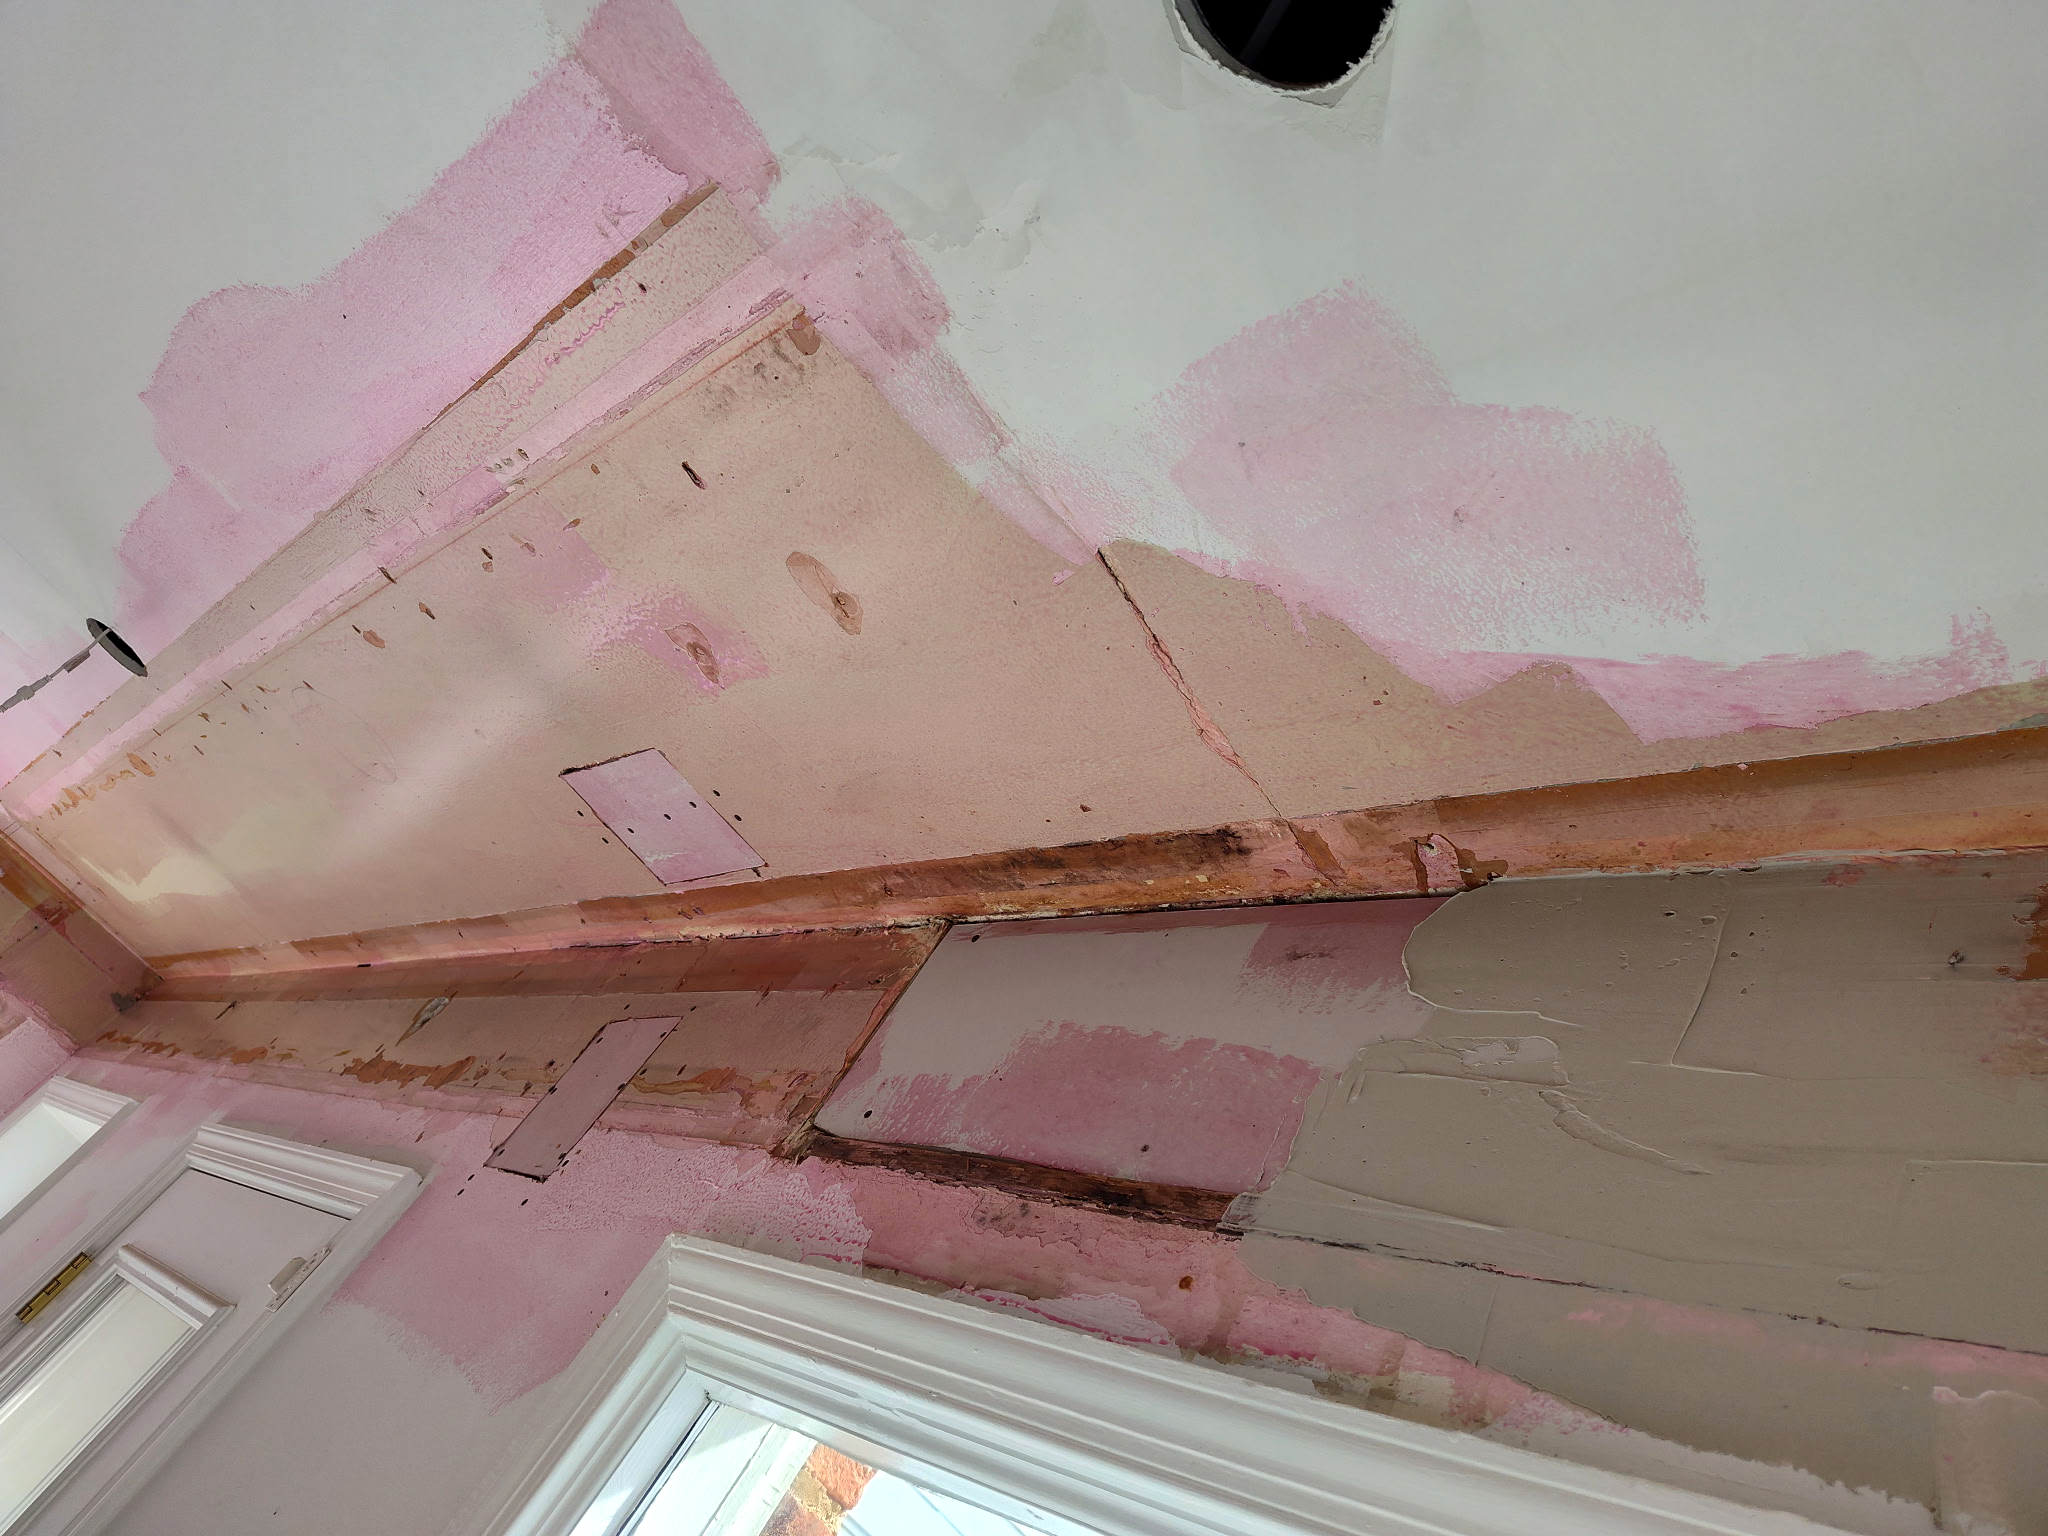
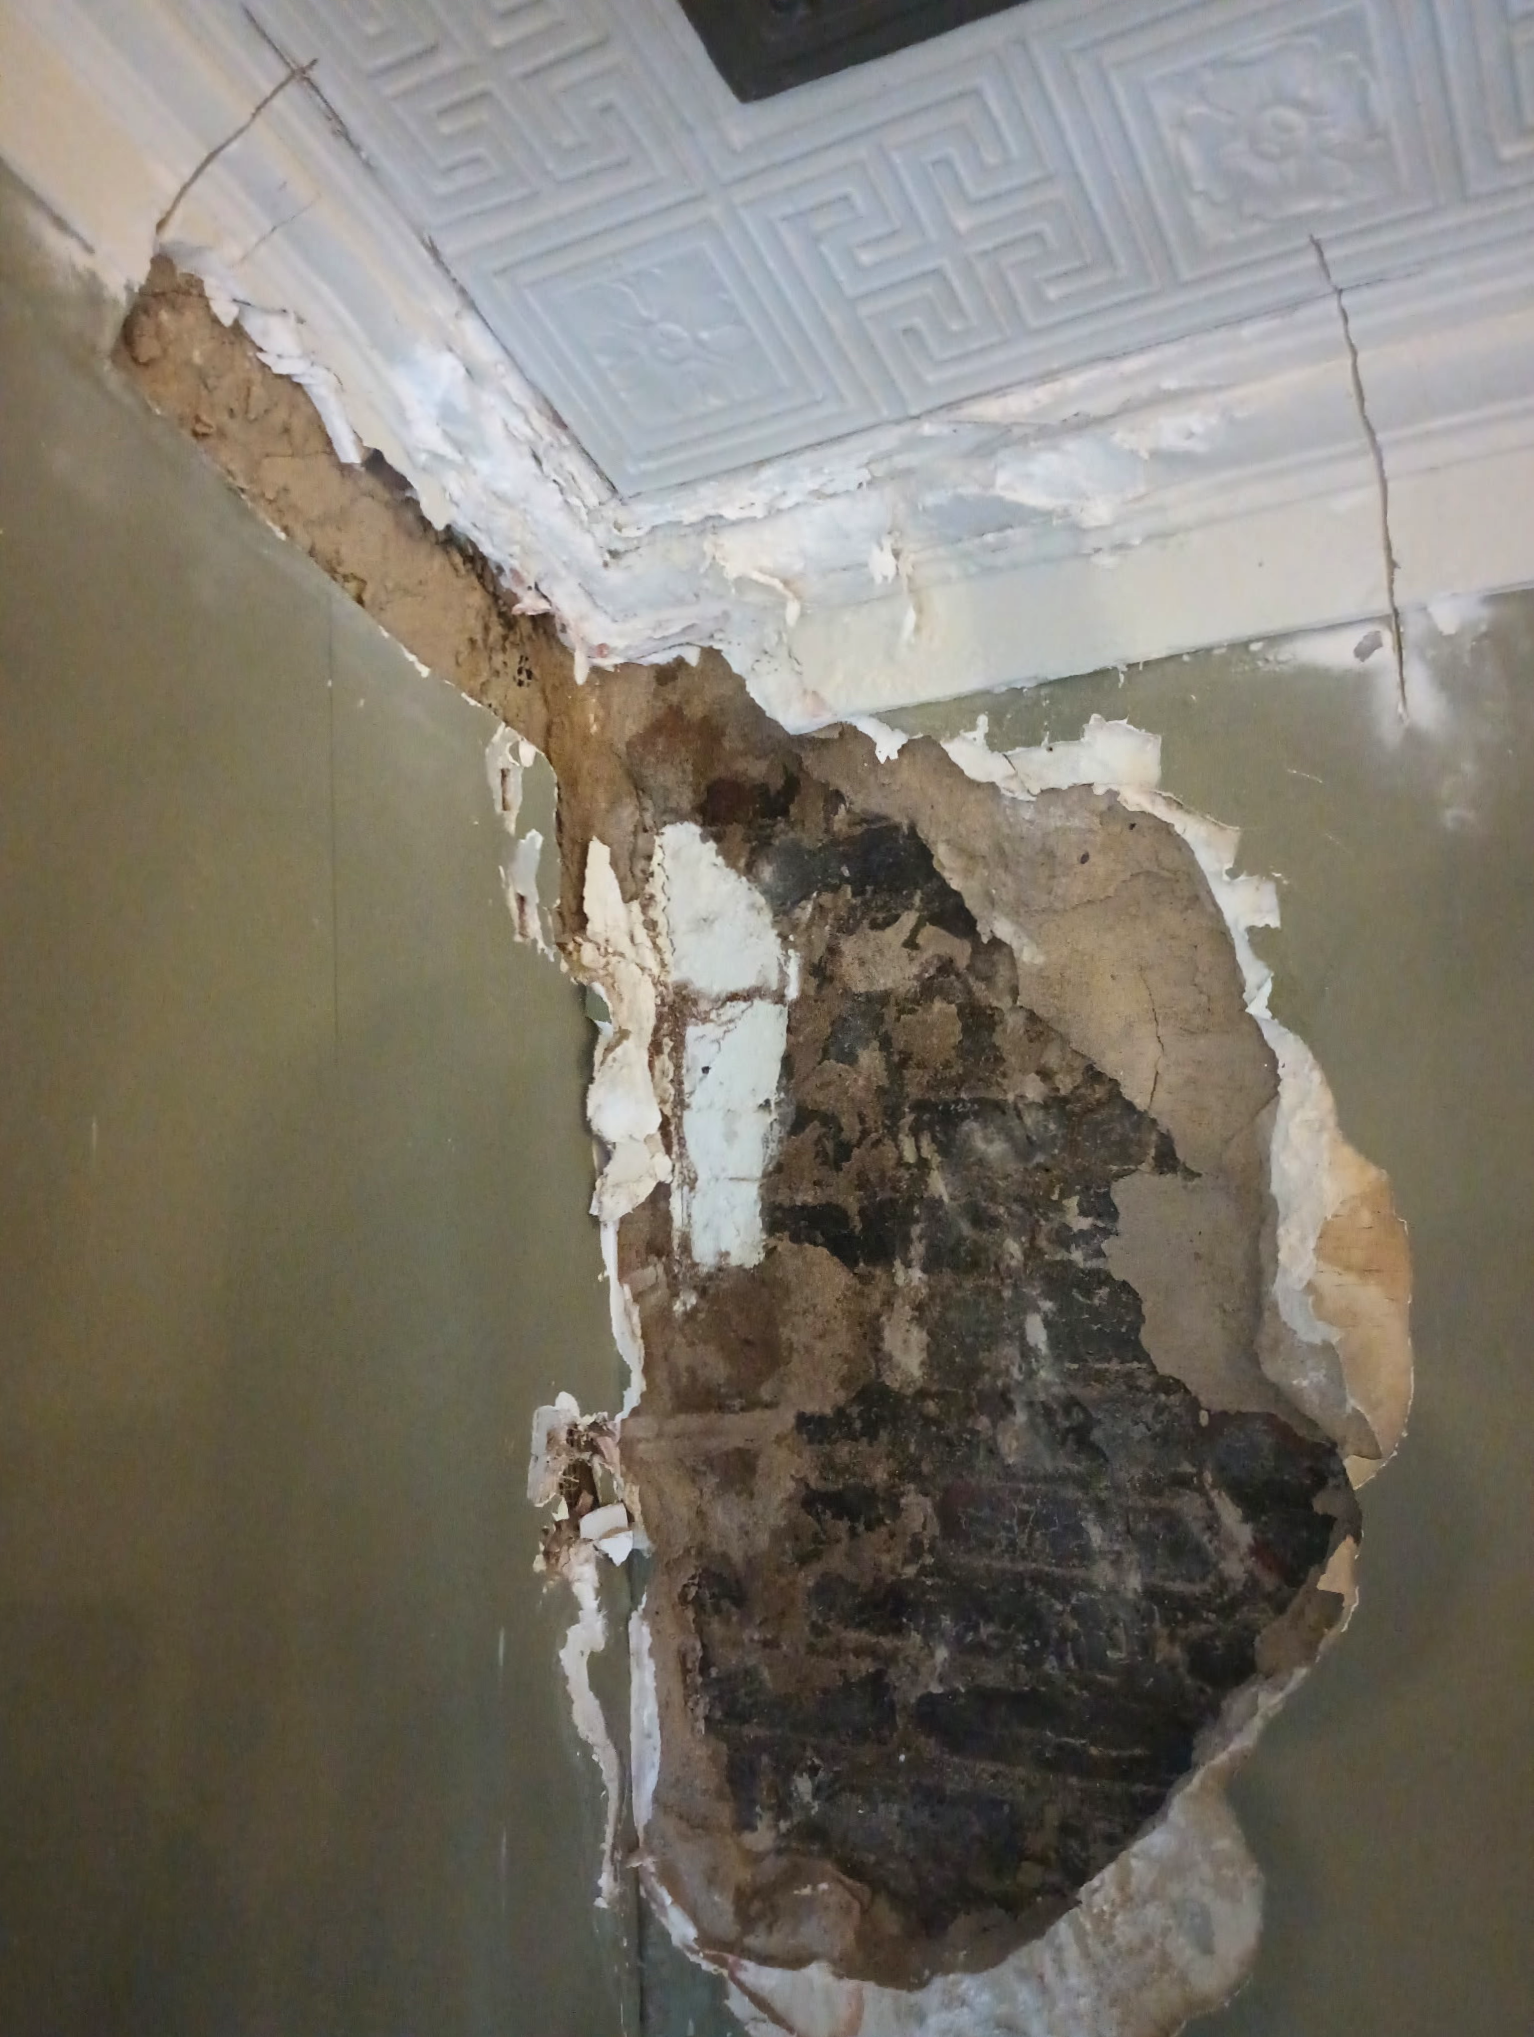
Plaster Wall & Ceiling Repair
Damaged sections of the existing plaster wall and ceiling were carefully removed to later be restored.

12
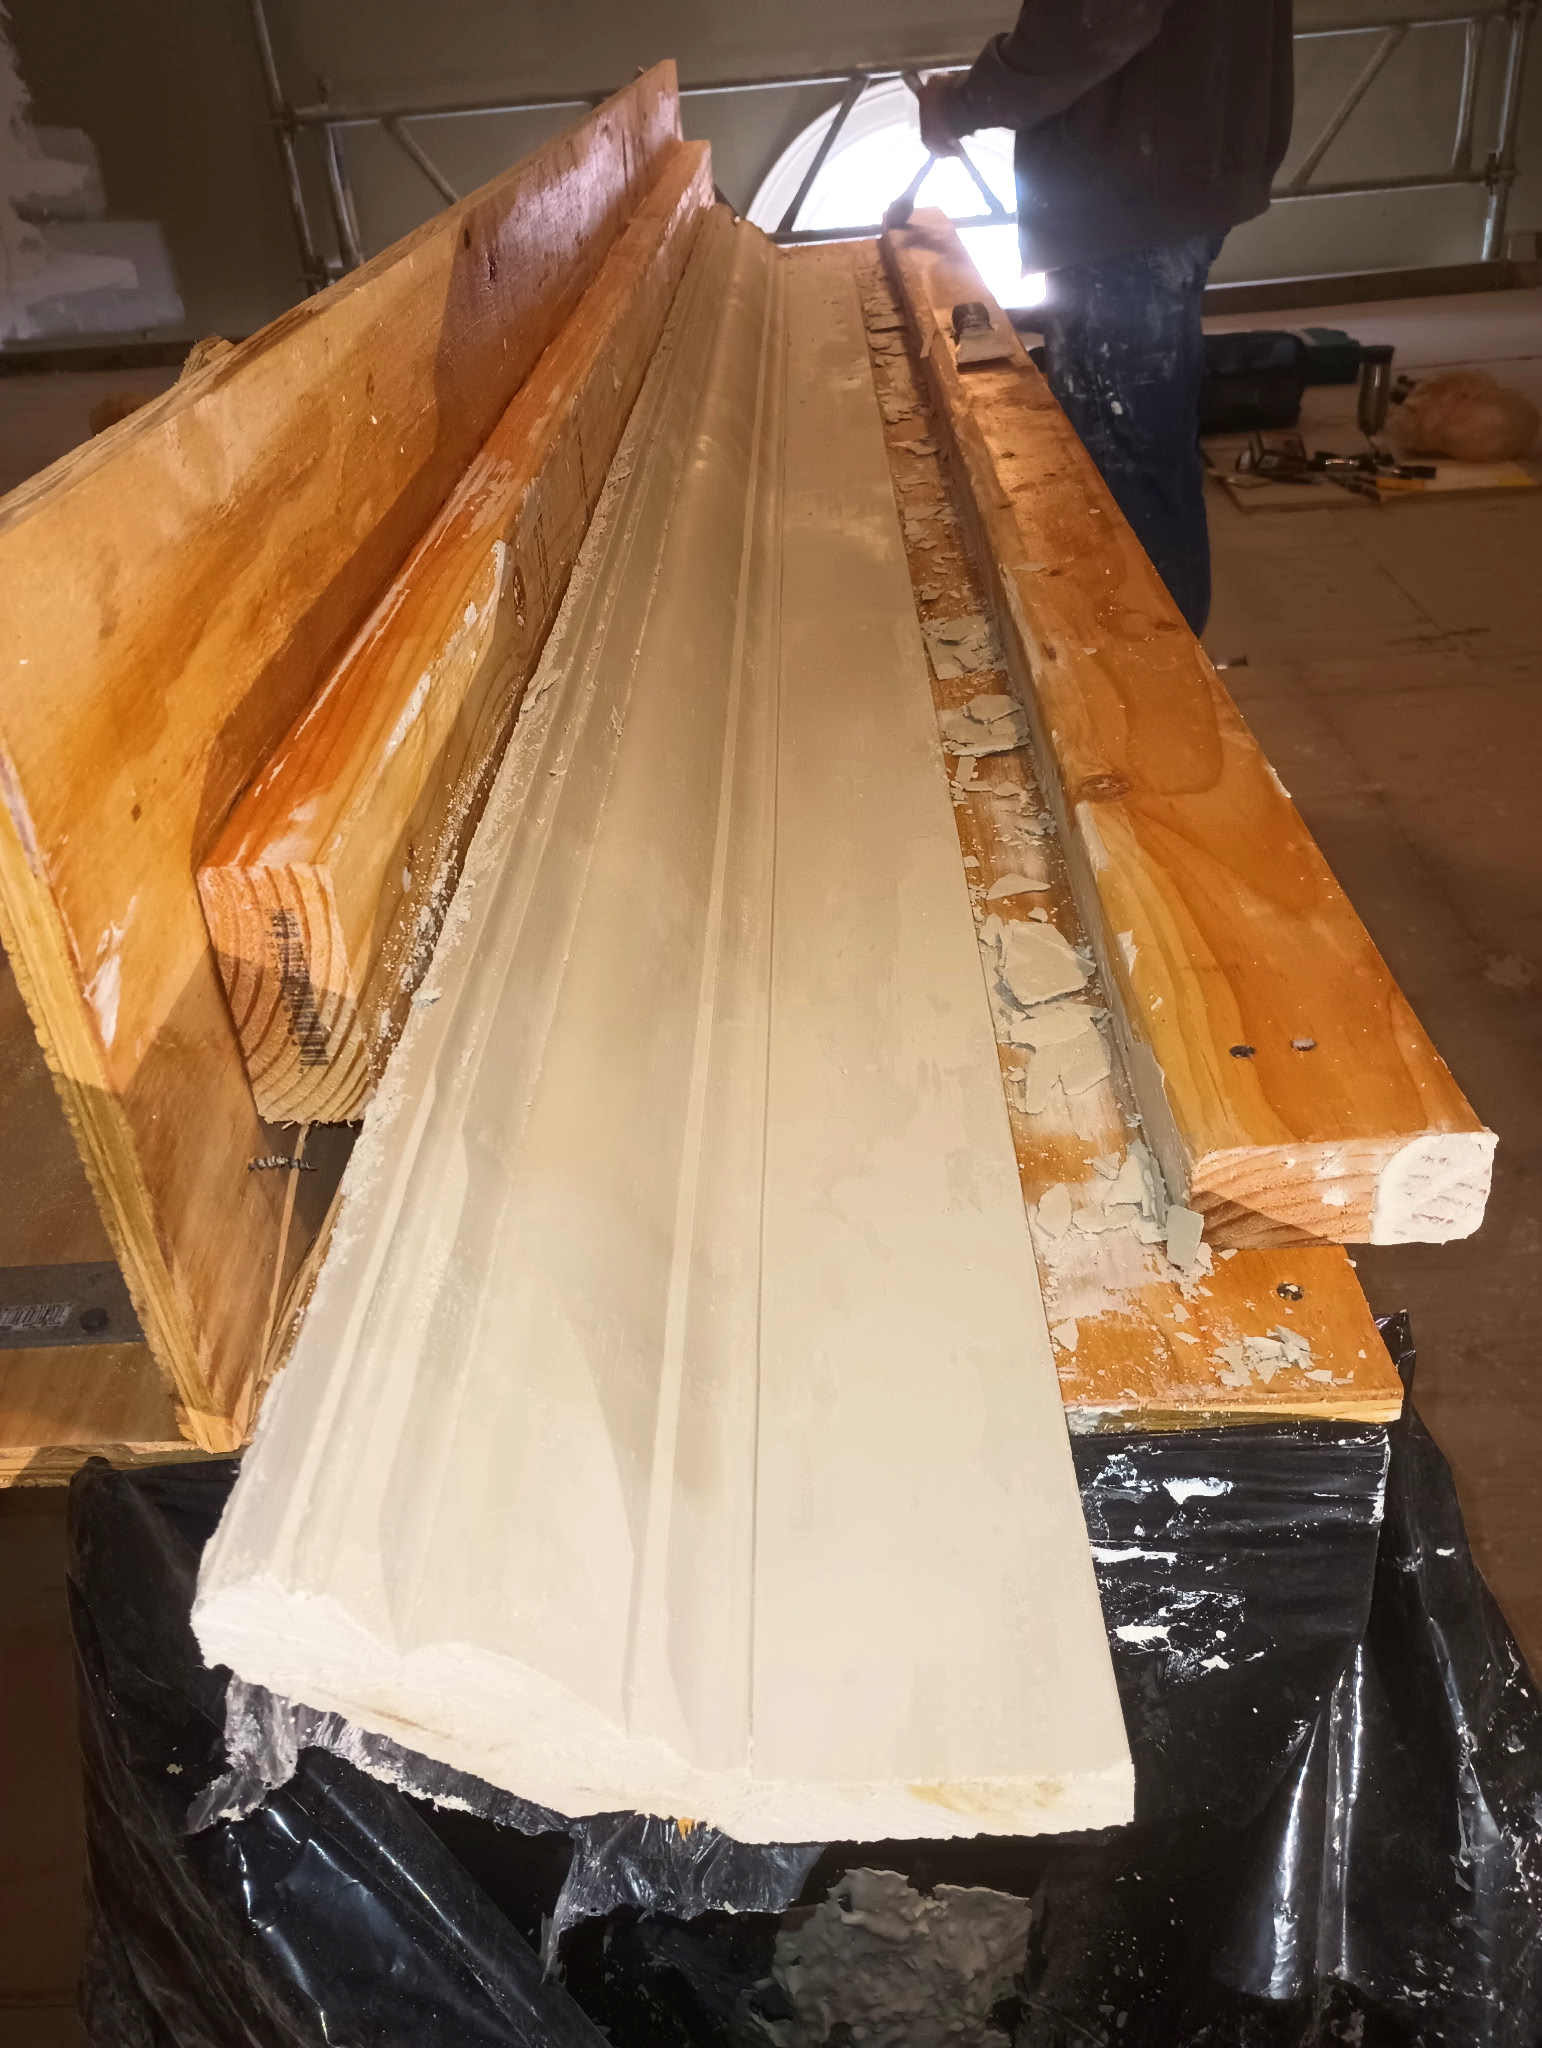
Plaster Wall, Ceiling & Molding Repair
A section of plaster molding was also recreated and installed to match the surrounding design. All repaired areas were properly shaped, smoothed, and prepared to create a seamless finish ready for priming and painting.

13
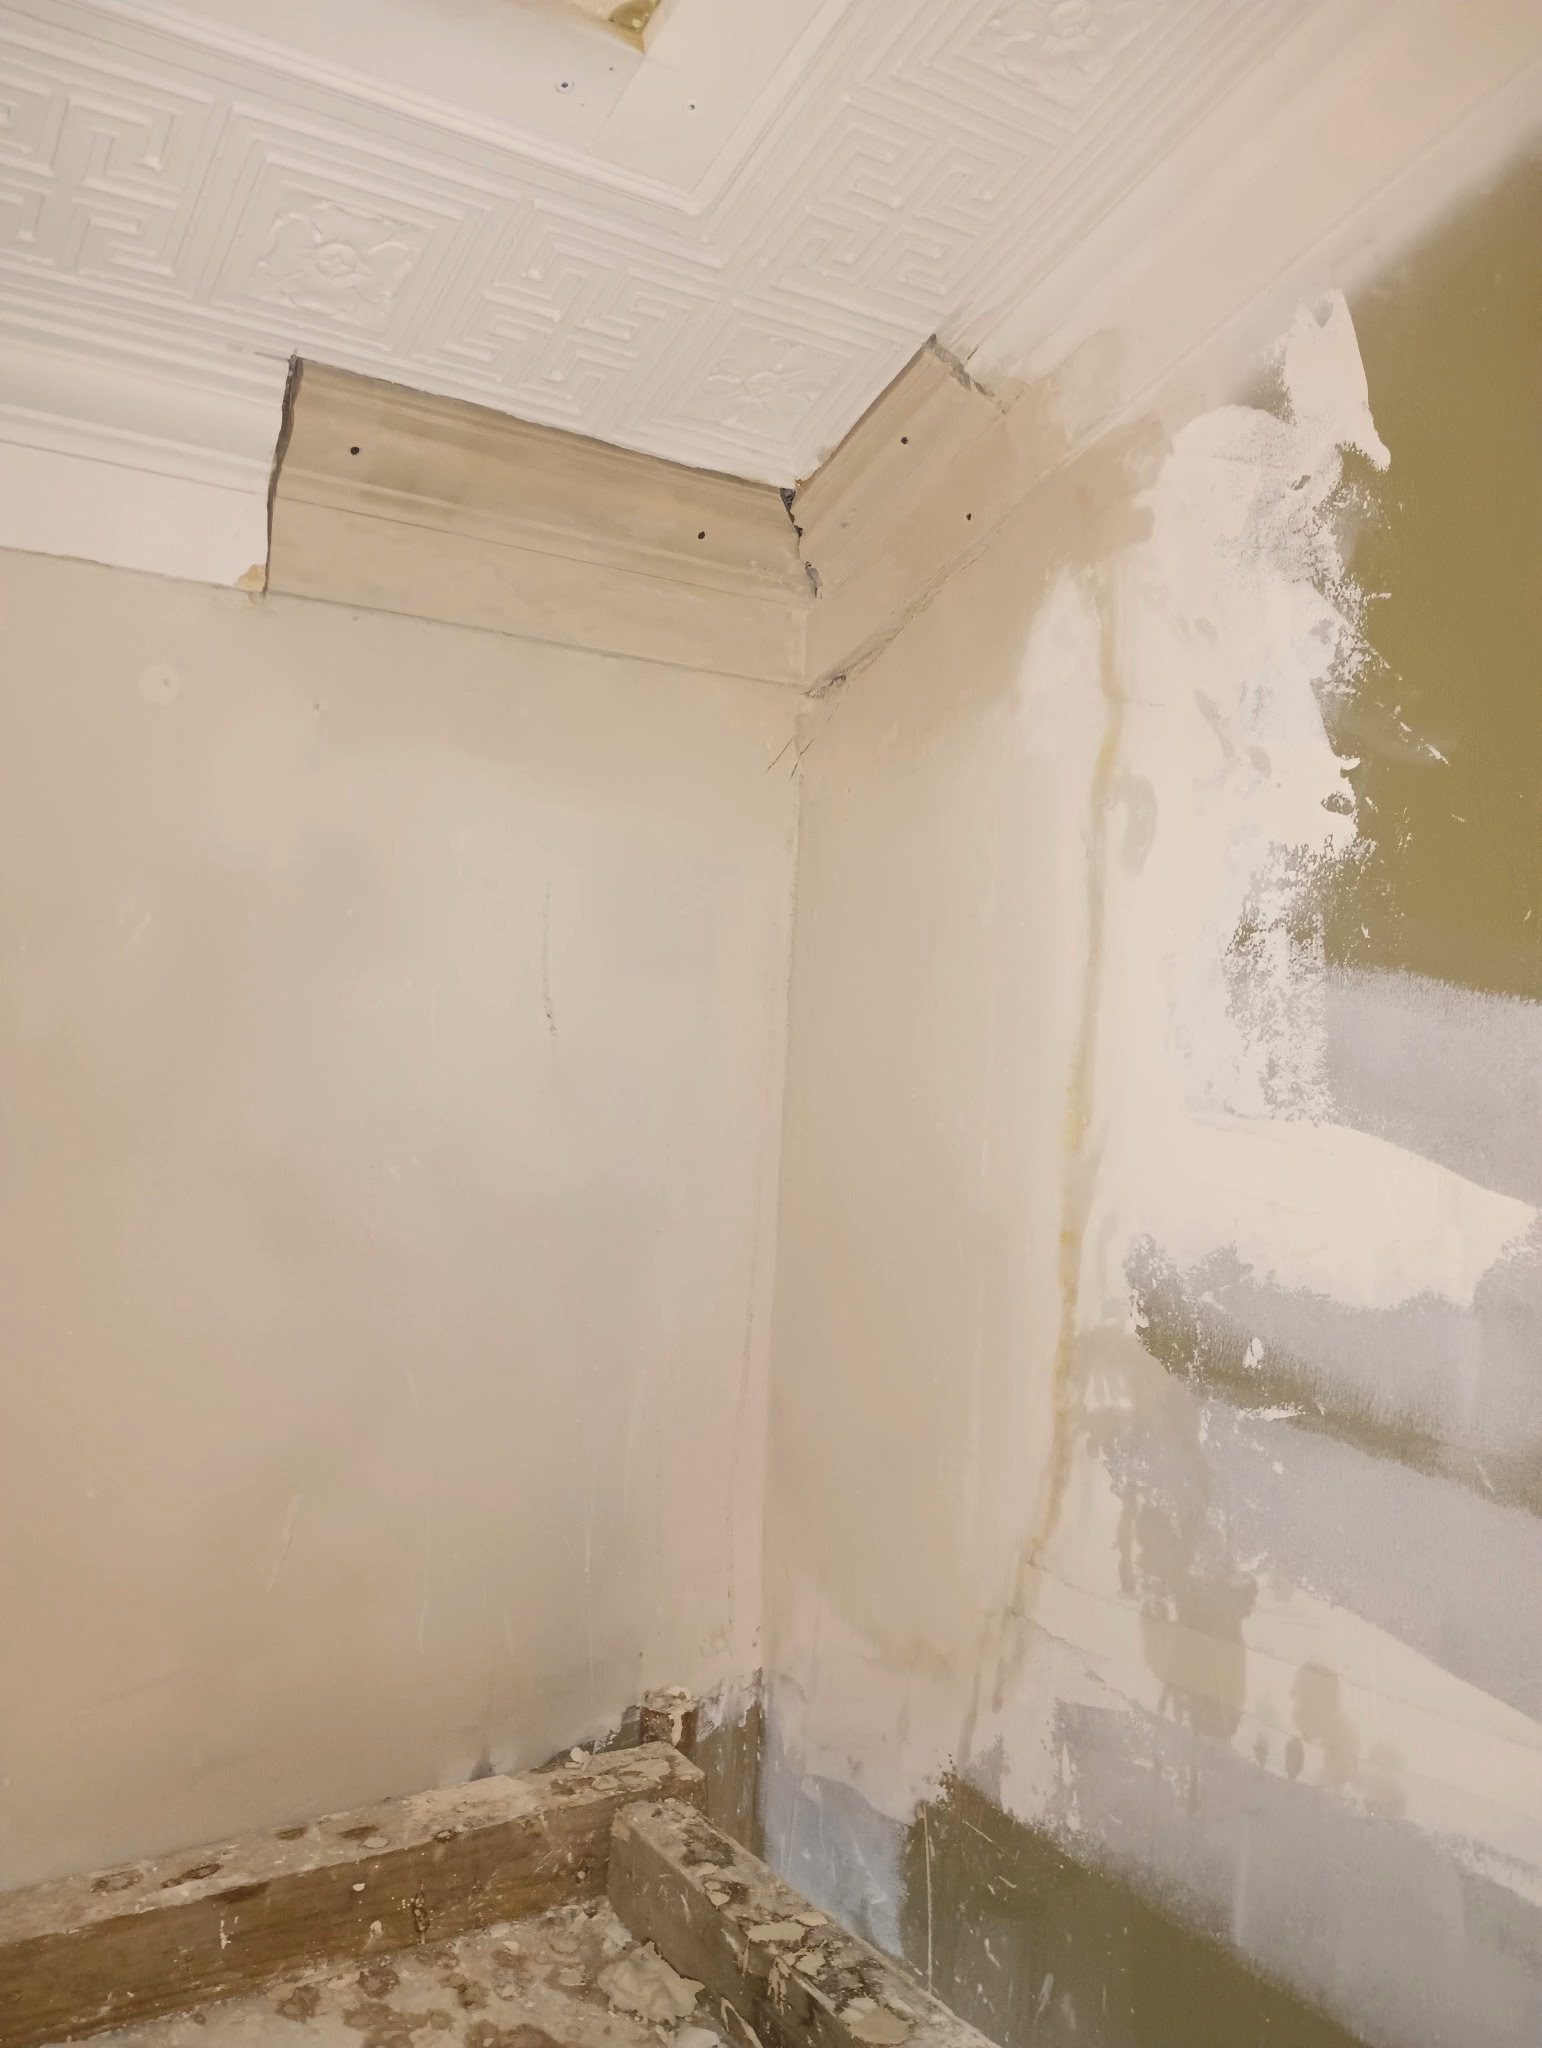
Plaster Wall, Ceiling & Molding Repair
The affected areas were properly prepared and smoothed to create a uniform surface, ready for the next stage.

14
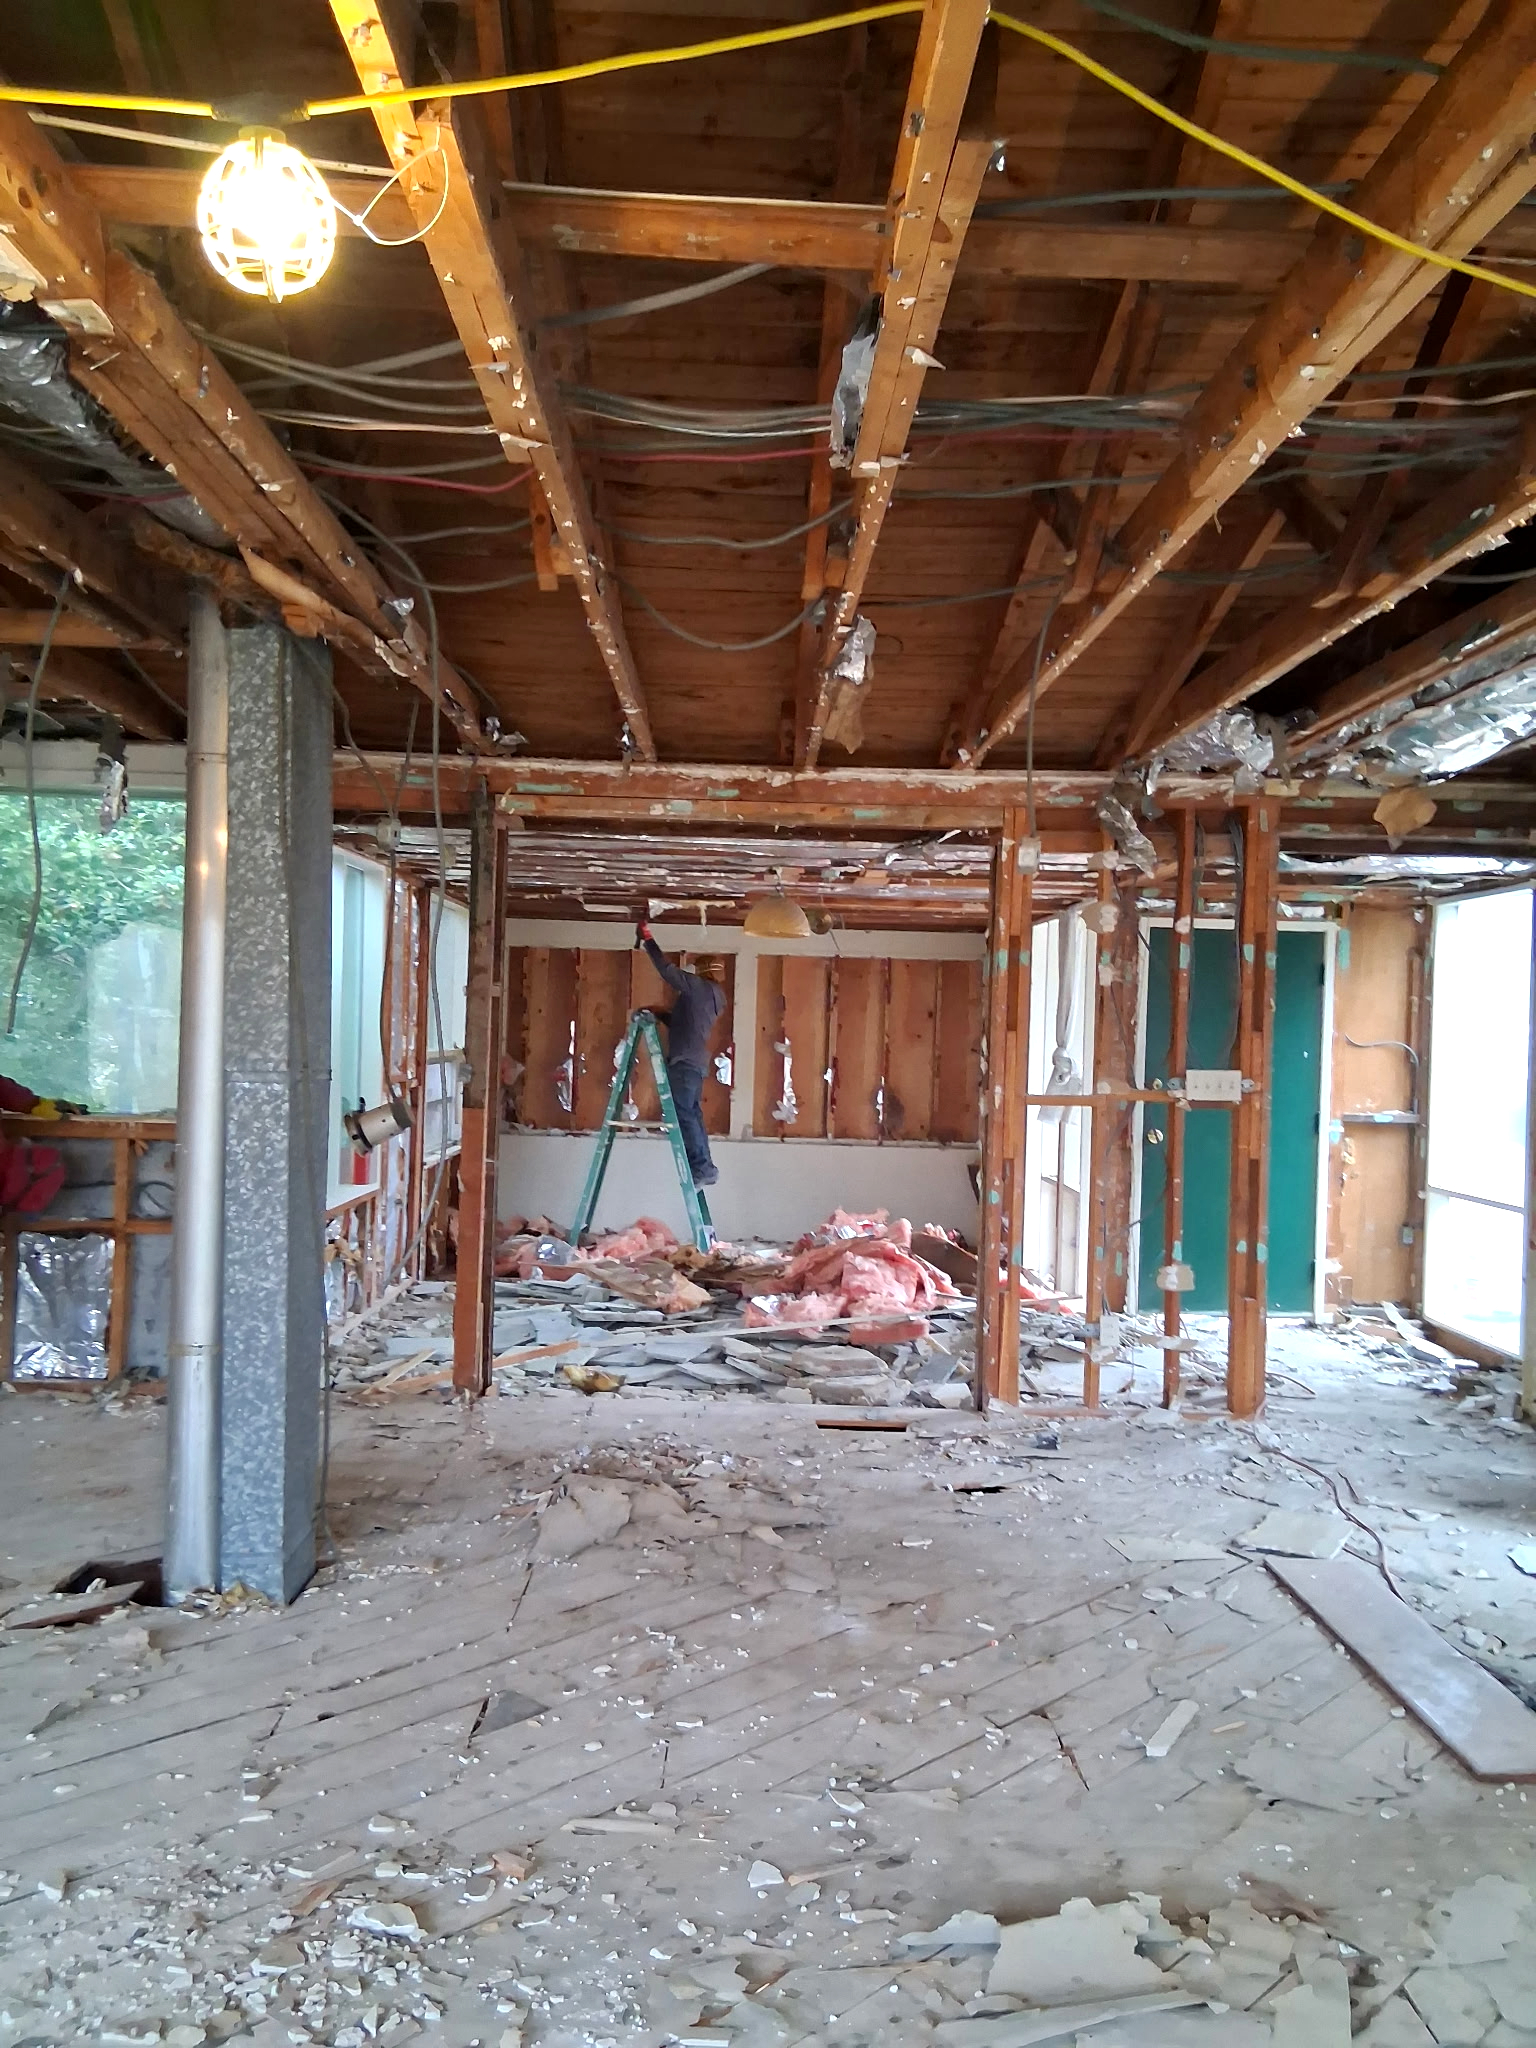
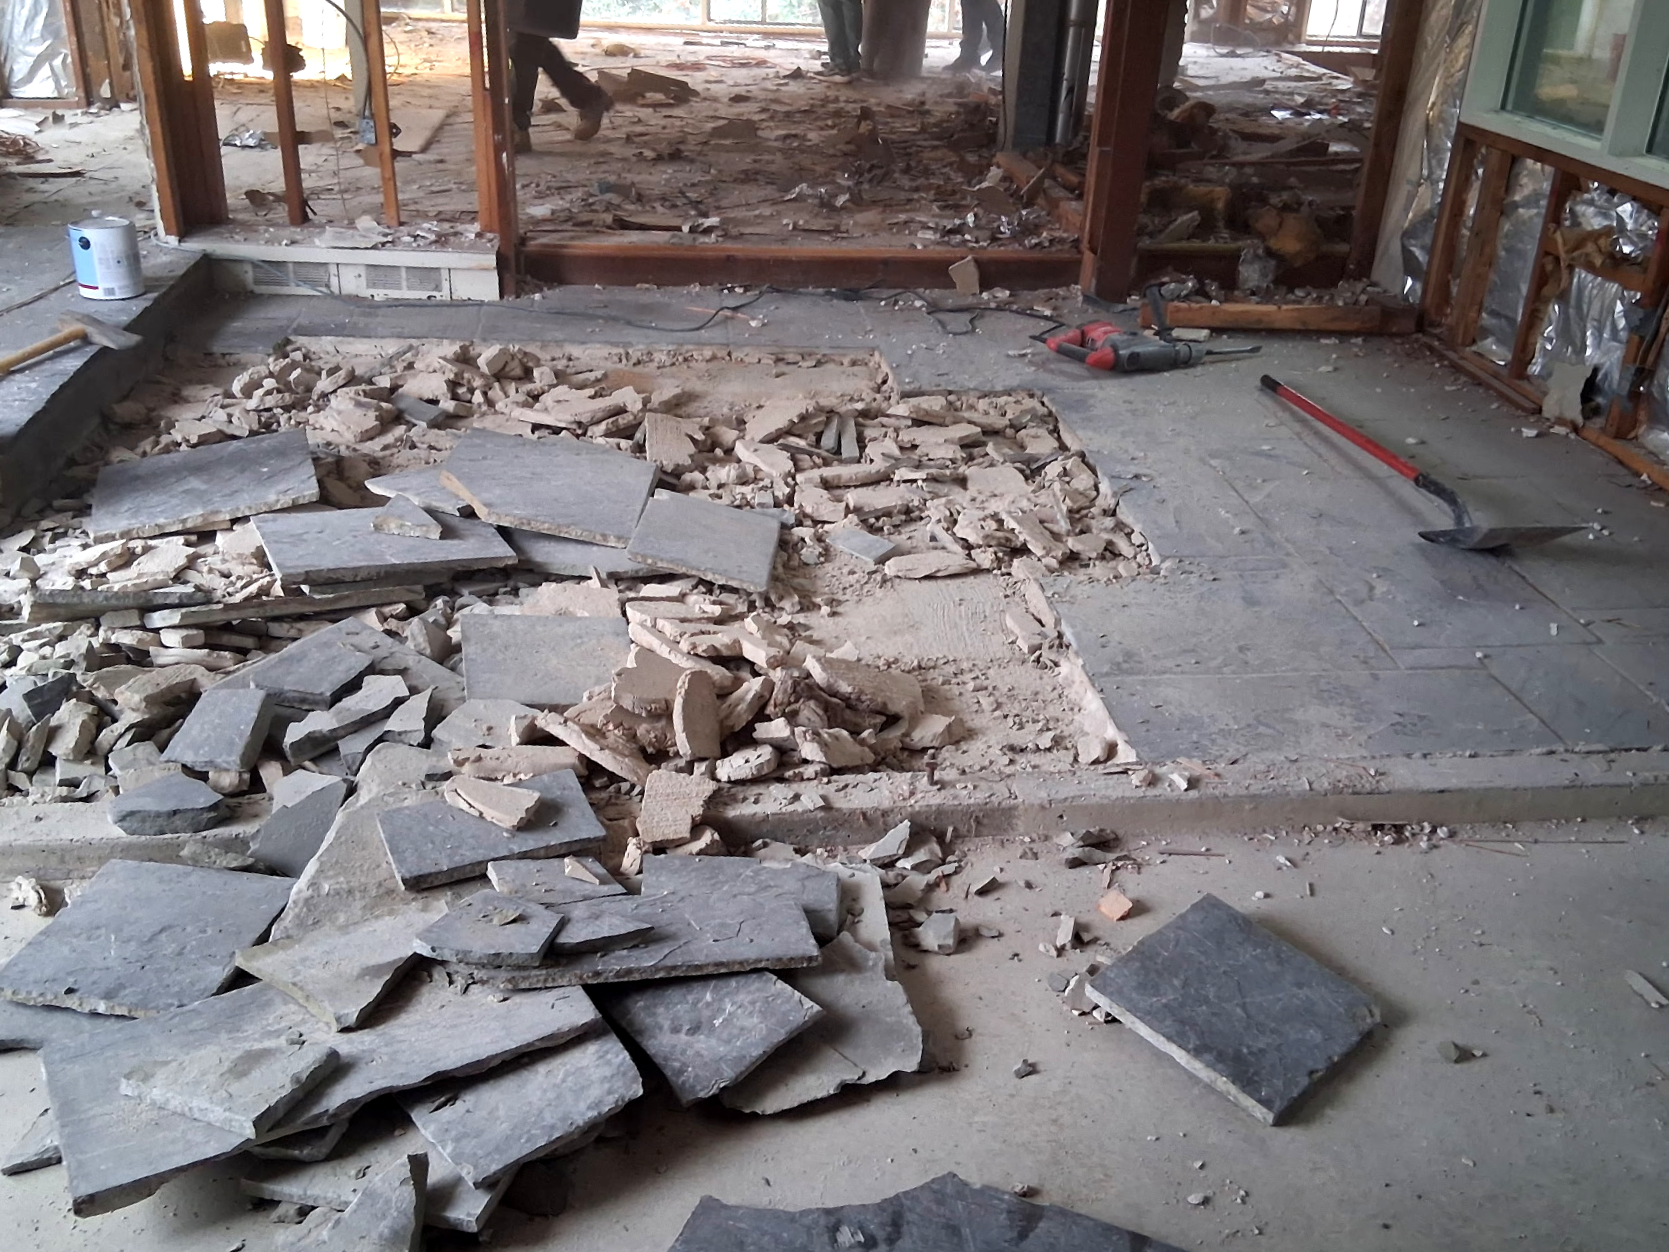
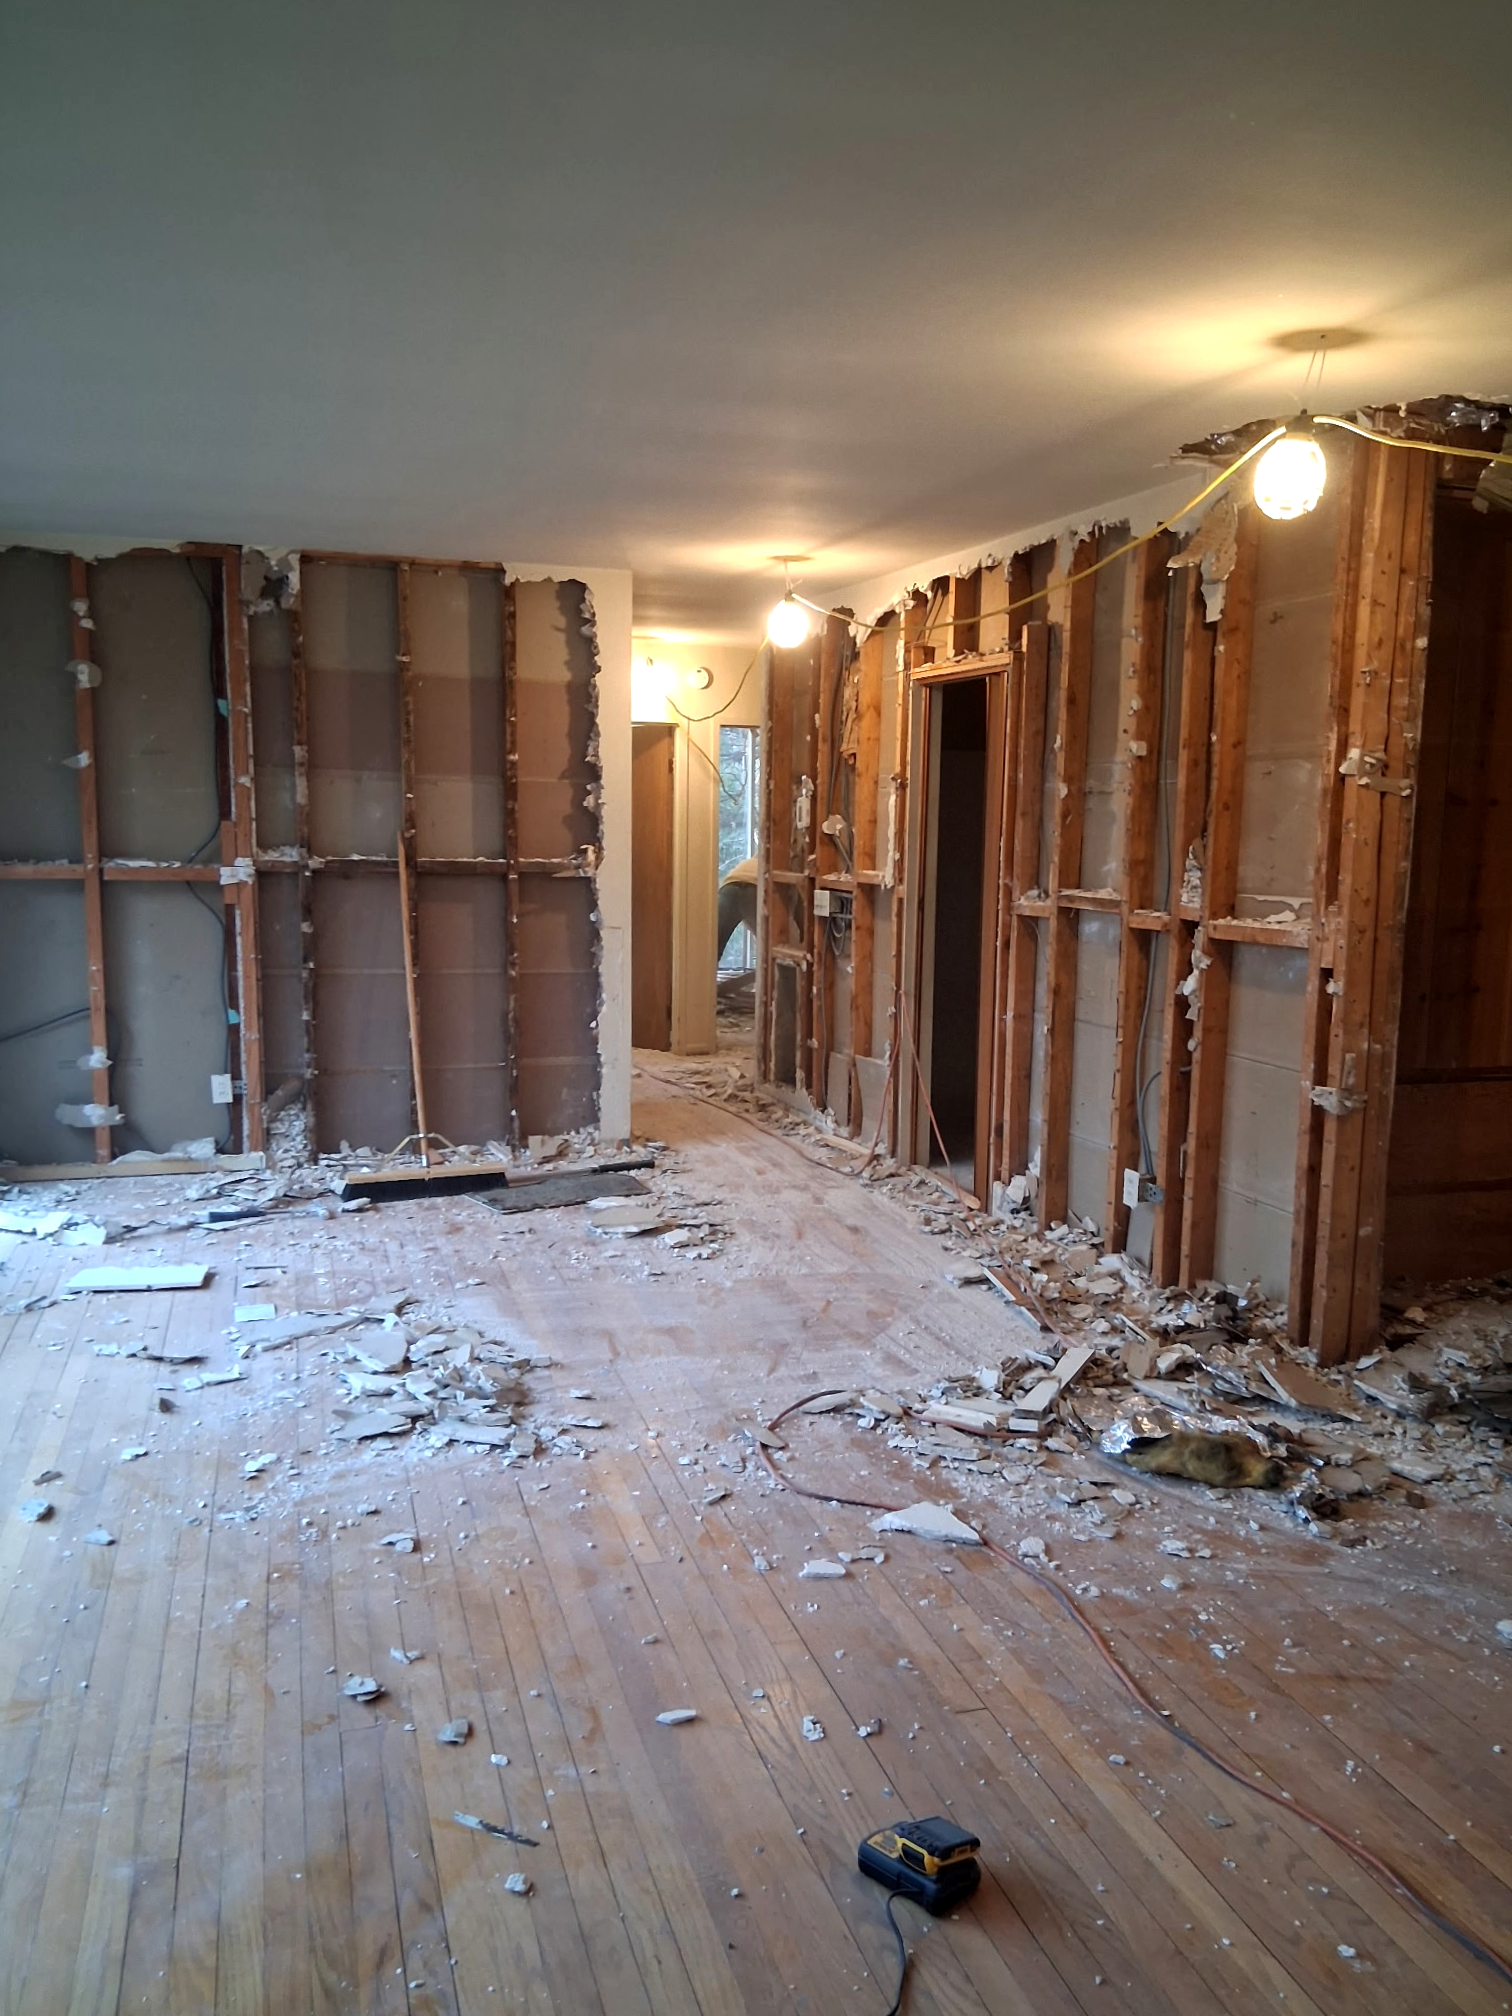
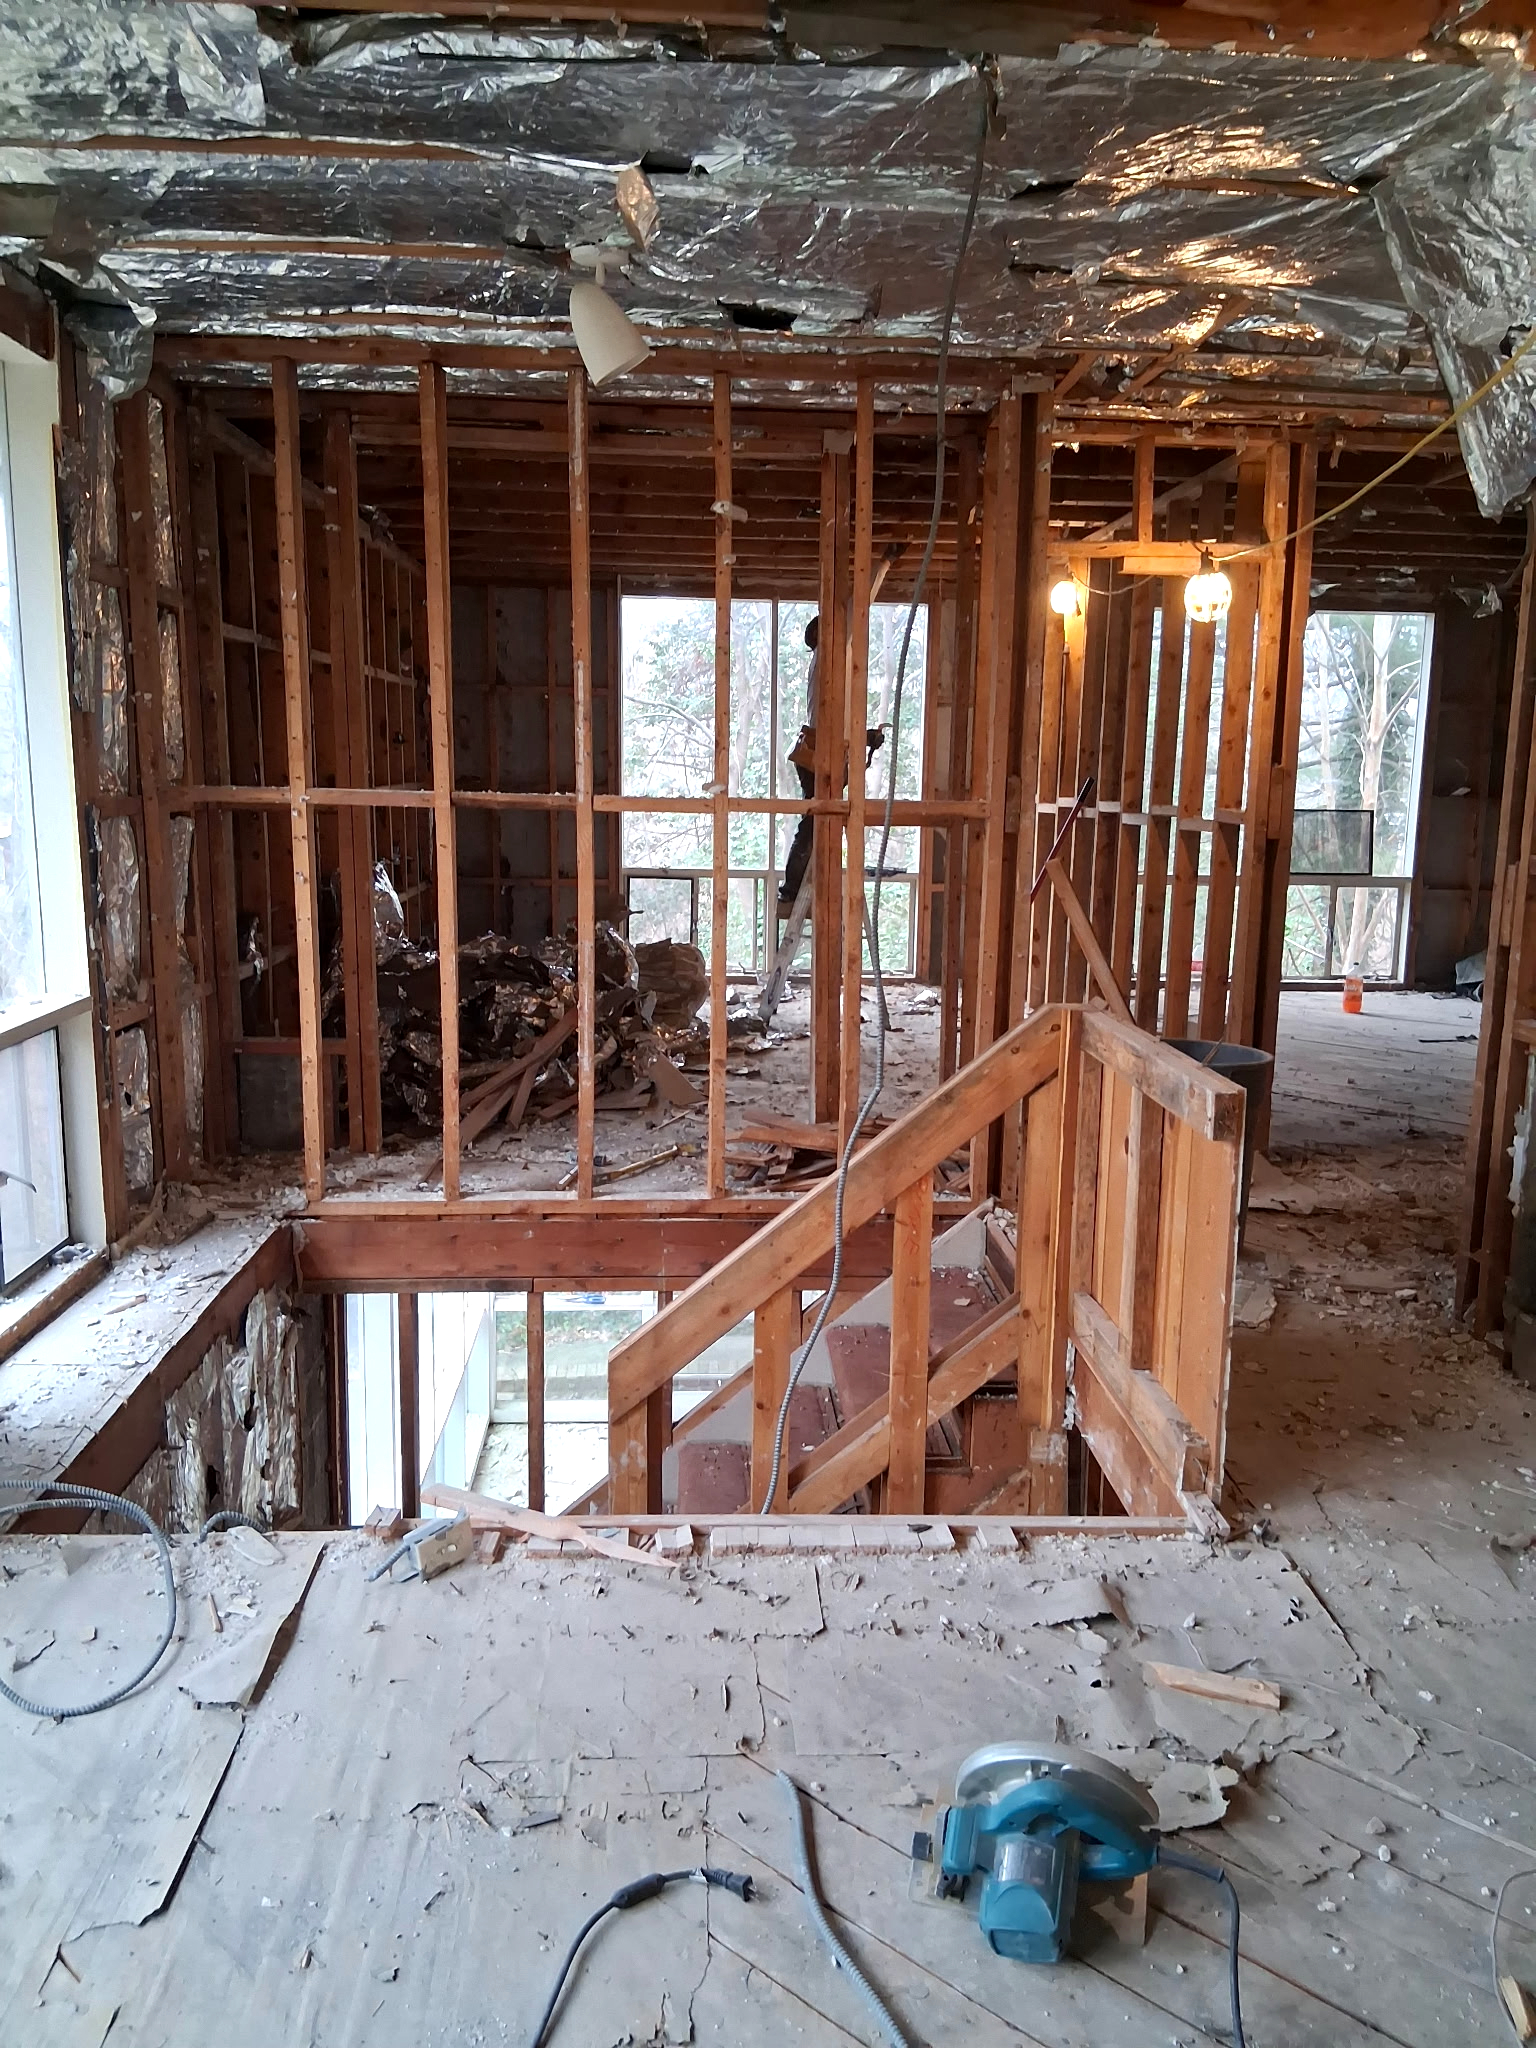
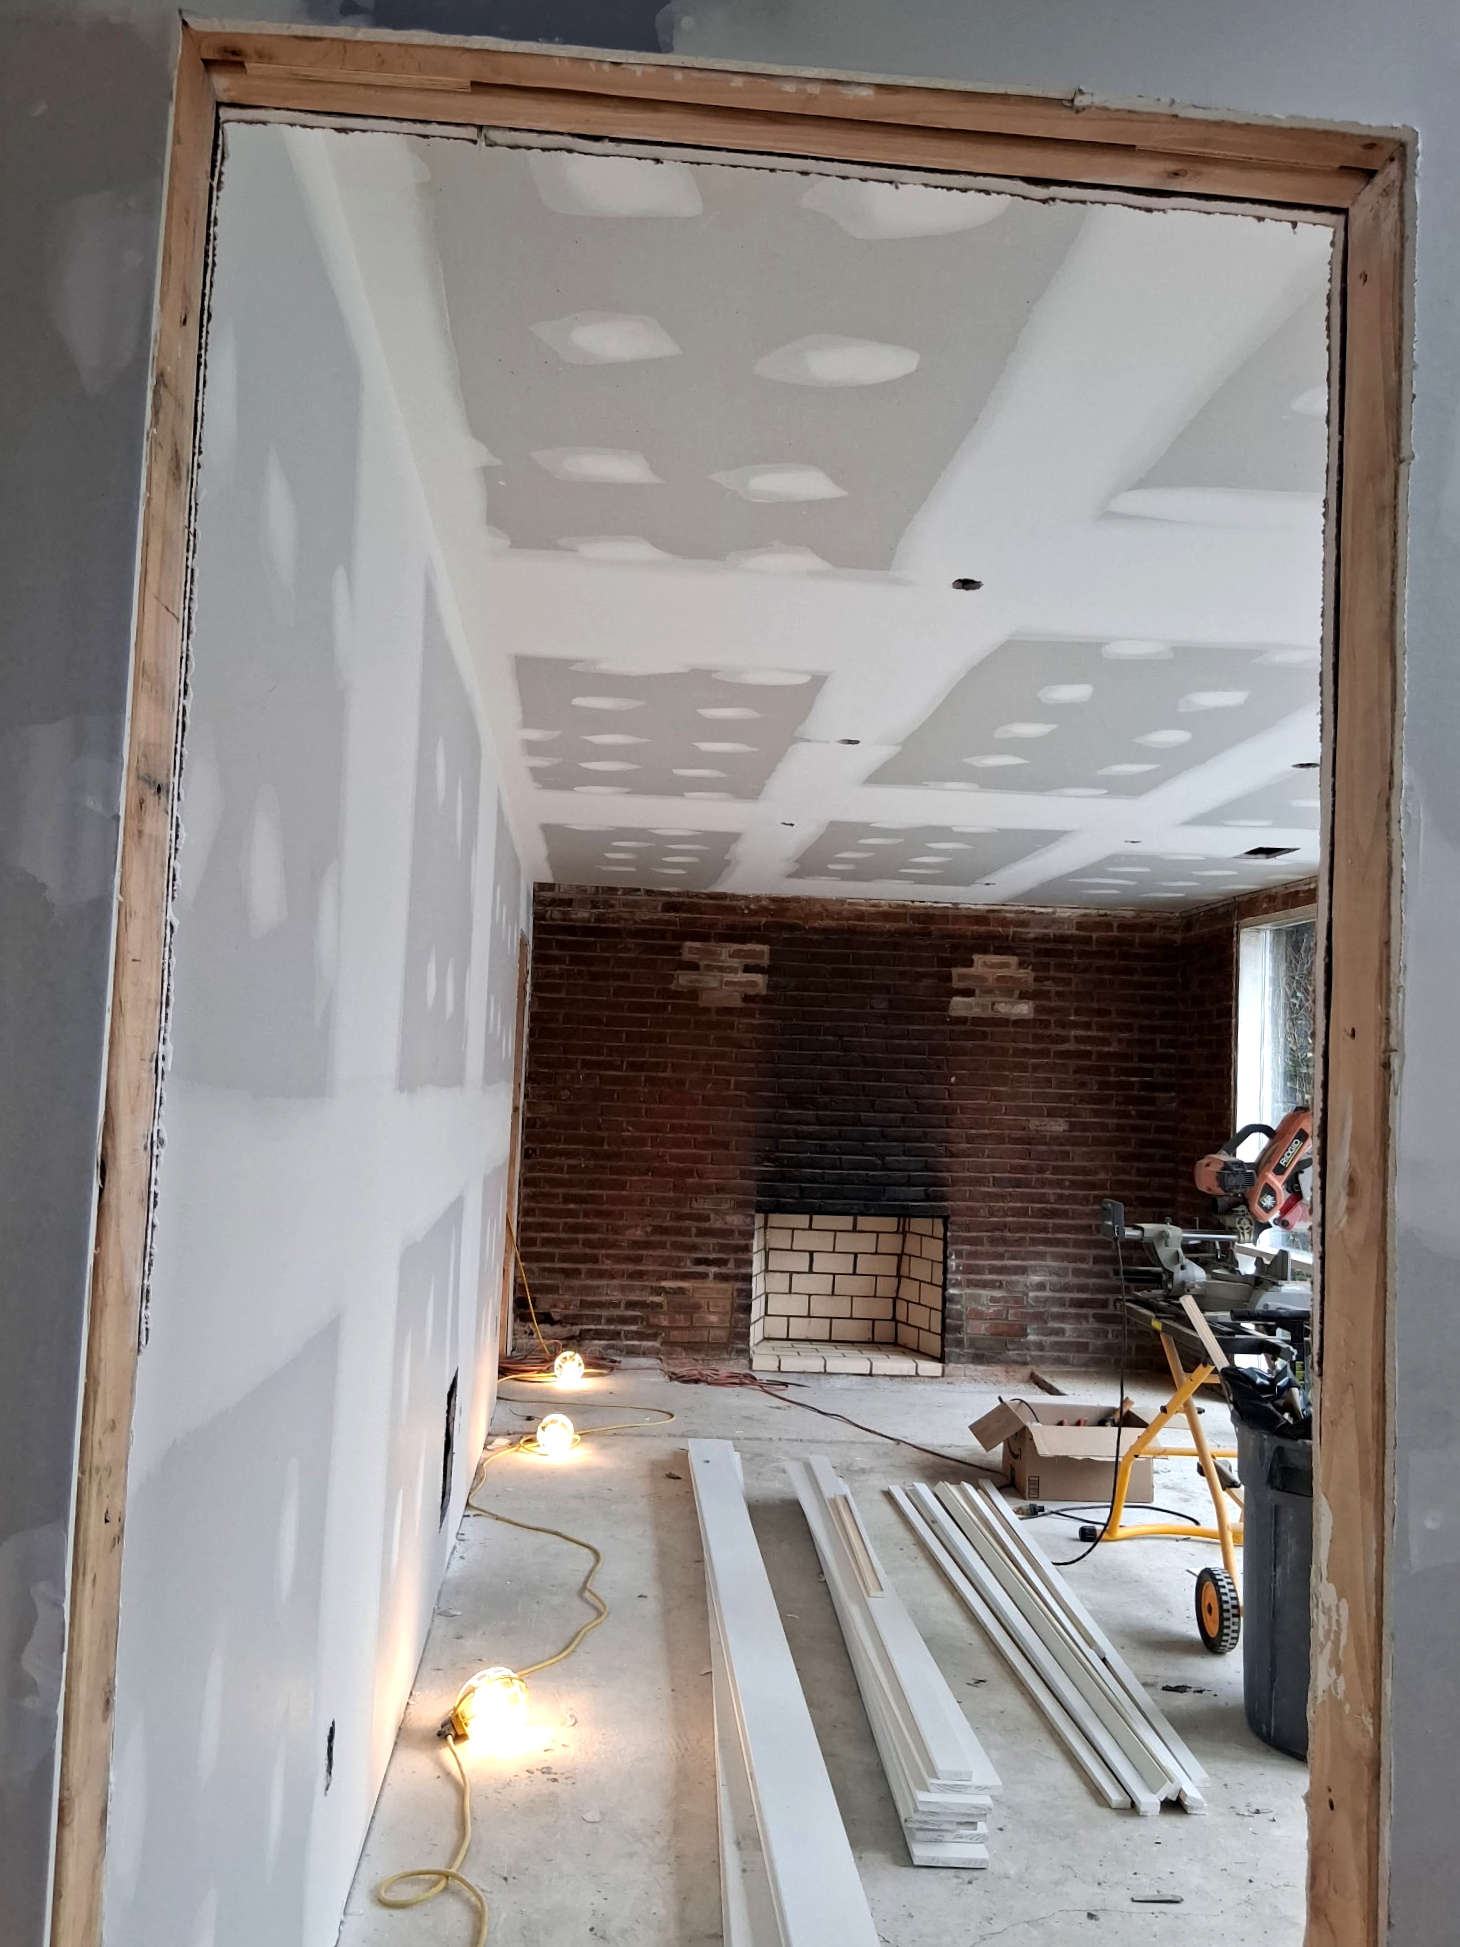
Full Interior Demolition & Removal
The entire level of the home was carefully cleared and prepared for renovation. Existing drywall, ceiling materials, old tile, wood flooring, stone flooring, and other interior finishes were removed to expose the underlying surfaces and prepare the space for reconstruction.

15
Full Interior Demolition & Removal
The entire level of the home was carefully cleared and prepared for renovation. Existing drywall, ceiling materials, old tile, wood flooring, stone flooring, and other interior finishes were removed to expose the underlying surfaces and prepare the space for reconstruction.

16
Full Interior Demolition & Removal
The entire level of the home was carefully cleared and prepared for renovation. Existing drywall, ceiling materials, old tile, wood flooring, stone flooring, and other interior finishes were removed to expose the underlying surfaces and prepare the space for reconstruction.

17
Full Interior Demolition & Removal
The entire level of the home was carefully cleared and prepared for renovation. Existing drywall, ceiling materials, old tile, wood flooring, stone flooring, and other interior finishes were removed to expose the underlying surfaces and prepare the space for reconstruction.

18
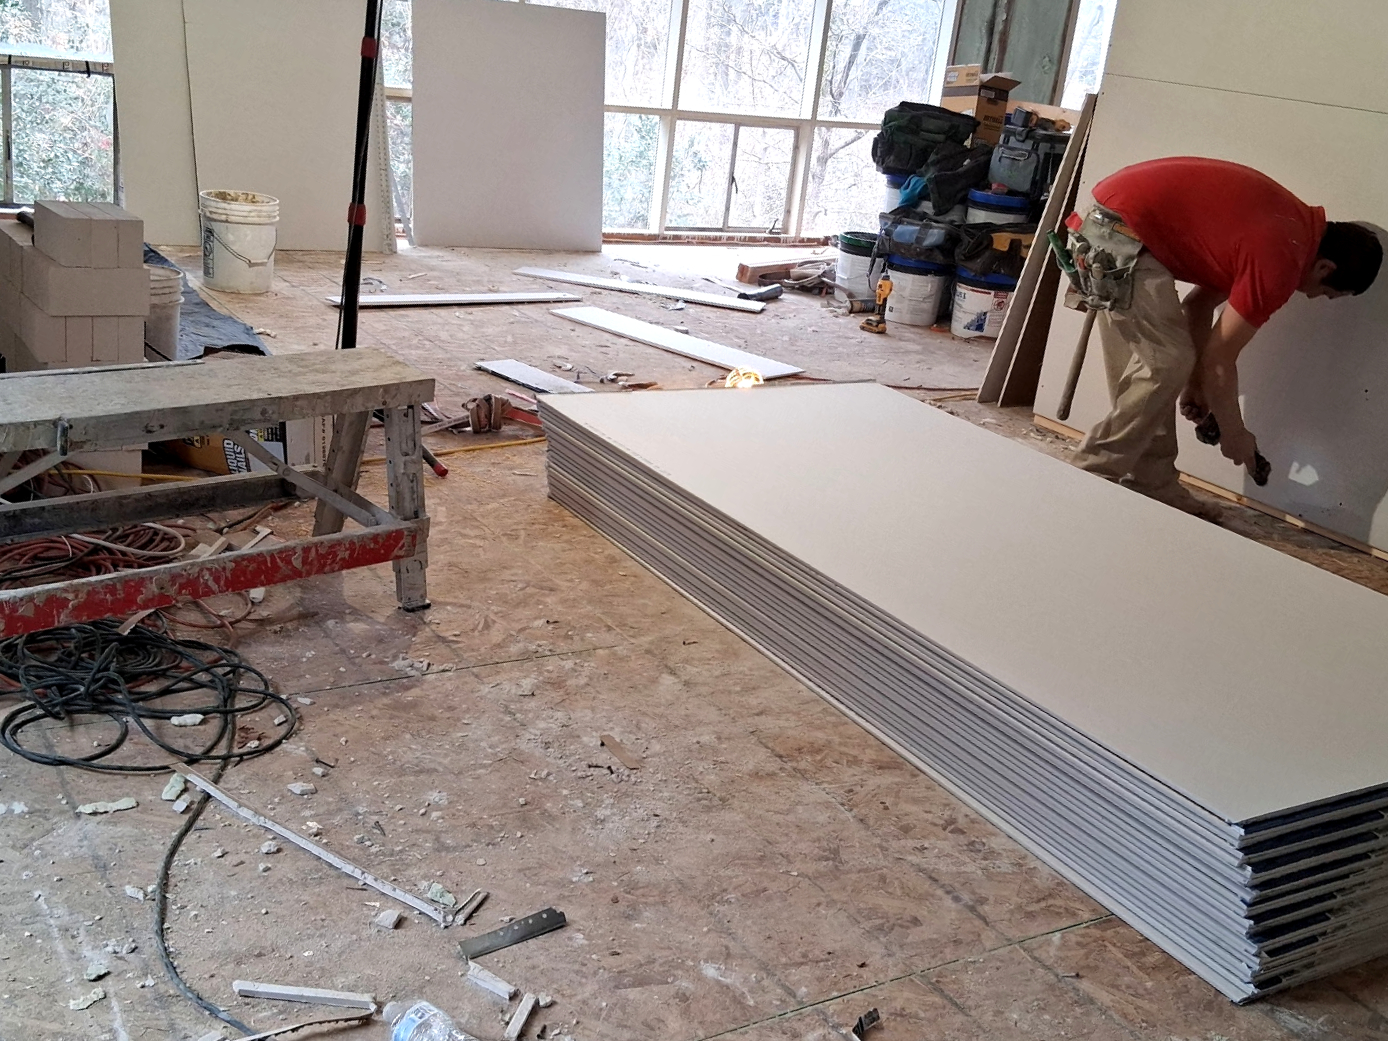
New Drywall Installation & Preparation
Following the removal of the existing materials, new drywall was installed throughout the designated areas of the level. The drywall was properly secured, finished, and prepared to create smooth, uniform surfaces ready for priming and painting.

19
New Drywall Installation & Preparation
Following the removal of the existing materials, new drywall was installed throughout the designated areas of the level. The drywall was properly secured, finished, and prepared to create smooth, uniform surfaces ready for priming and painting.
20
New Drywall Installation & Preparation
Following the removal of the existing materials, new drywall was installed throughout the designated areas of the level. The drywall was properly secured, finished, and prepared to create smooth, uniform surfaces ready for priming and painting.

21
New Drywall Installation & Preparation
Following the removal of the existing materials, new drywall was installed throughout the designated areas of the level. The drywall was properly secured, finished, and prepared to create smooth, uniform surfaces ready for priming and painting.

22
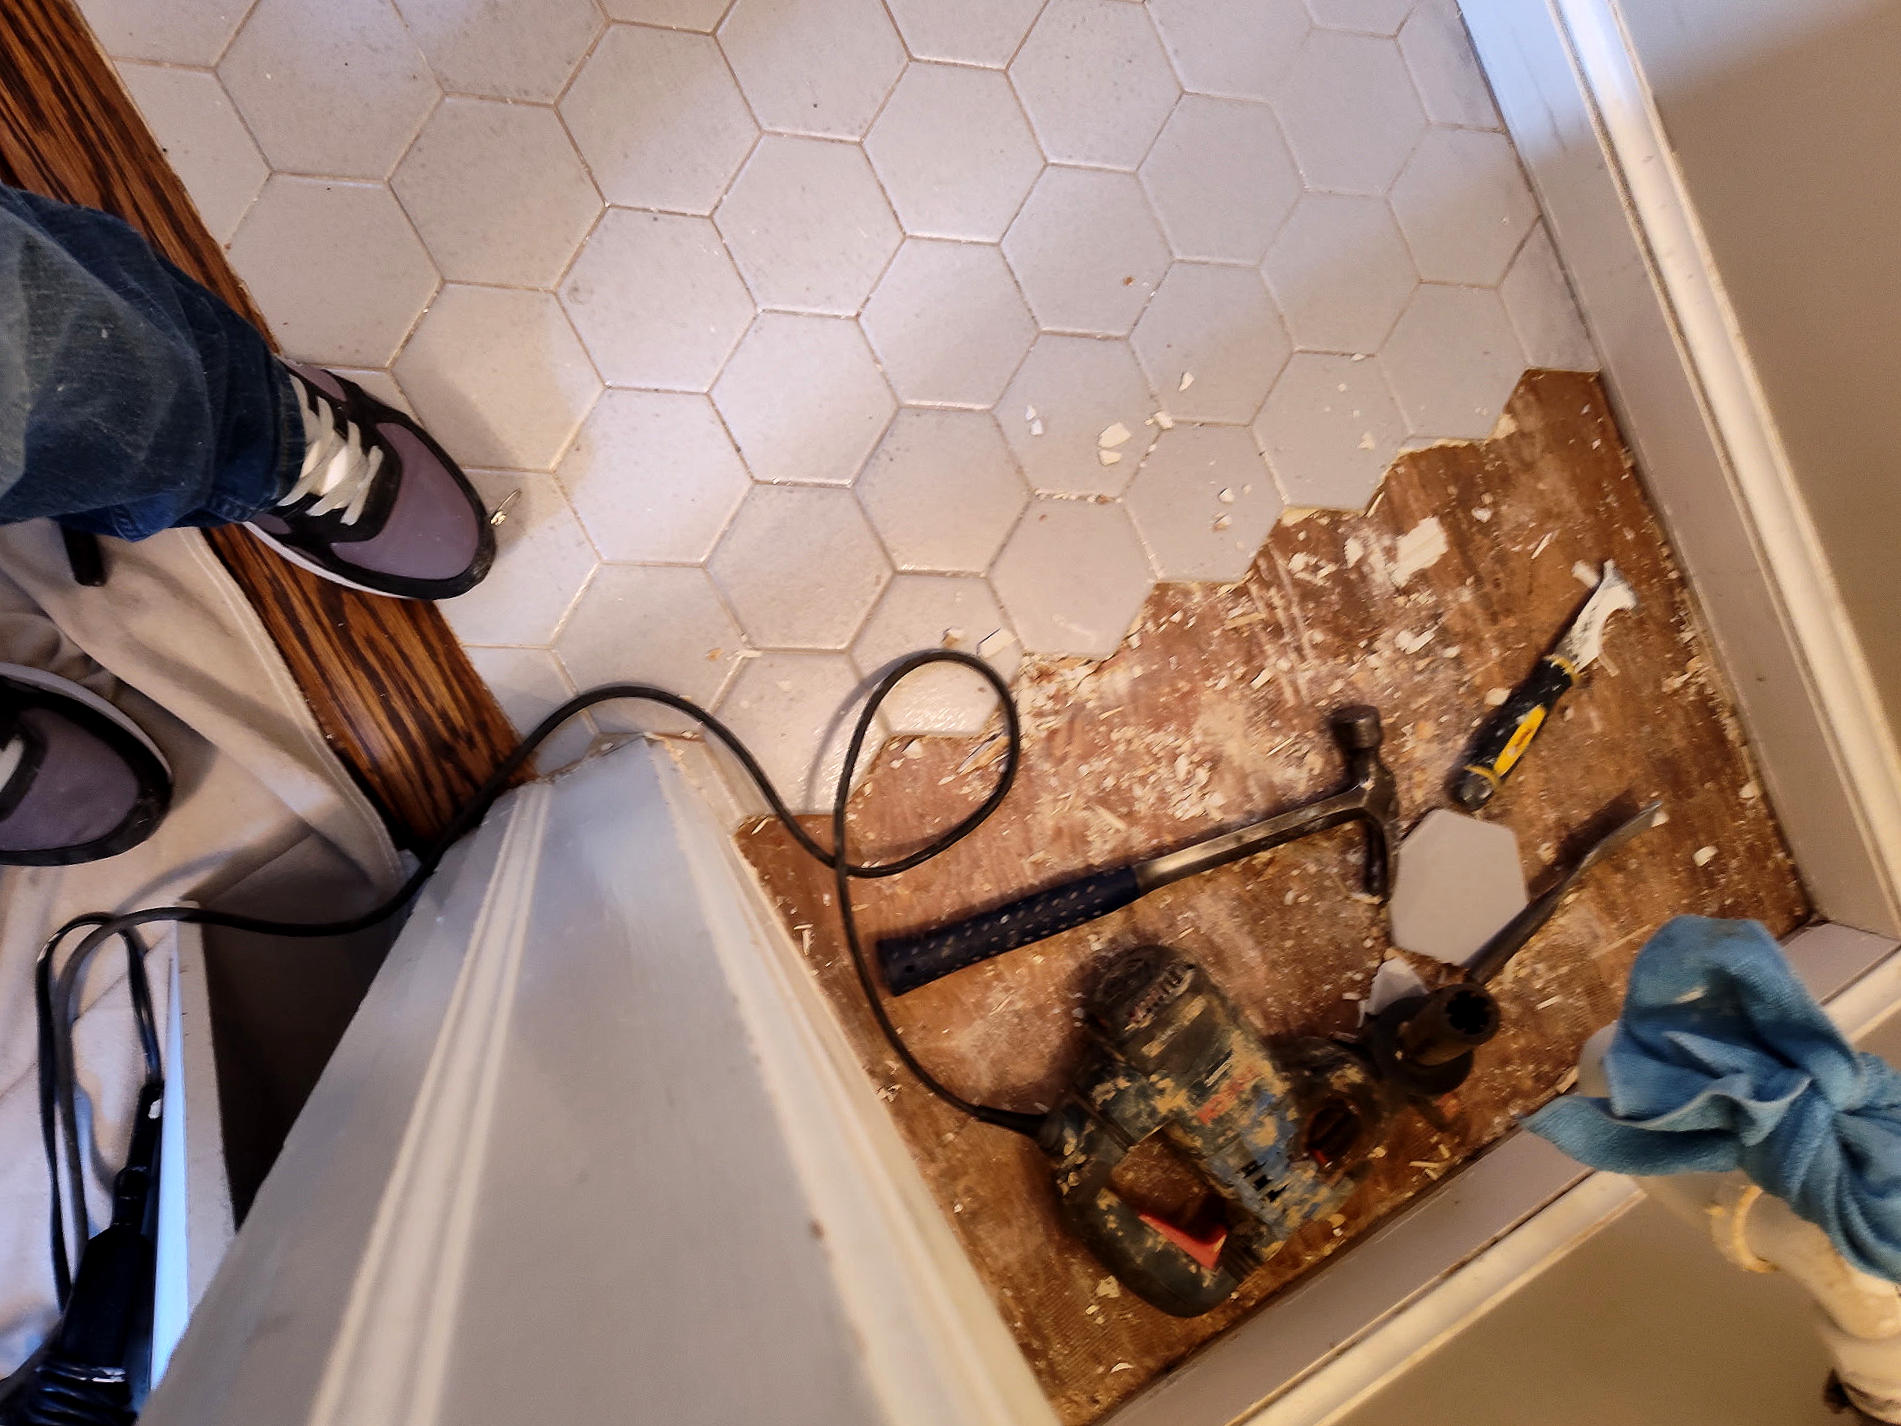
Floor Tile Removal
Existing floor tiles were carefully removed from the designated area to prepare the surface for a new finish.

23
New Floor Tile Installation
Existing floor tiles were carefully removed from the designated area to prepare the surface for a new finish. The flooring was then properly prepared, and new floor tiles were installed to create a clean, updated, and durable finished surface.
01 / 23
Bathroom Floor Preparation for Tile Installation
The bathroom floor, including both the shower area and the surrounding floor, was carefully prepared for new tile installation. The surfaces were properly leveled and prepared to provide a solid, uniform base for the new tile finish.
01
Bathroom Floor Preparation for Tile Installation
The bathroom floor, including both the shower area and the surrounding floor, was carefully prepared for new tile installation. The surfaces were properly leveled and prepared to provide a solid, uniform base for the new tile finish.
02
Bathroom Shower Tile Installation
New tile was installed throughout the interior of the shower. The tile was carefully placed to create a clean, cohesive, and finished appearance across the shower.
03
Bathroom Floor Tile Installation
New tile was installed throughout both the interior of the shower and the surrounding bathroom floor area. The tile was carefully placed to create a clean, cohesive, and finished appearance across the shower and bathroom floor.
04
Finished Bathroom Renovation
A complete bathroom renovation from top to bottom, featuring new tile installation, a new vanity and toilet, fresh paint, and custom additions throughout the space. The renovation transformed the bathroom into a refreshed, functional, and updated space.
05
Full Living Room Preparation-Before
The living room was carefully prepared for painting by protecting all necessary surfaces and areas. Any damaged areas of the walls were repaired and prepared as needed before painting. The entire room was then painted from top to bottom, including the walls, ceiling, window areas, trim, and other interior surfaces, creating a clean and refreshed finished look.
06
Full Living Room Preparation & Painting
Any damaged areas of the walls were repaired and prepared as needed before painting. The entire room was then painted from top to bottom, including the walls, ceiling, window areas, trim, and other interior surfaces, creating a clean and refreshed finished look.
07
Wall Painting
The wall section was first prepared and painted to create a clean, finished surface.
08
Decorative Wood Design
The wall section was first prepared and painted to create a clean, finished surface. Once the painting was completed, a decorative wood design was carefully installed over the front of the wall, adding dimension and a custom accent to the space.
09
Wall Repair, Priming & Painting
Damaged and uneven areas of the walls were repaired using Easy Sand to create a smooth, uniform surface. The walls were then fully prepared, primed, and painted to provide a clean and refreshed finished appearance.
10
New Drywall Installation & Preparation
New drywall was installed on sections of both the wall and ceiling to repair and restore the affected areas. The newly installed drywall was then properly secured, awaiting to be finished, and prepared to create smooth, uniform surfaces ready for priming and painting.
11
Plaster Wall & Ceiling Repair
Damaged sections of the existing plaster wall and ceiling were carefully removed to later be restored.
12
Plaster Wall, Ceiling & Molding Repair
A section of plaster molding was also recreated and installed to match the surrounding design. All repaired areas were properly shaped, smoothed, and prepared to create a seamless finish ready for priming and painting.
13
Plaster Wall, Ceiling & Molding Repair
The affected areas were properly prepared and smoothed to create a uniform surface, ready for the next stage.
14
Full Interior Demolition & Removal
The entire level of the home was carefully cleared and prepared for renovation. Existing drywall, ceiling materials, old tile, wood flooring, stone flooring, and other interior finishes were removed to expose the underlying surfaces and prepare the space for reconstruction.
15
Full Interior Demolition & Removal
The entire level of the home was carefully cleared and prepared for renovation. Existing drywall, ceiling materials, old tile, wood flooring, stone flooring, and other interior finishes were removed to expose the underlying surfaces and prepare the space for reconstruction.
16
Full Interior Demolition & Removal
The entire level of the home was carefully cleared and prepared for renovation. Existing drywall, ceiling materials, old tile, wood flooring, stone flooring, and other interior finishes were removed to expose the underlying surfaces and prepare the space for reconstruction.
17
Full Interior Demolition & Removal
The entire level of the home was carefully cleared and prepared for renovation. Existing drywall, ceiling materials, old tile, wood flooring, stone flooring, and other interior finishes were removed to expose the underlying surfaces and prepare the space for reconstruction.
18
New Drywall Installation & Preparation
Following the removal of the existing materials, new drywall was installed throughout the designated areas of the level. The drywall was properly secured, finished, and prepared to create smooth, uniform surfaces ready for priming and painting.
19
New Drywall Installation & Preparation
Following the removal of the existing materials, new drywall was installed throughout the designated areas of the level. The drywall was properly secured, finished, and prepared to create smooth, uniform surfaces ready for priming and painting.
20
New Drywall Installation & Preparation
Following the removal of the existing materials, new drywall was installed throughout the designated areas of the level. The drywall was properly secured, finished, and prepared to create smooth, uniform surfaces ready for priming and painting.
21
New Drywall Installation & Preparation
Following the removal of the existing materials, new drywall was installed throughout the designated areas of the level. The drywall was properly secured, finished, and prepared to create smooth, uniform surfaces ready for priming and painting.
22
Floor Tile Removal
Existing floor tiles were carefully removed from the designated area to prepare the surface for a new finish.
23
New Floor Tile Installation
Existing floor tiles were carefully removed from the designated area to prepare the surface for a new finish. The flooring was then properly prepared, and new floor tiles were installed to create a clean, updated, and durable finished surface.
Exterior Projects

01
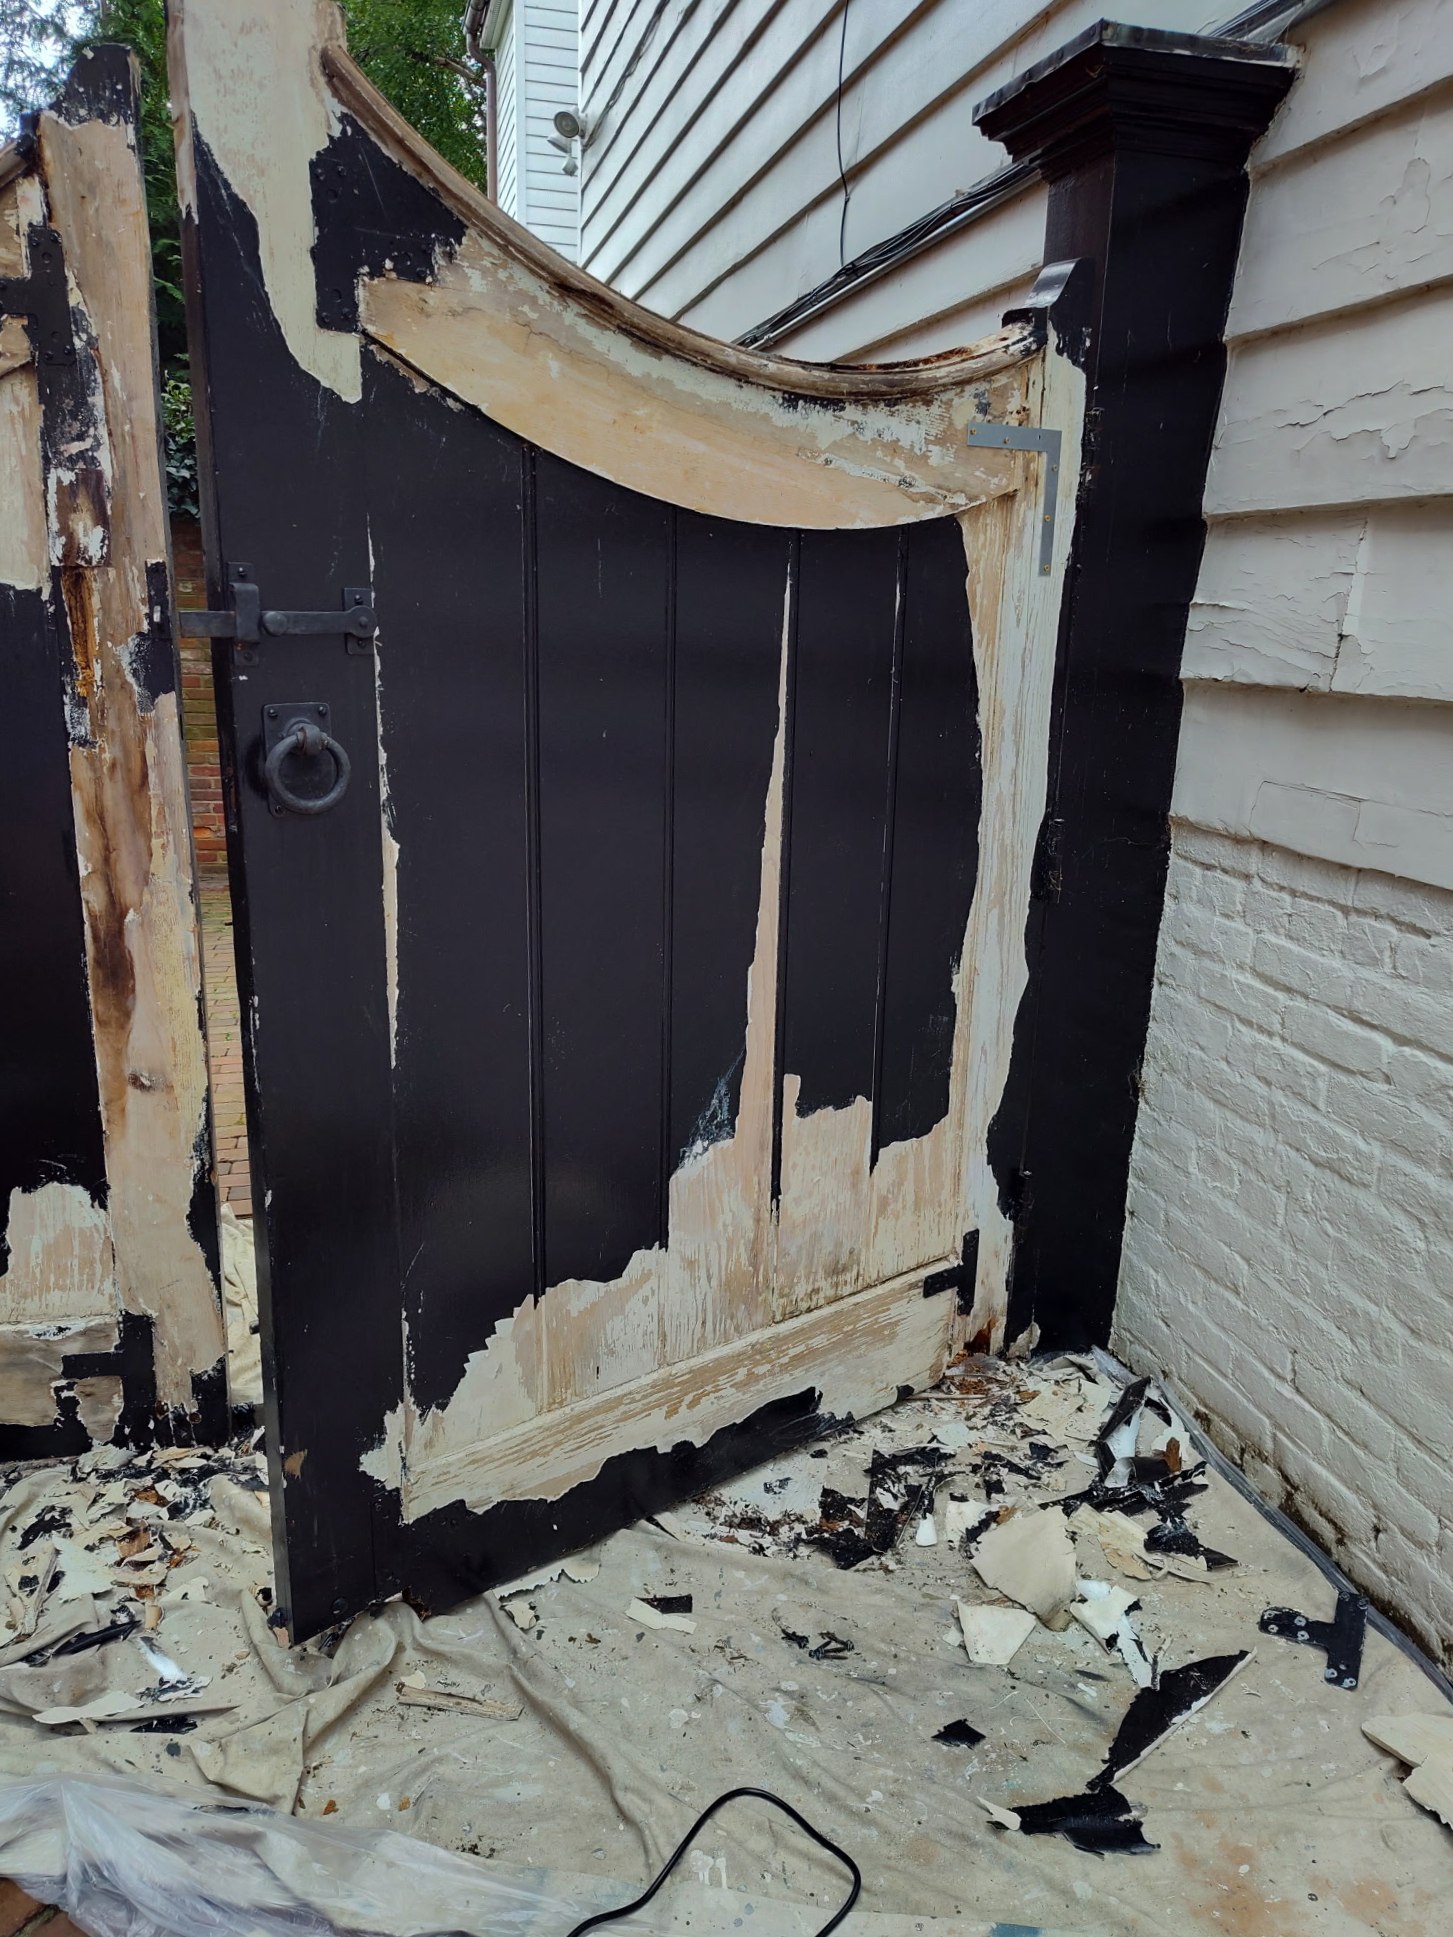
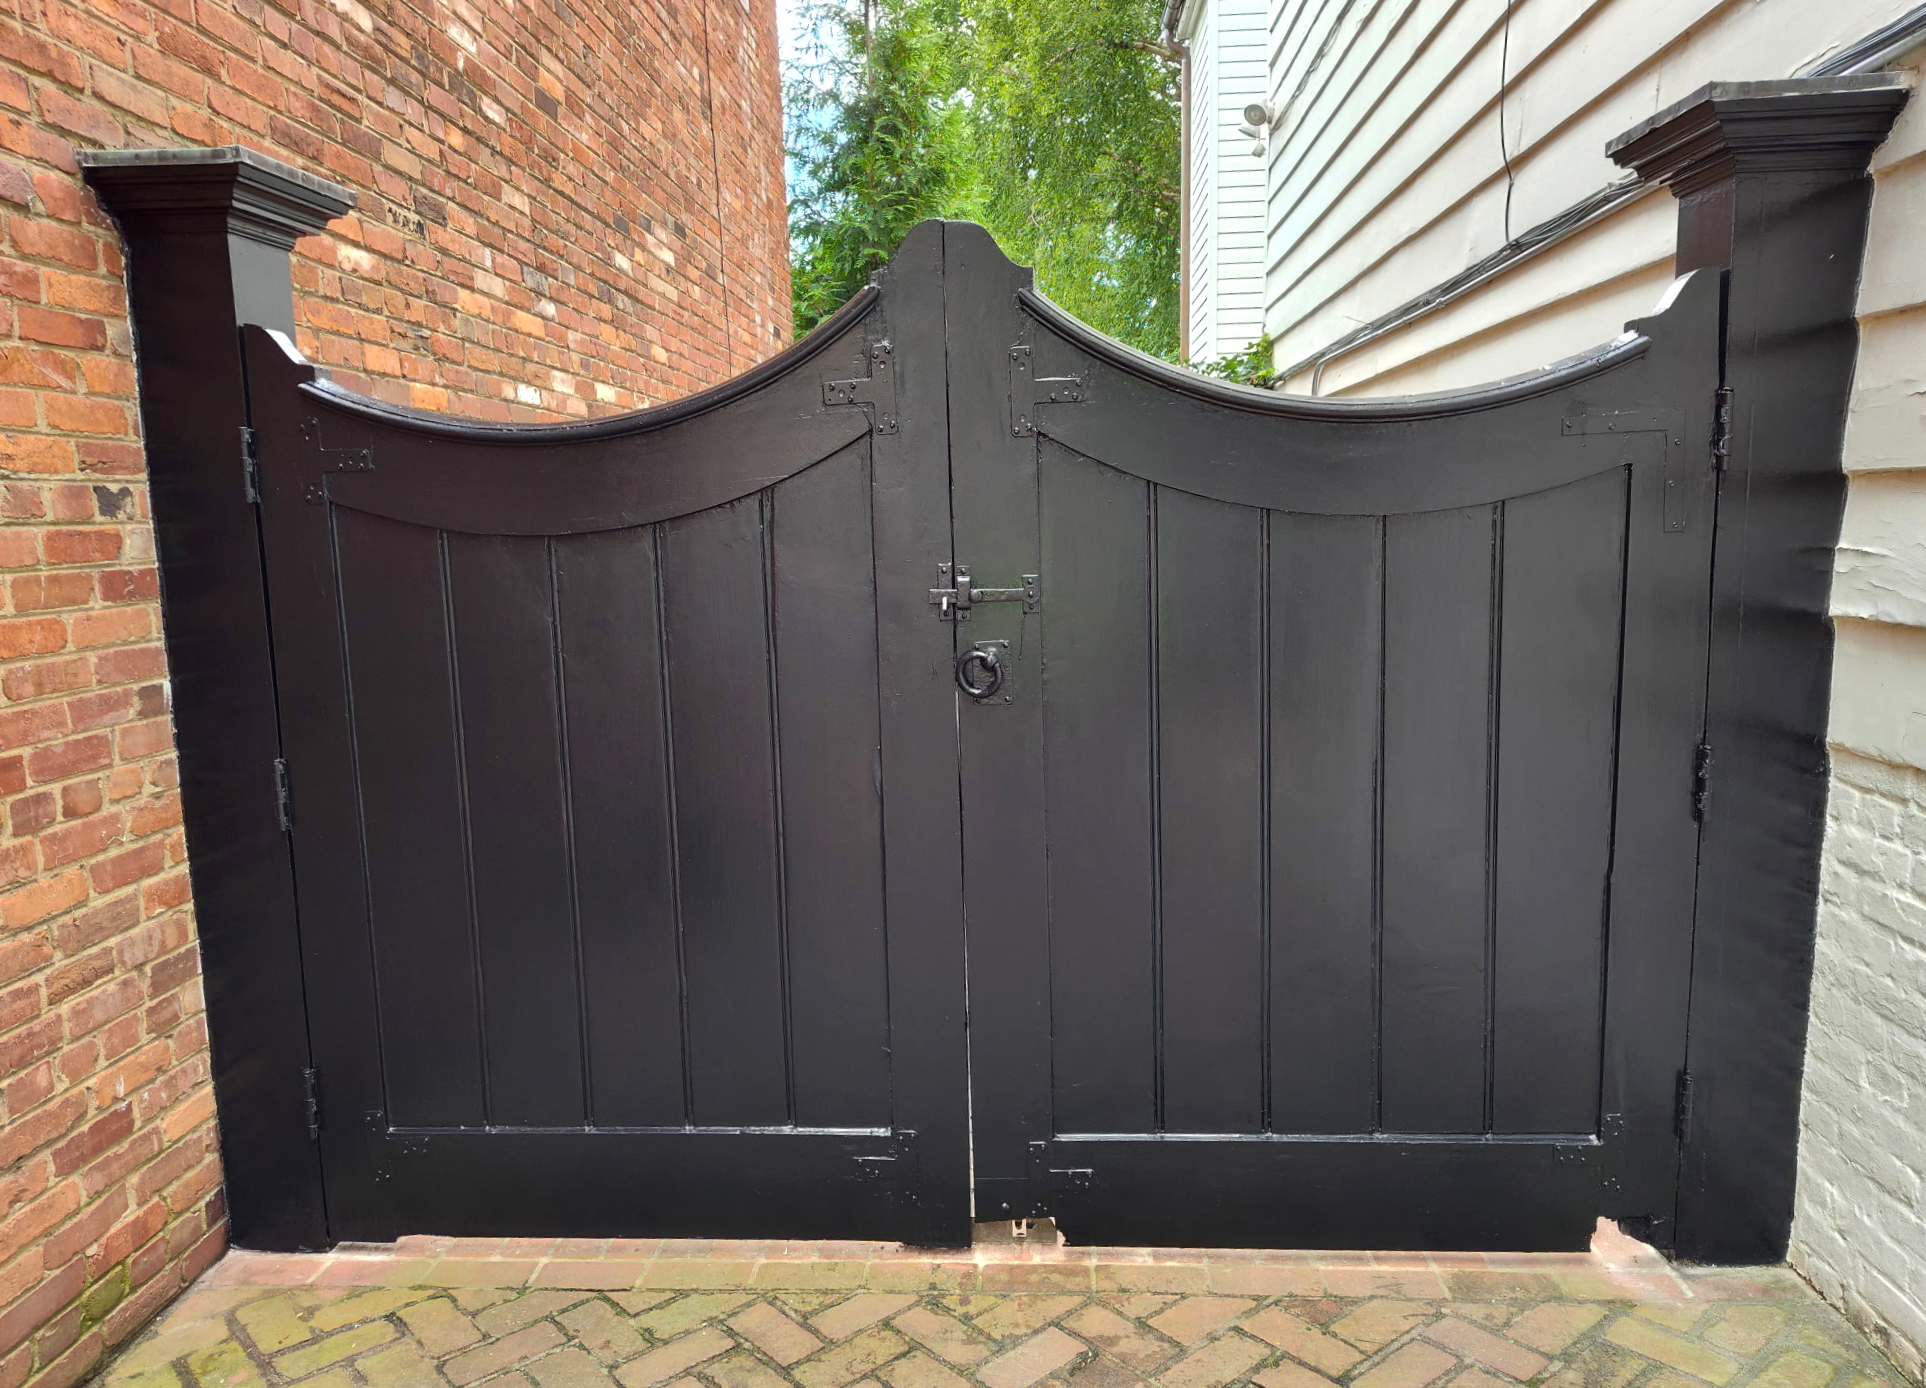
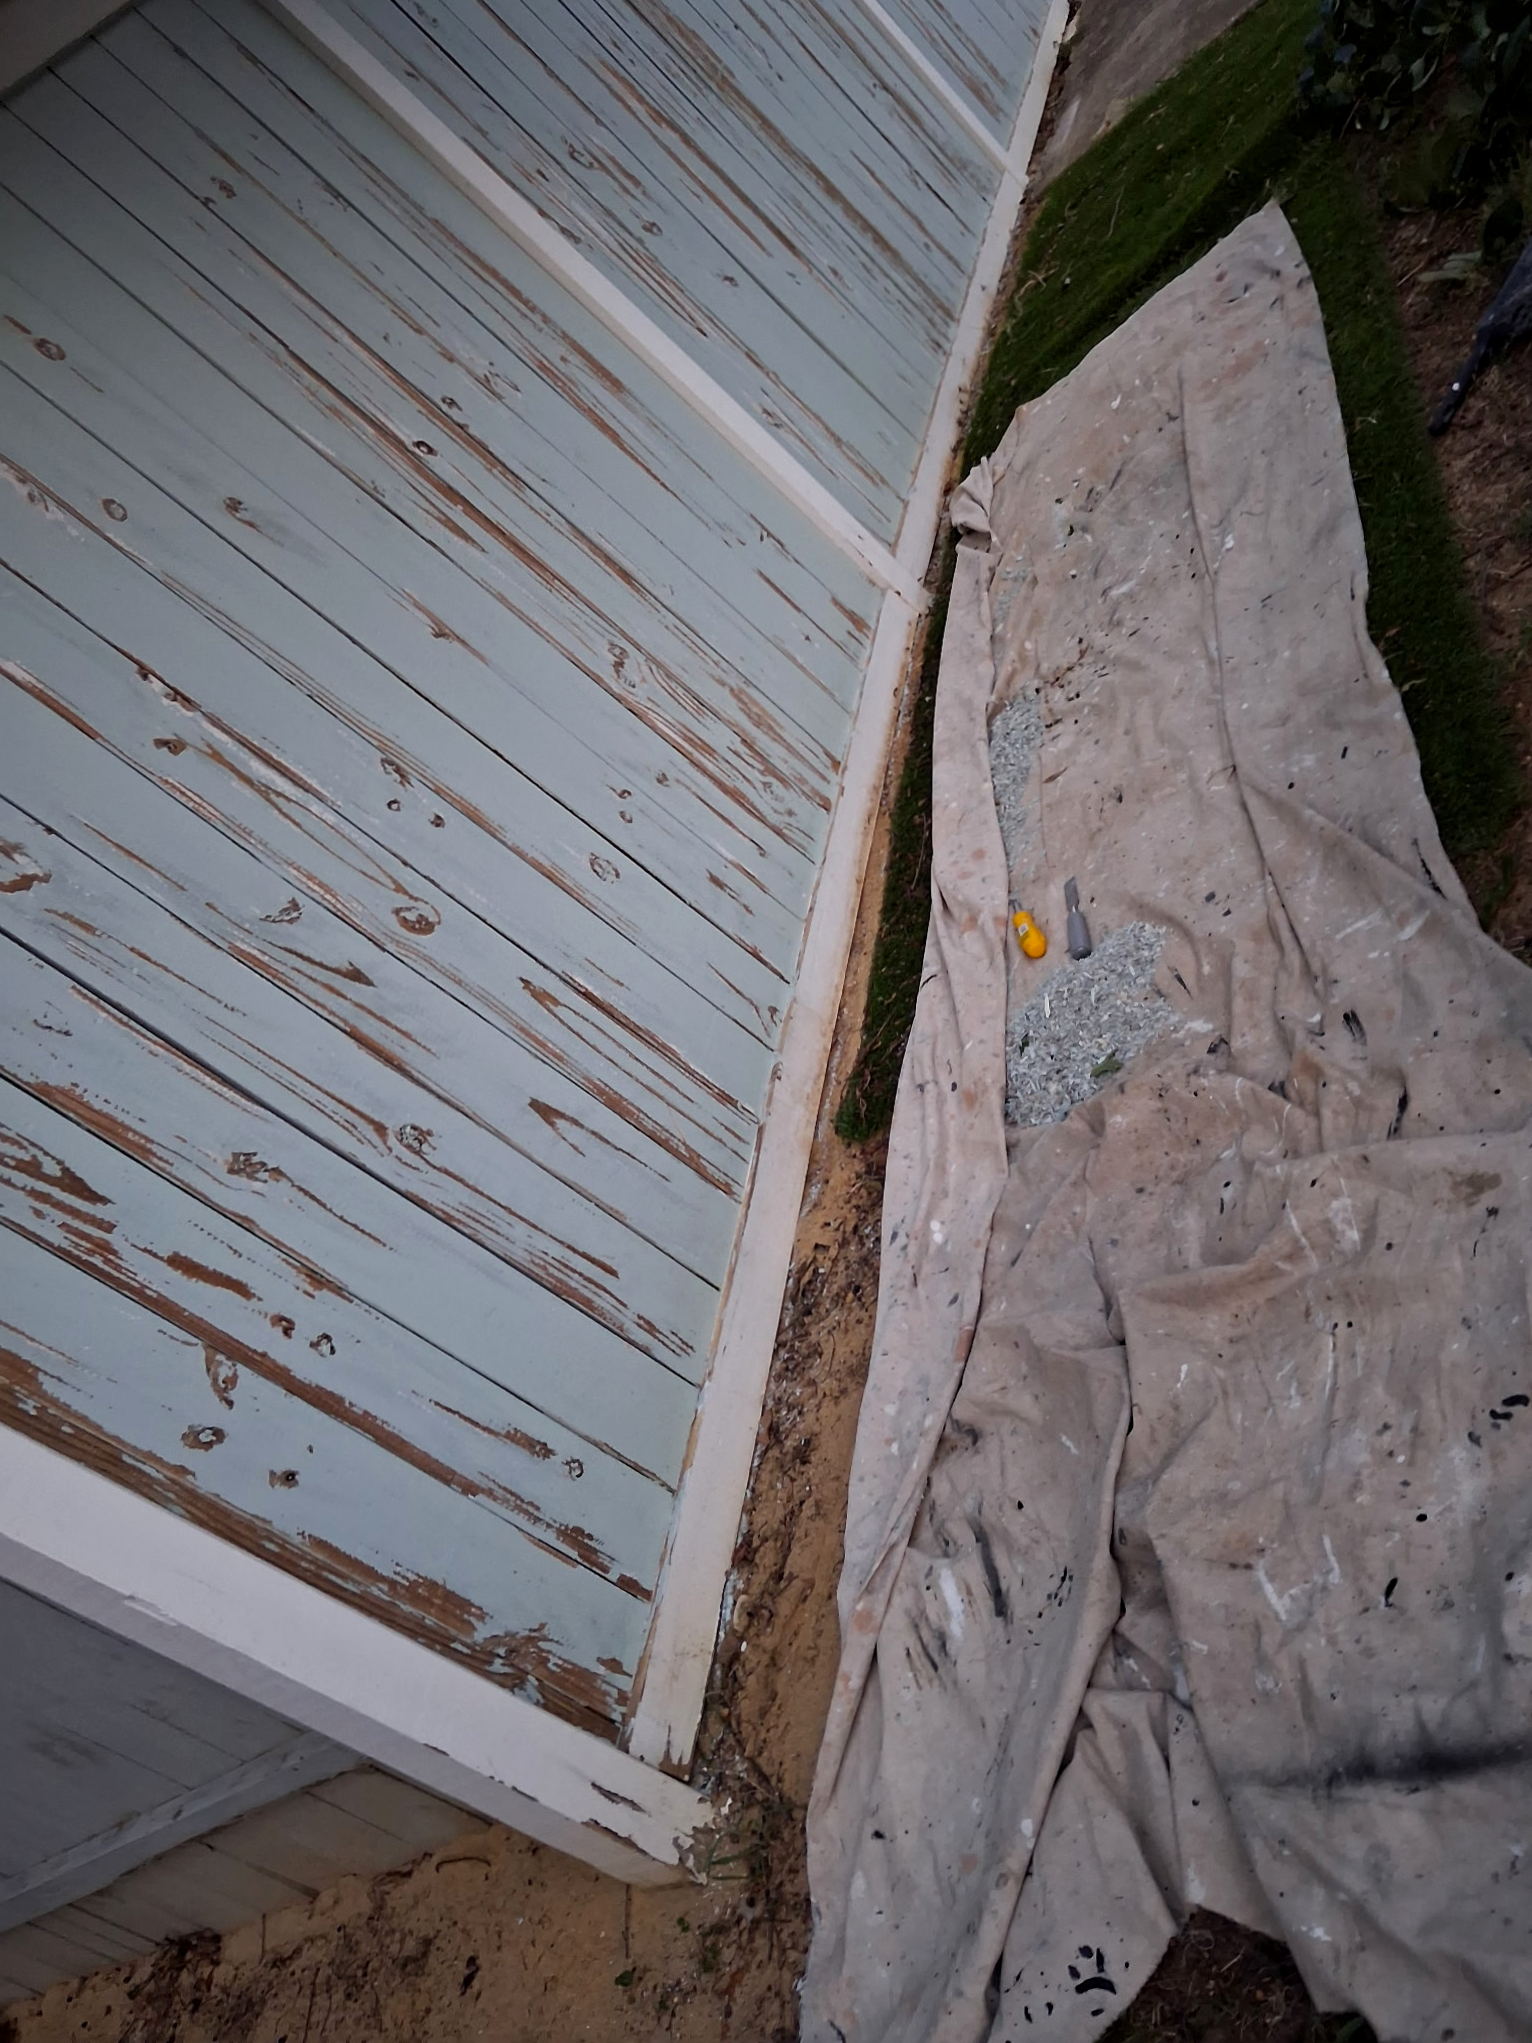
Wooden Door Gate Repair
The existing paint was carefully scraped from the door gate to expose the underlying surface and identify areas requiring repair

02
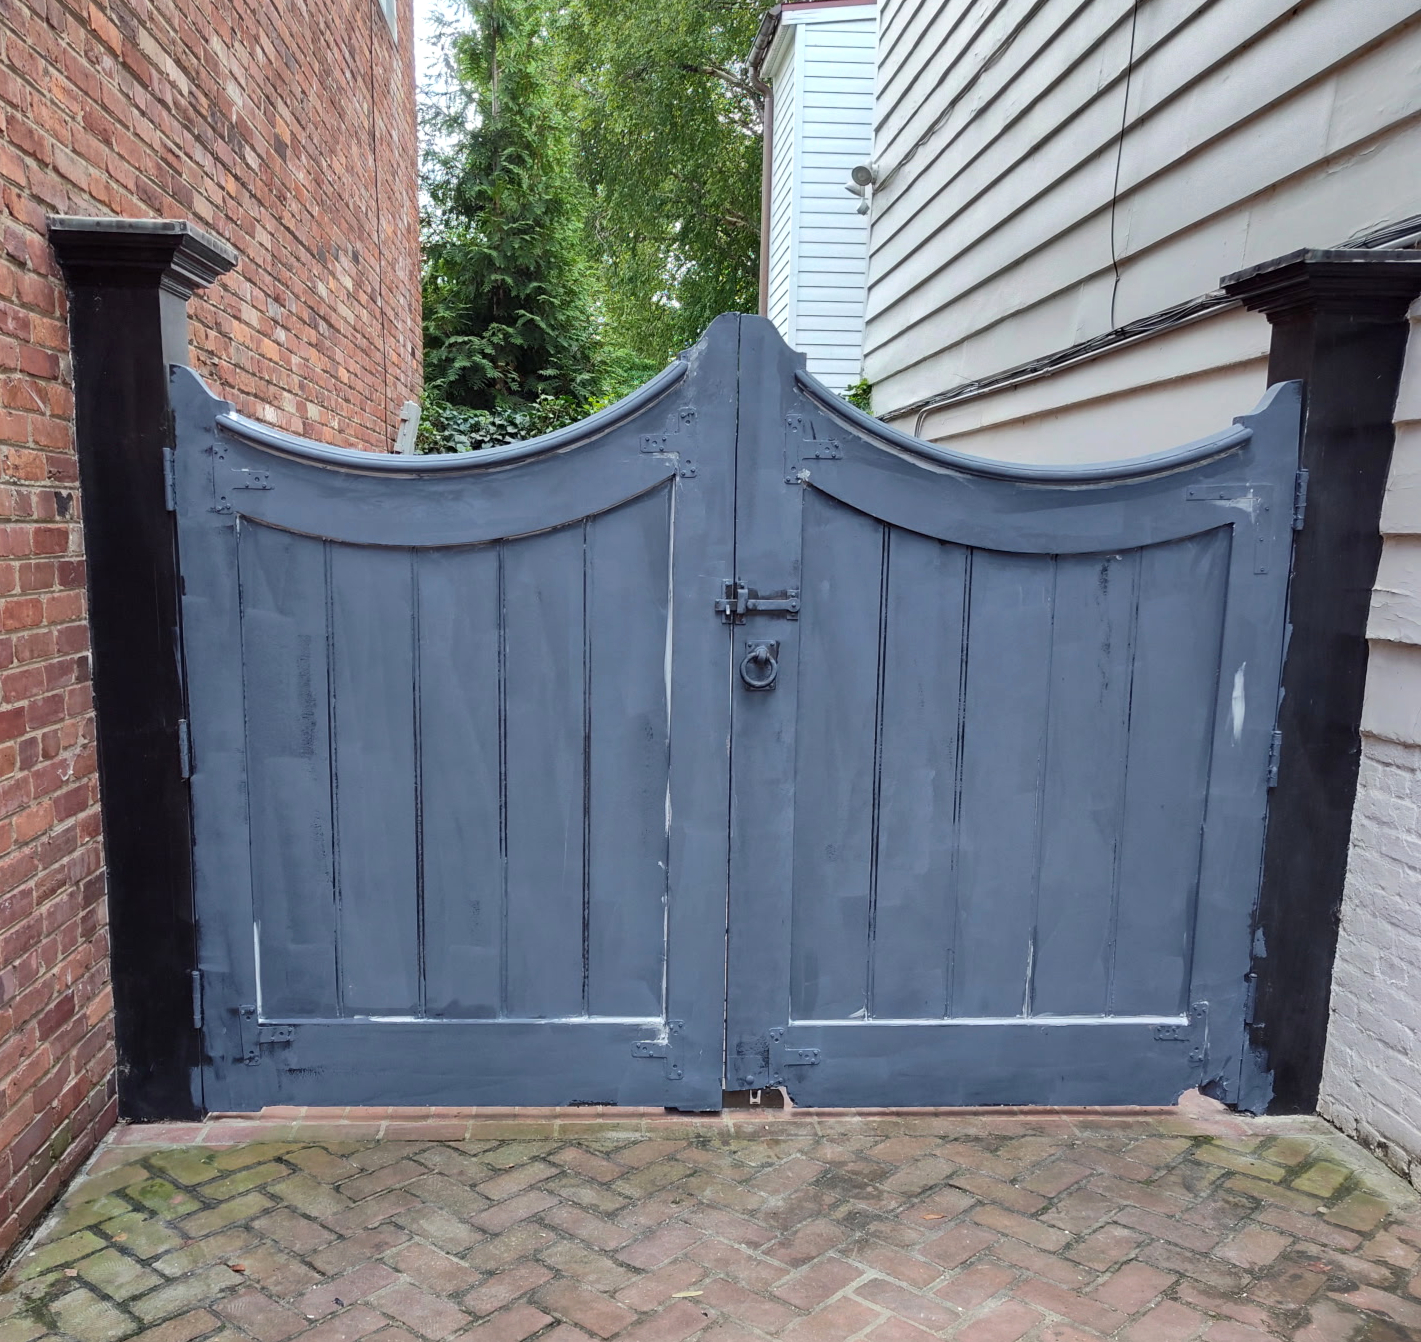
Wooden Door Gate Repair & Painting
Damaged sections were repaired with wood filler, then sanded smooth and properly prepared before being painted to restore the gate's appearance and provide a clean, finished surface.

03
Wooden Door Gate Repair & Painting
Damaged sections were repaired with wood filler, then sanded smooth and properly prepared before being painted to restore the gate's appearance and provide a clean, finished surface.

04
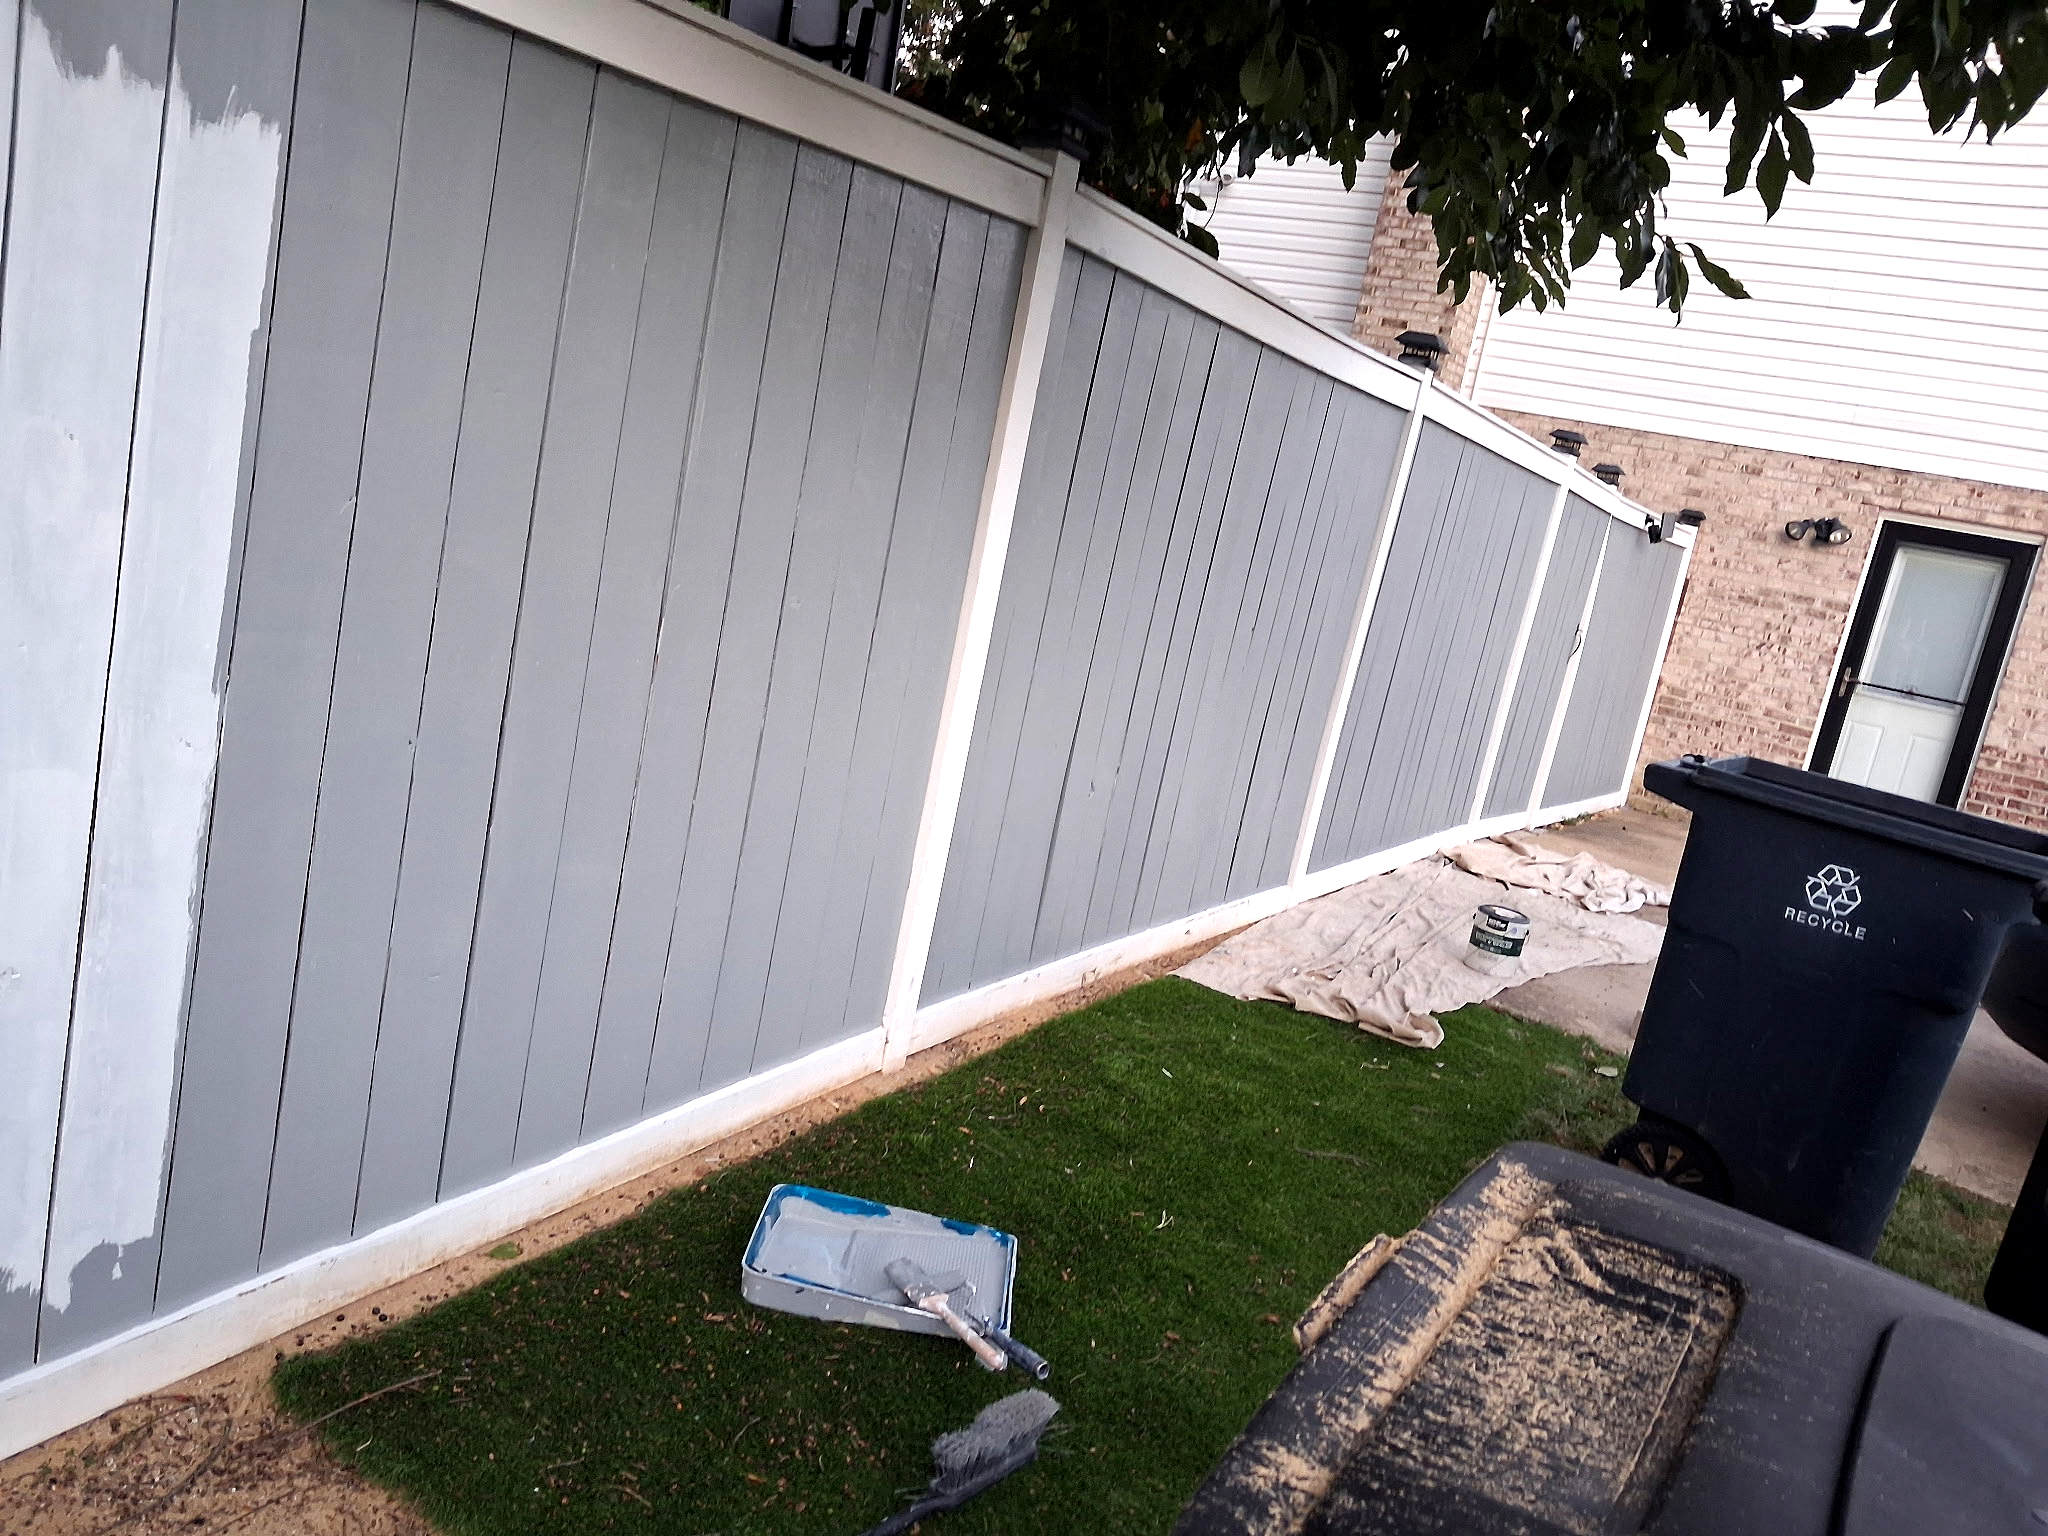
Fence Surface Preparation
The existing paint on the fence was carefully scraped to remove loose and deteriorated areas. The surface was then thoroughly sanded to create a smooth, properly prepared surface before applying a fresh coat of paint for a clean and renewed finish.

05
Fence Surface Preparation & Painting
The existing paint on the fence was carefully scraped to remove loose and deteriorated areas. The surface was then thoroughly sanded to create a smooth, properly prepared surface before applying a fresh coat of paint for a clean and renewed finish.

06
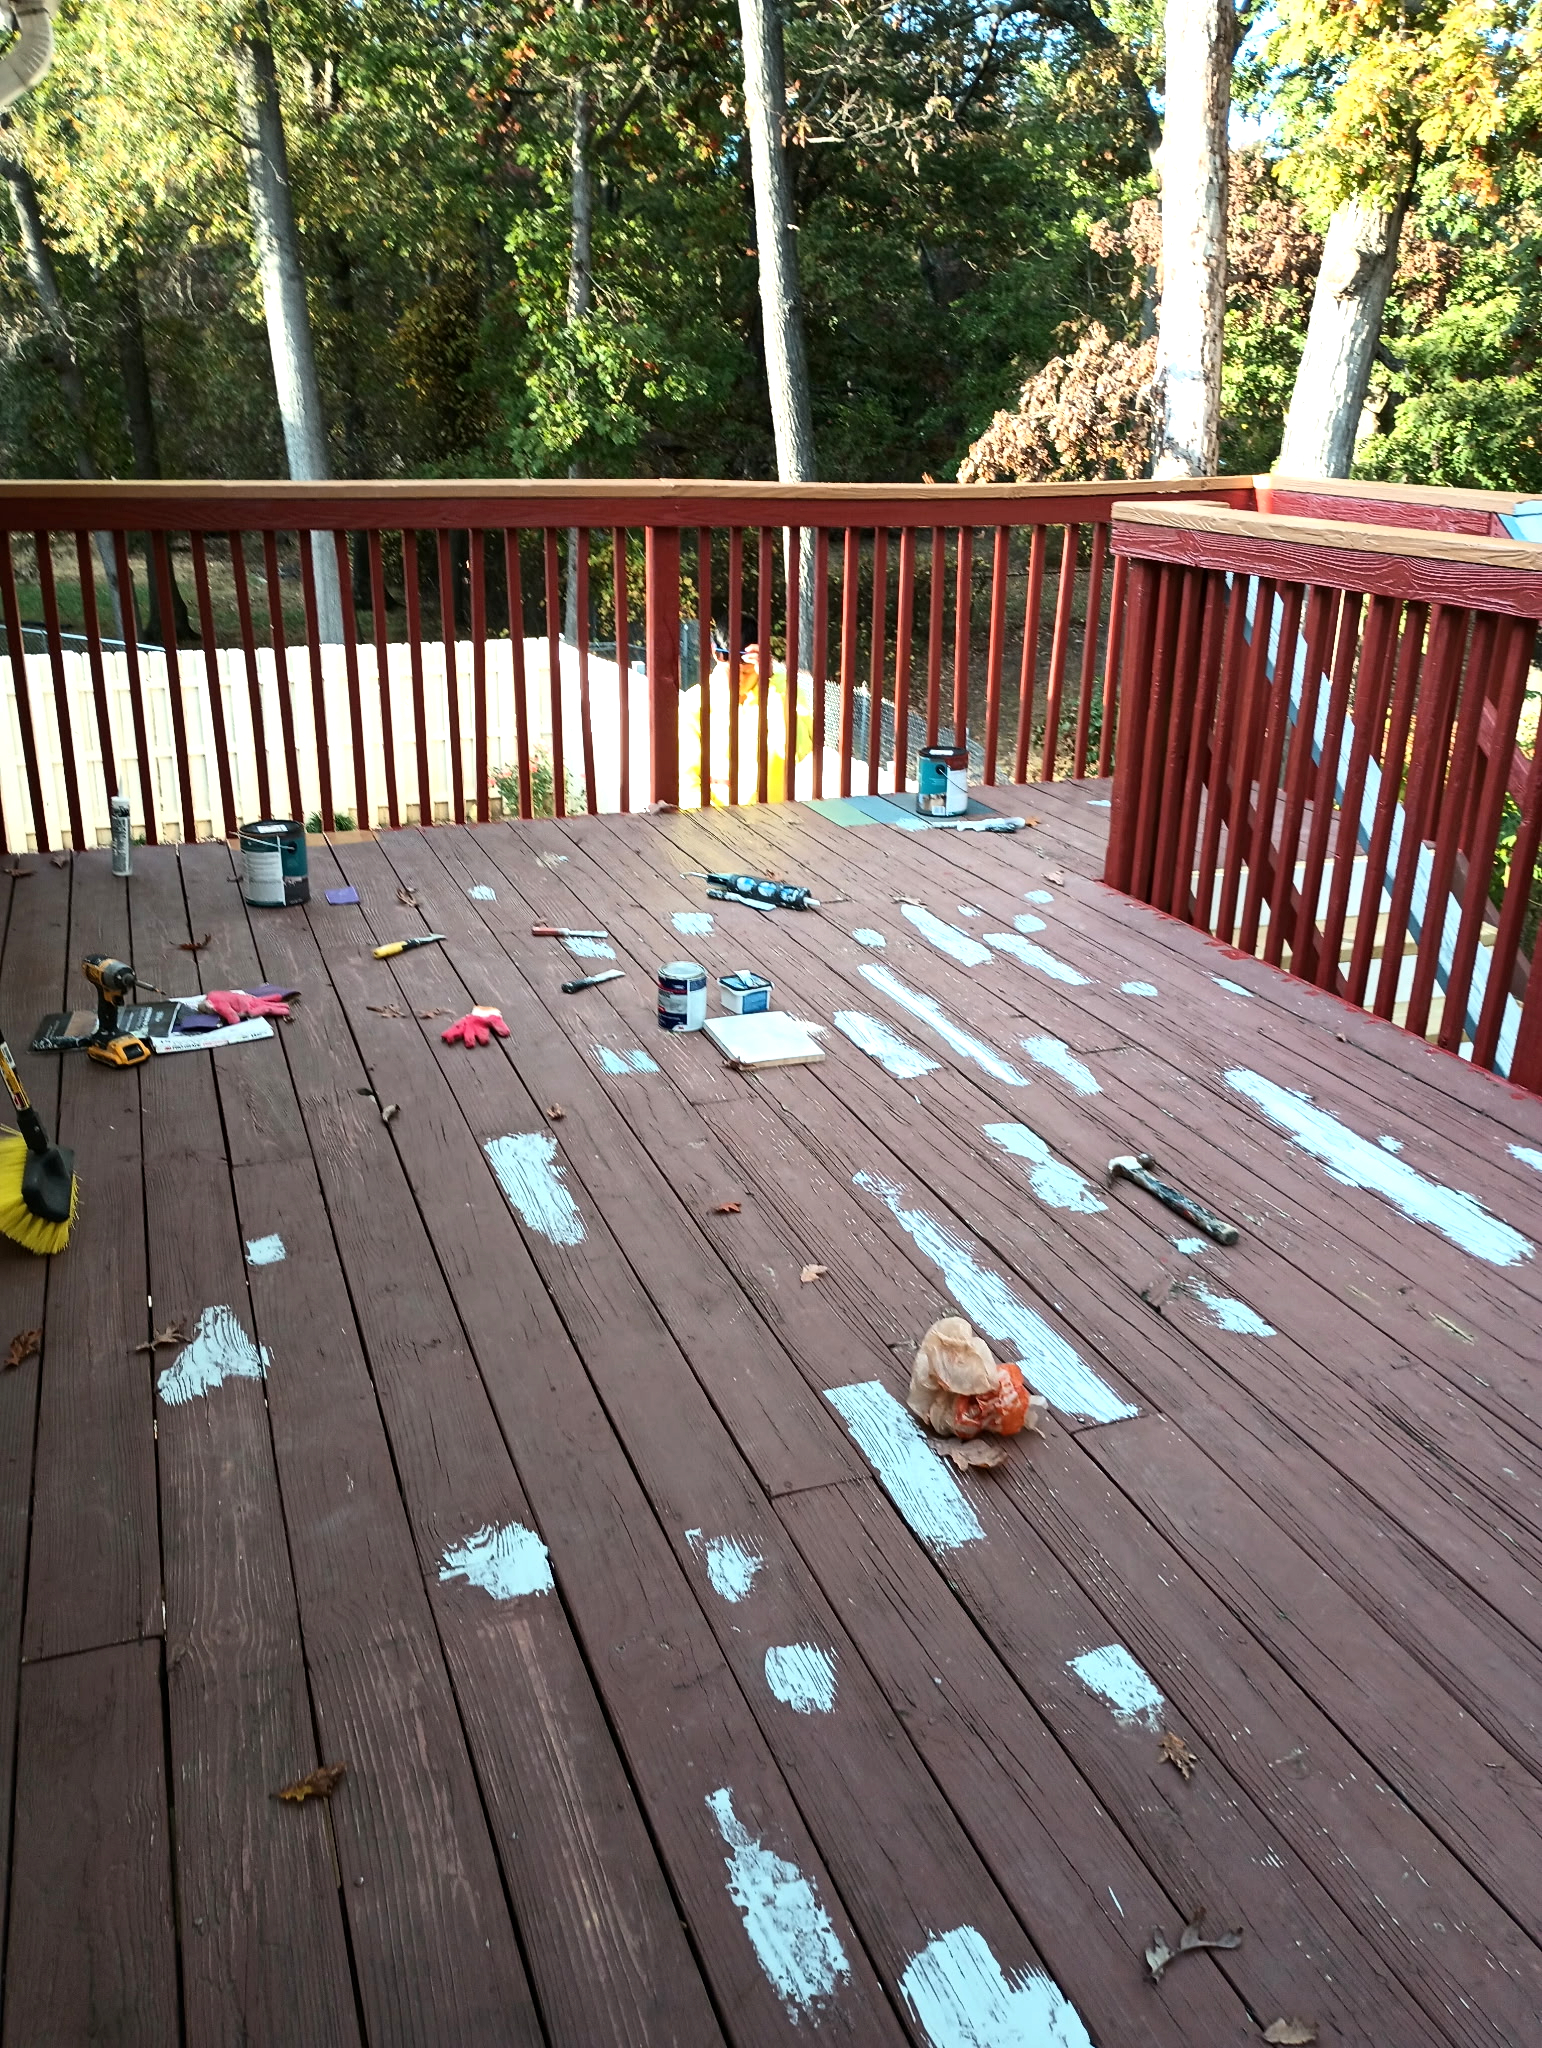
Deck Floor Repair
The deteriorated sections of the existing deck floor were carefully scraped and removed to eliminate damaged material. The affected areas were repaired with wood filler, then sanded smooth to properly prepare the surface for finishing.

07
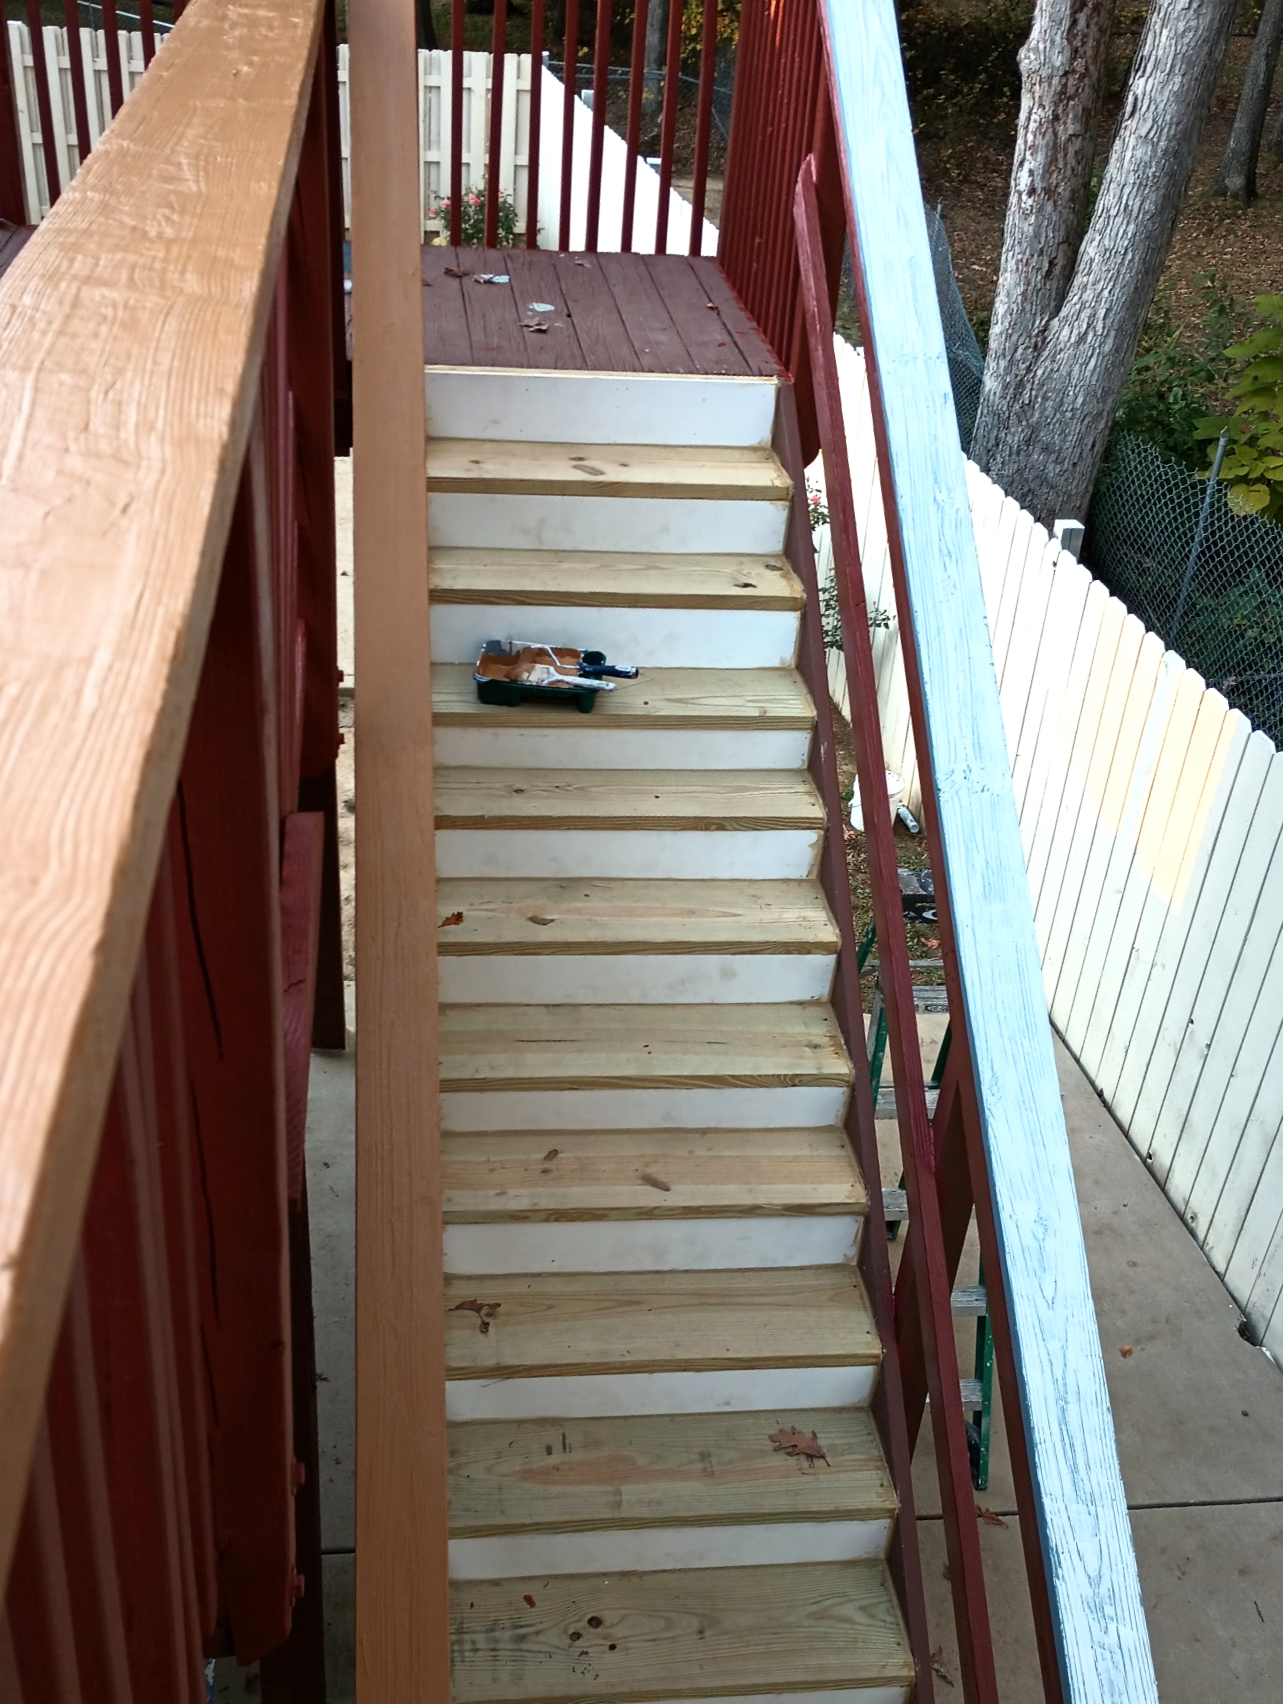
Deck Stair Installation
A separate portion of the project included the custom design and installation of new deck stairs, providing improved access while complementing the existing deck structure.

08
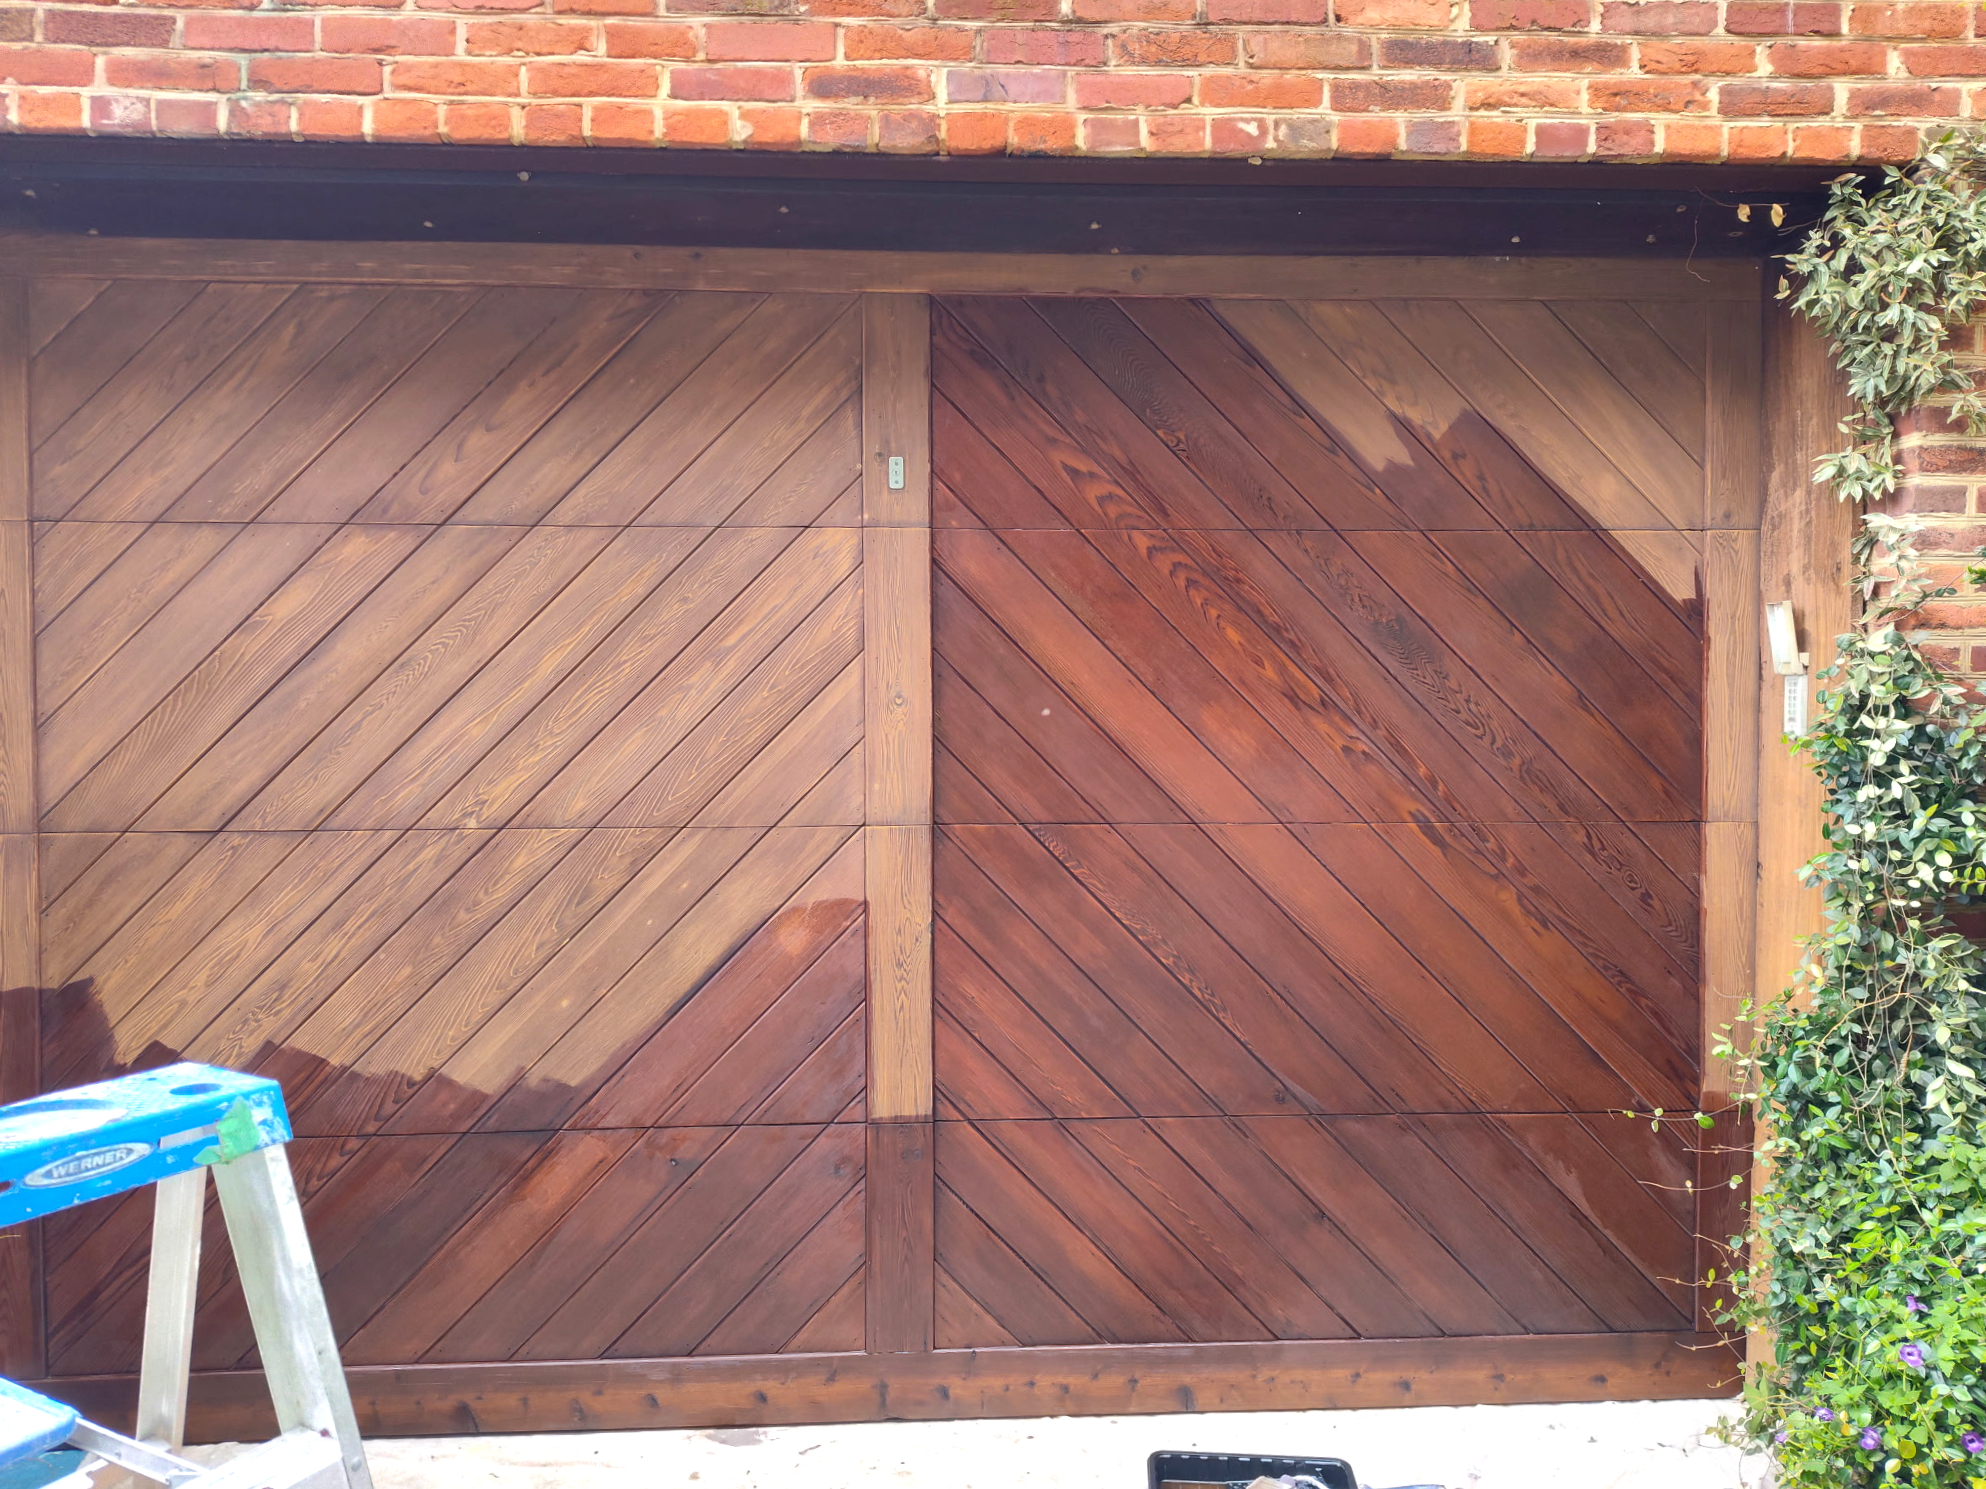
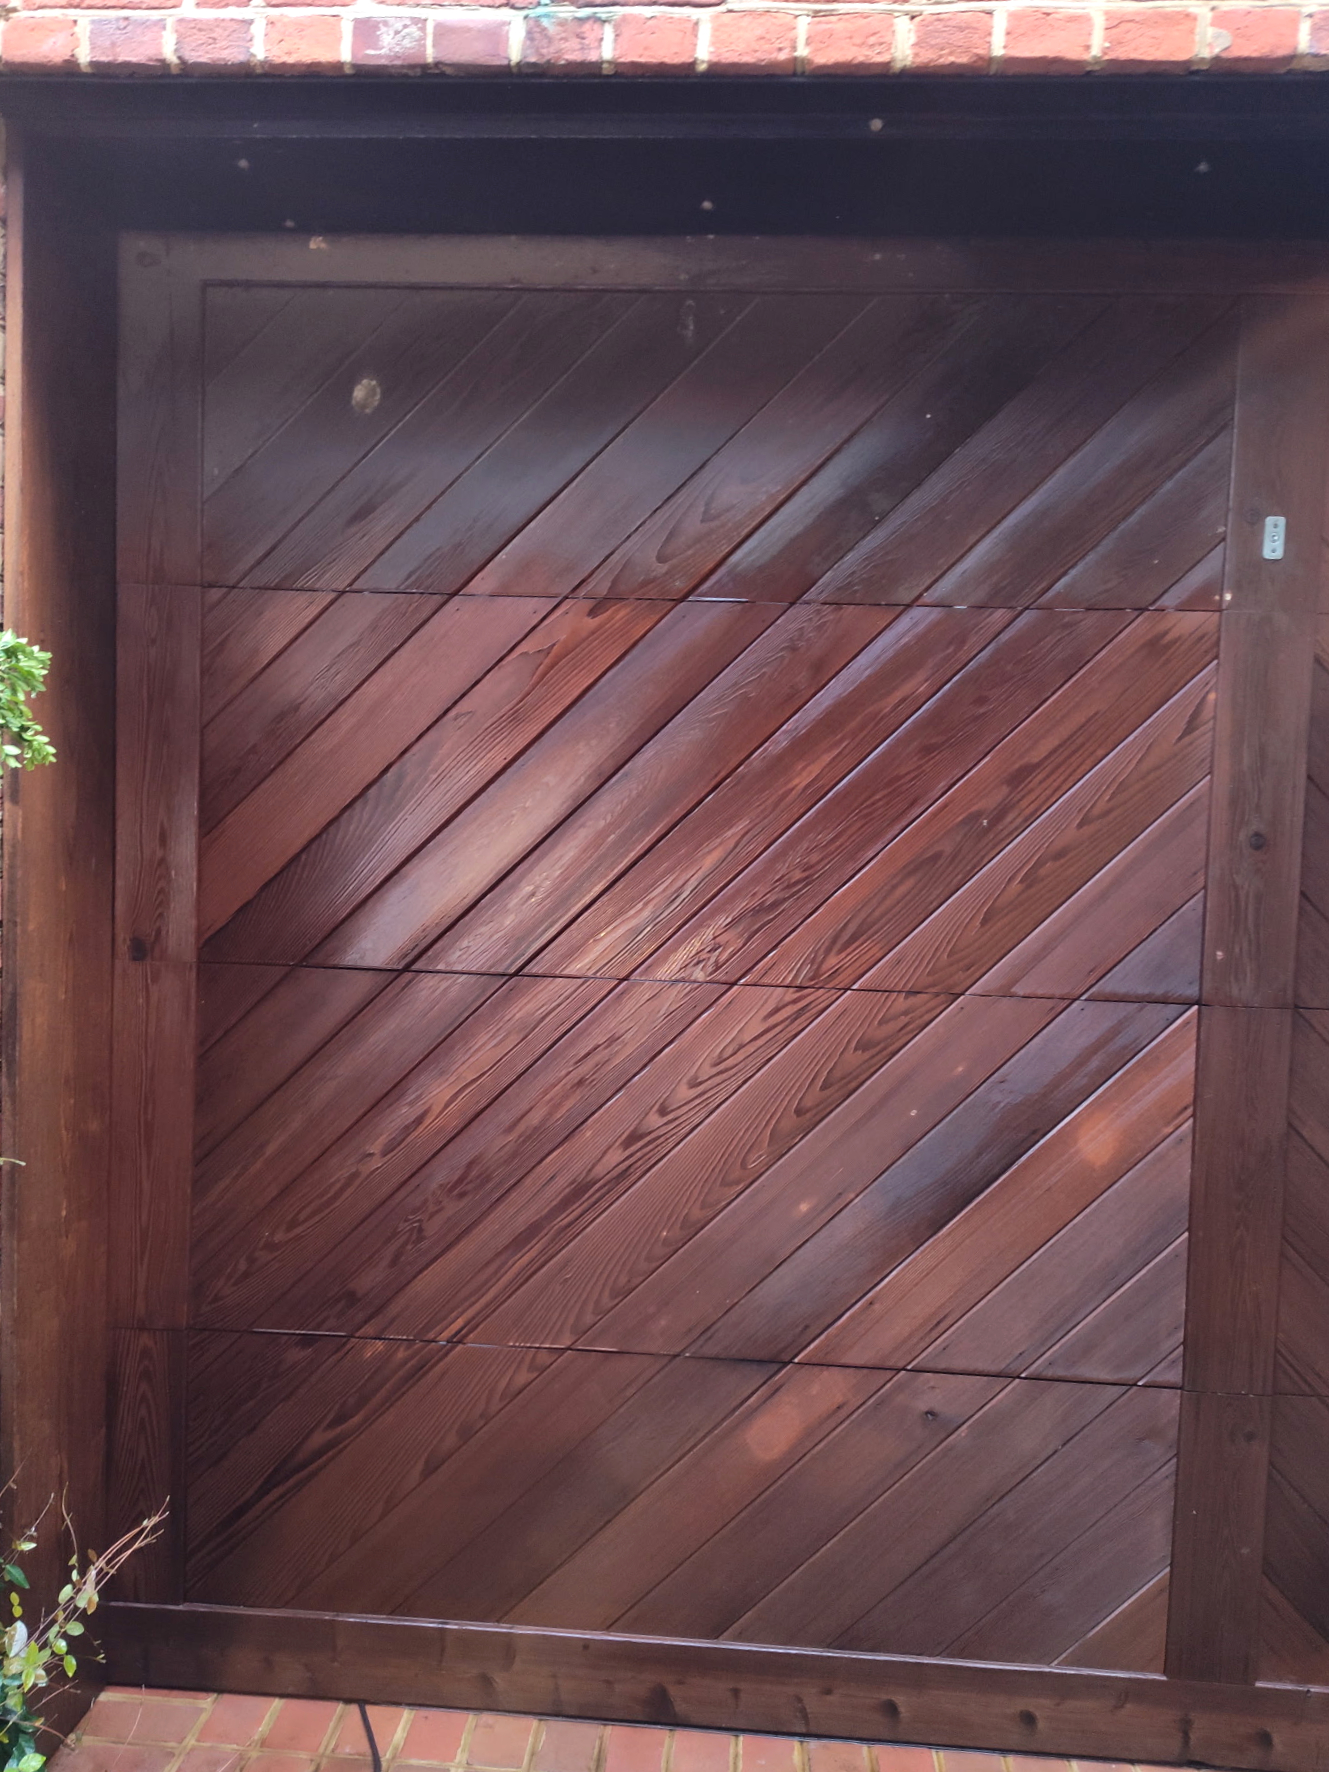
Garage Wooden Door Preparation & Staining
The existing wooden garage door was carefully scraped to remove deteriorated material and loose finish. The surface was then thoroughly sanded smooth and properly prepared for the application of a wood stain, enhancing the natural appearance of the wood and providing a refreshed finish.

09
Garage Wooden Door Preparation & Staining
The existing wooden garage door was carefully scraped to remove deteriorated material and loose finish. The surface was then thoroughly sanded smooth and properly prepared for the application of a wood stain, enhancing the natural appearance of the wood and providing a refreshed finish.

10
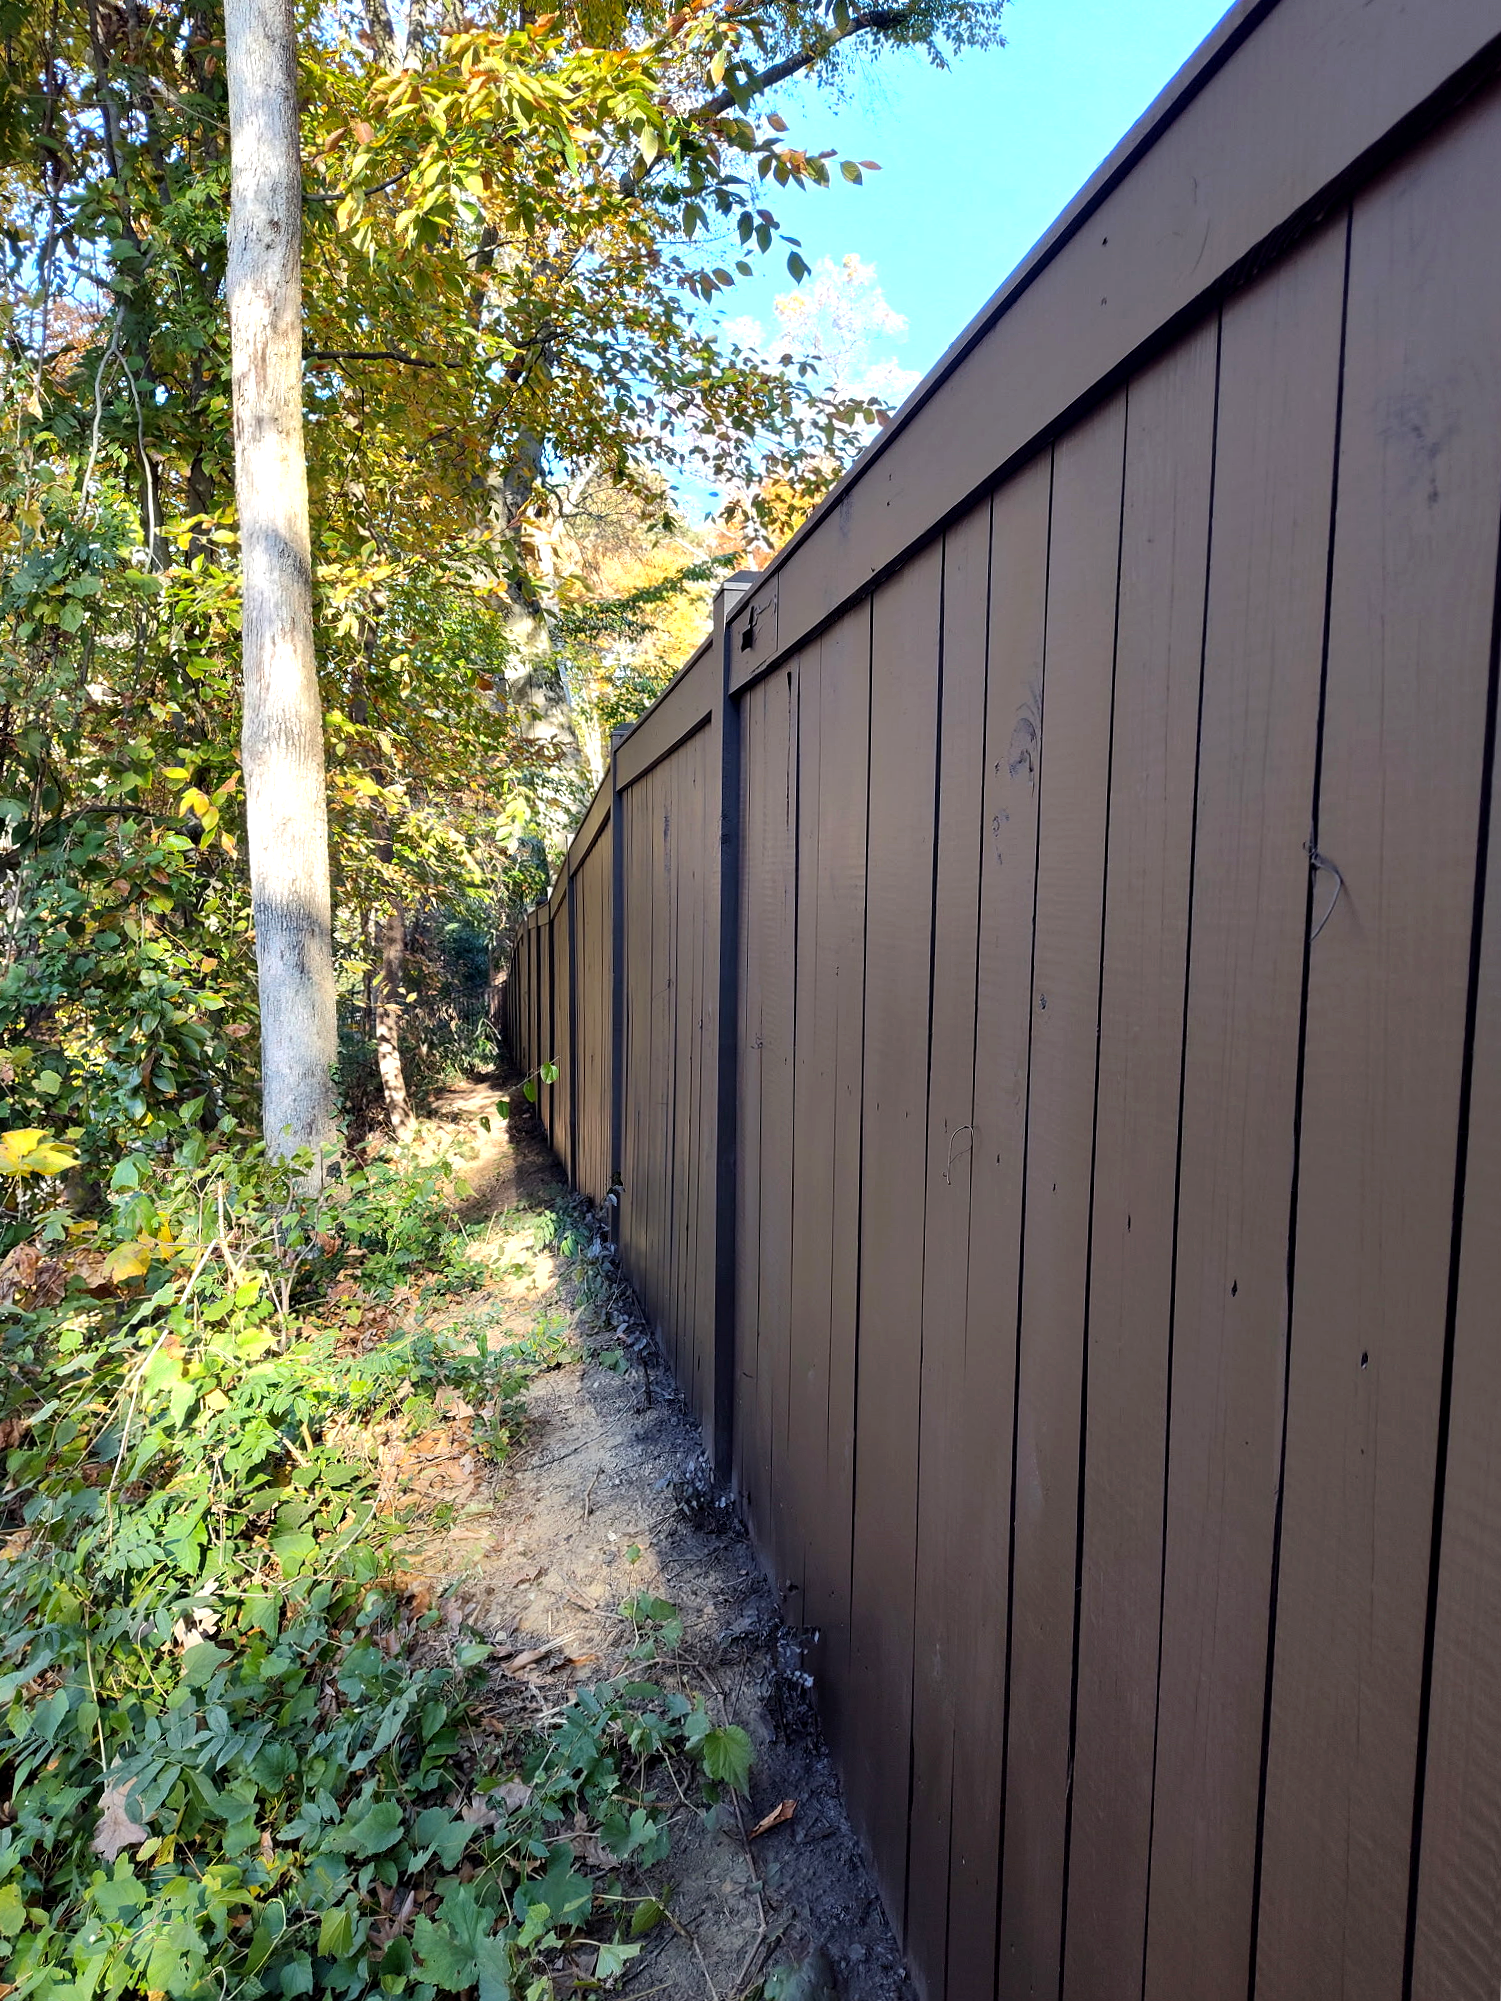
Complete Fence Painting.png
Damaged and deteriorated sections of the fence were repaired or replaced as needed before the entire fence was properly prepared, primed, and professionally painted. The completed work restored the fence's appearance while providing a clean, consistent finish.

11
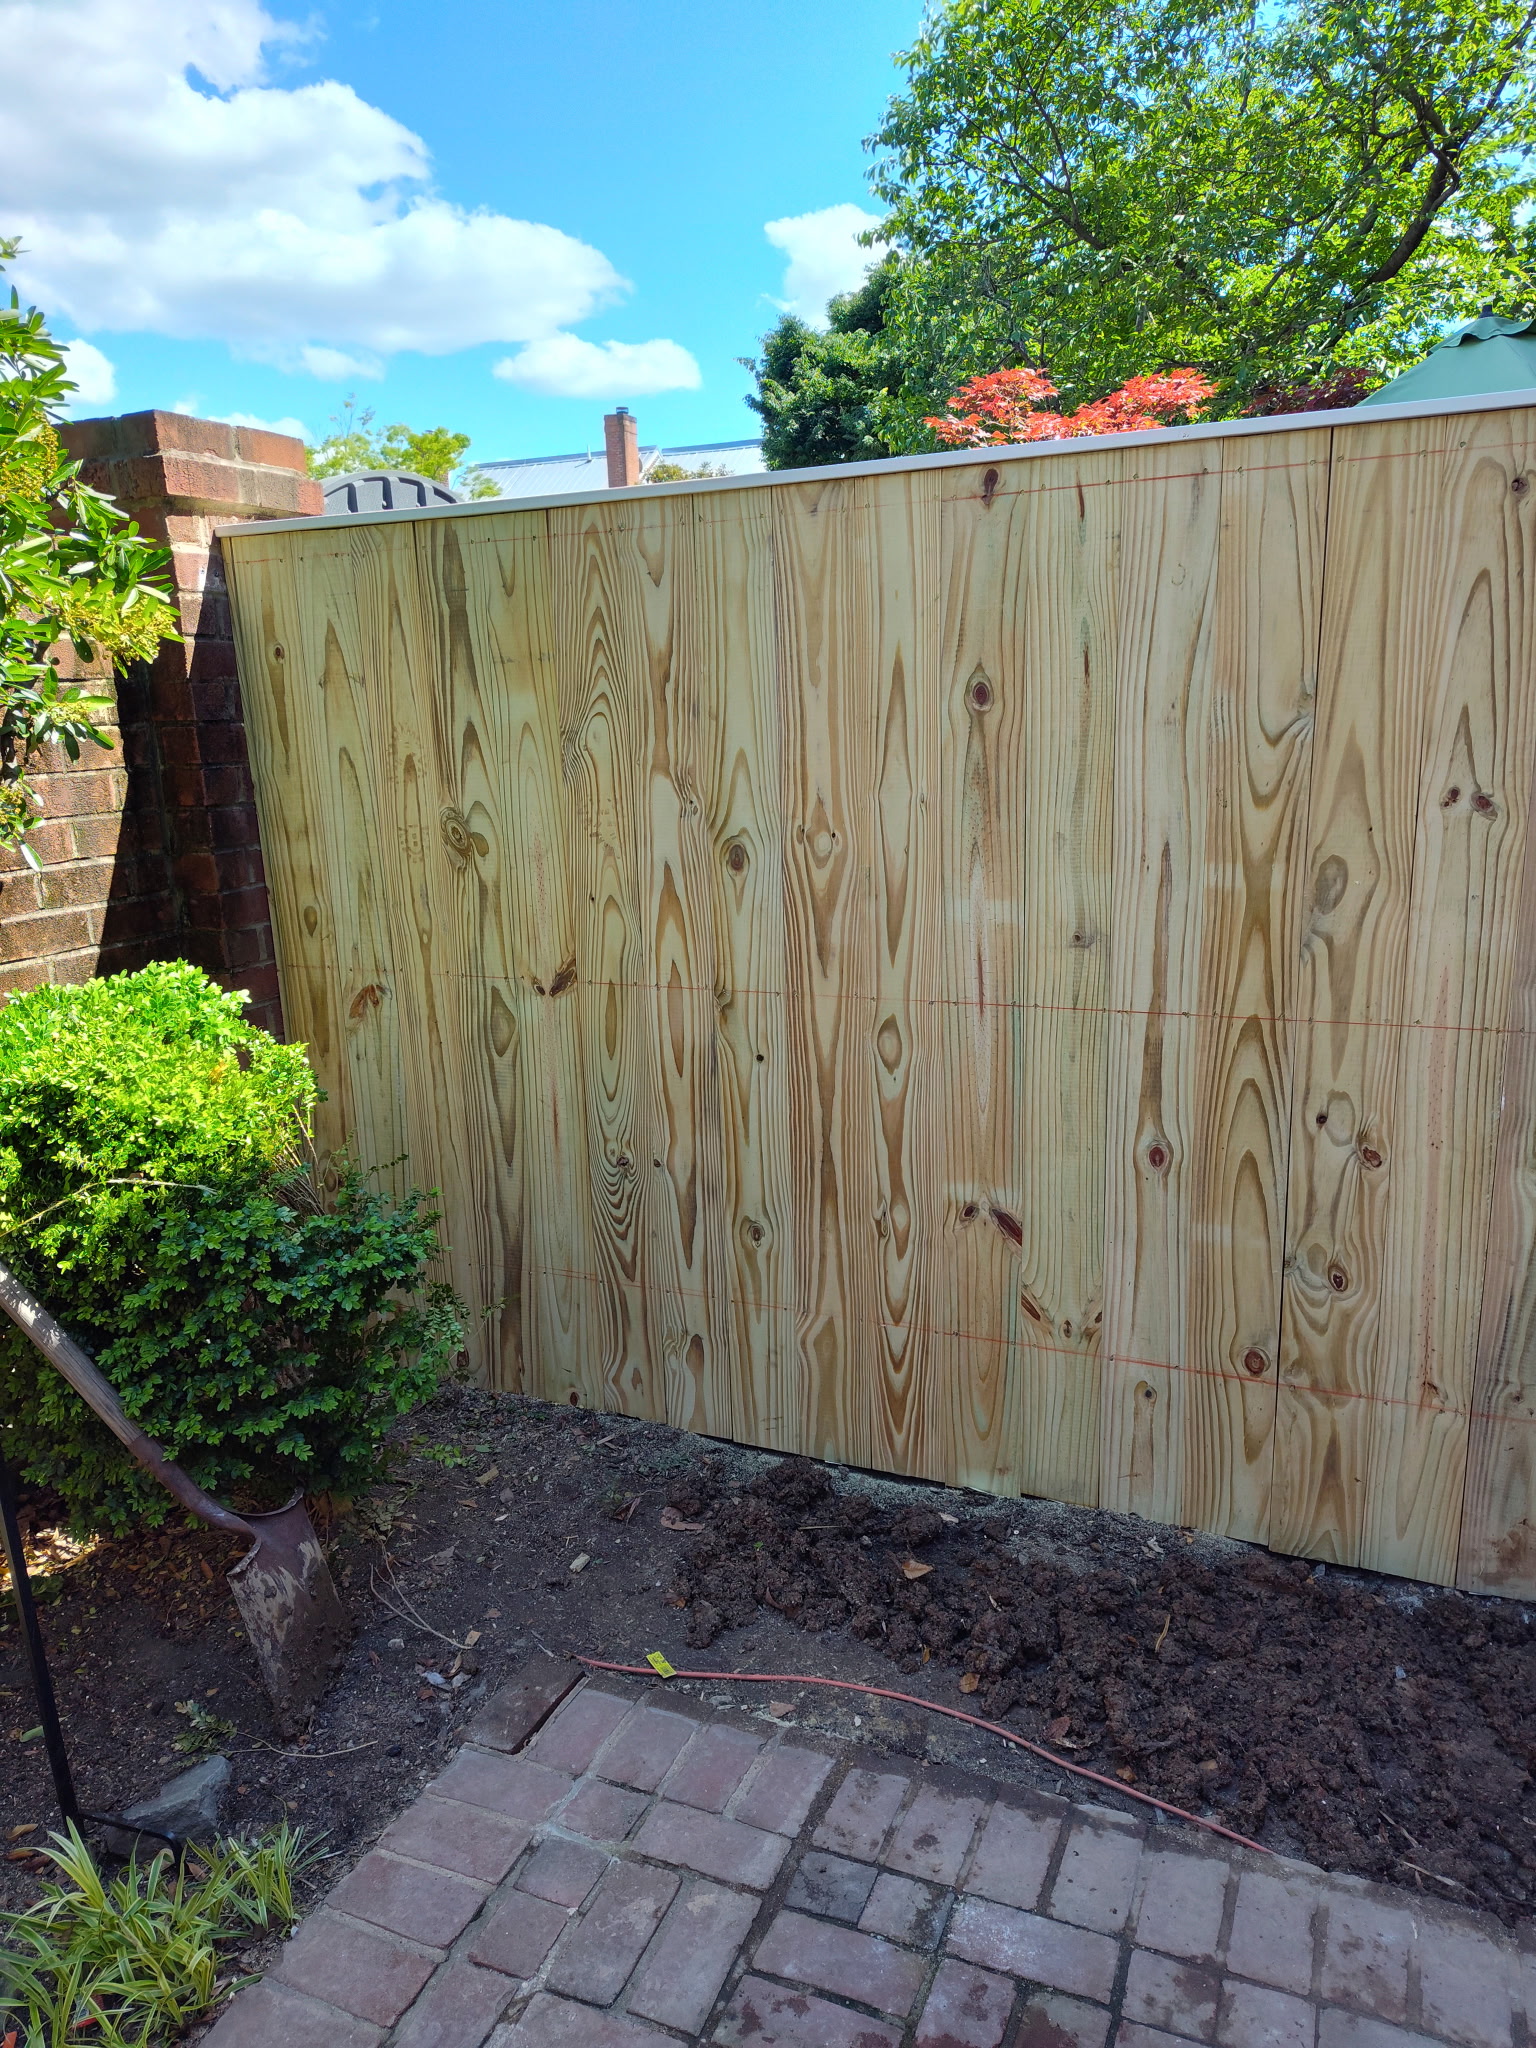
Custom Fence Installation
A custom fence was designed and installed to meet the property's specific layout and needs. The fence was carefully measured, assembled, and installed to provide a durable, functional, and finished addition to the property.

12
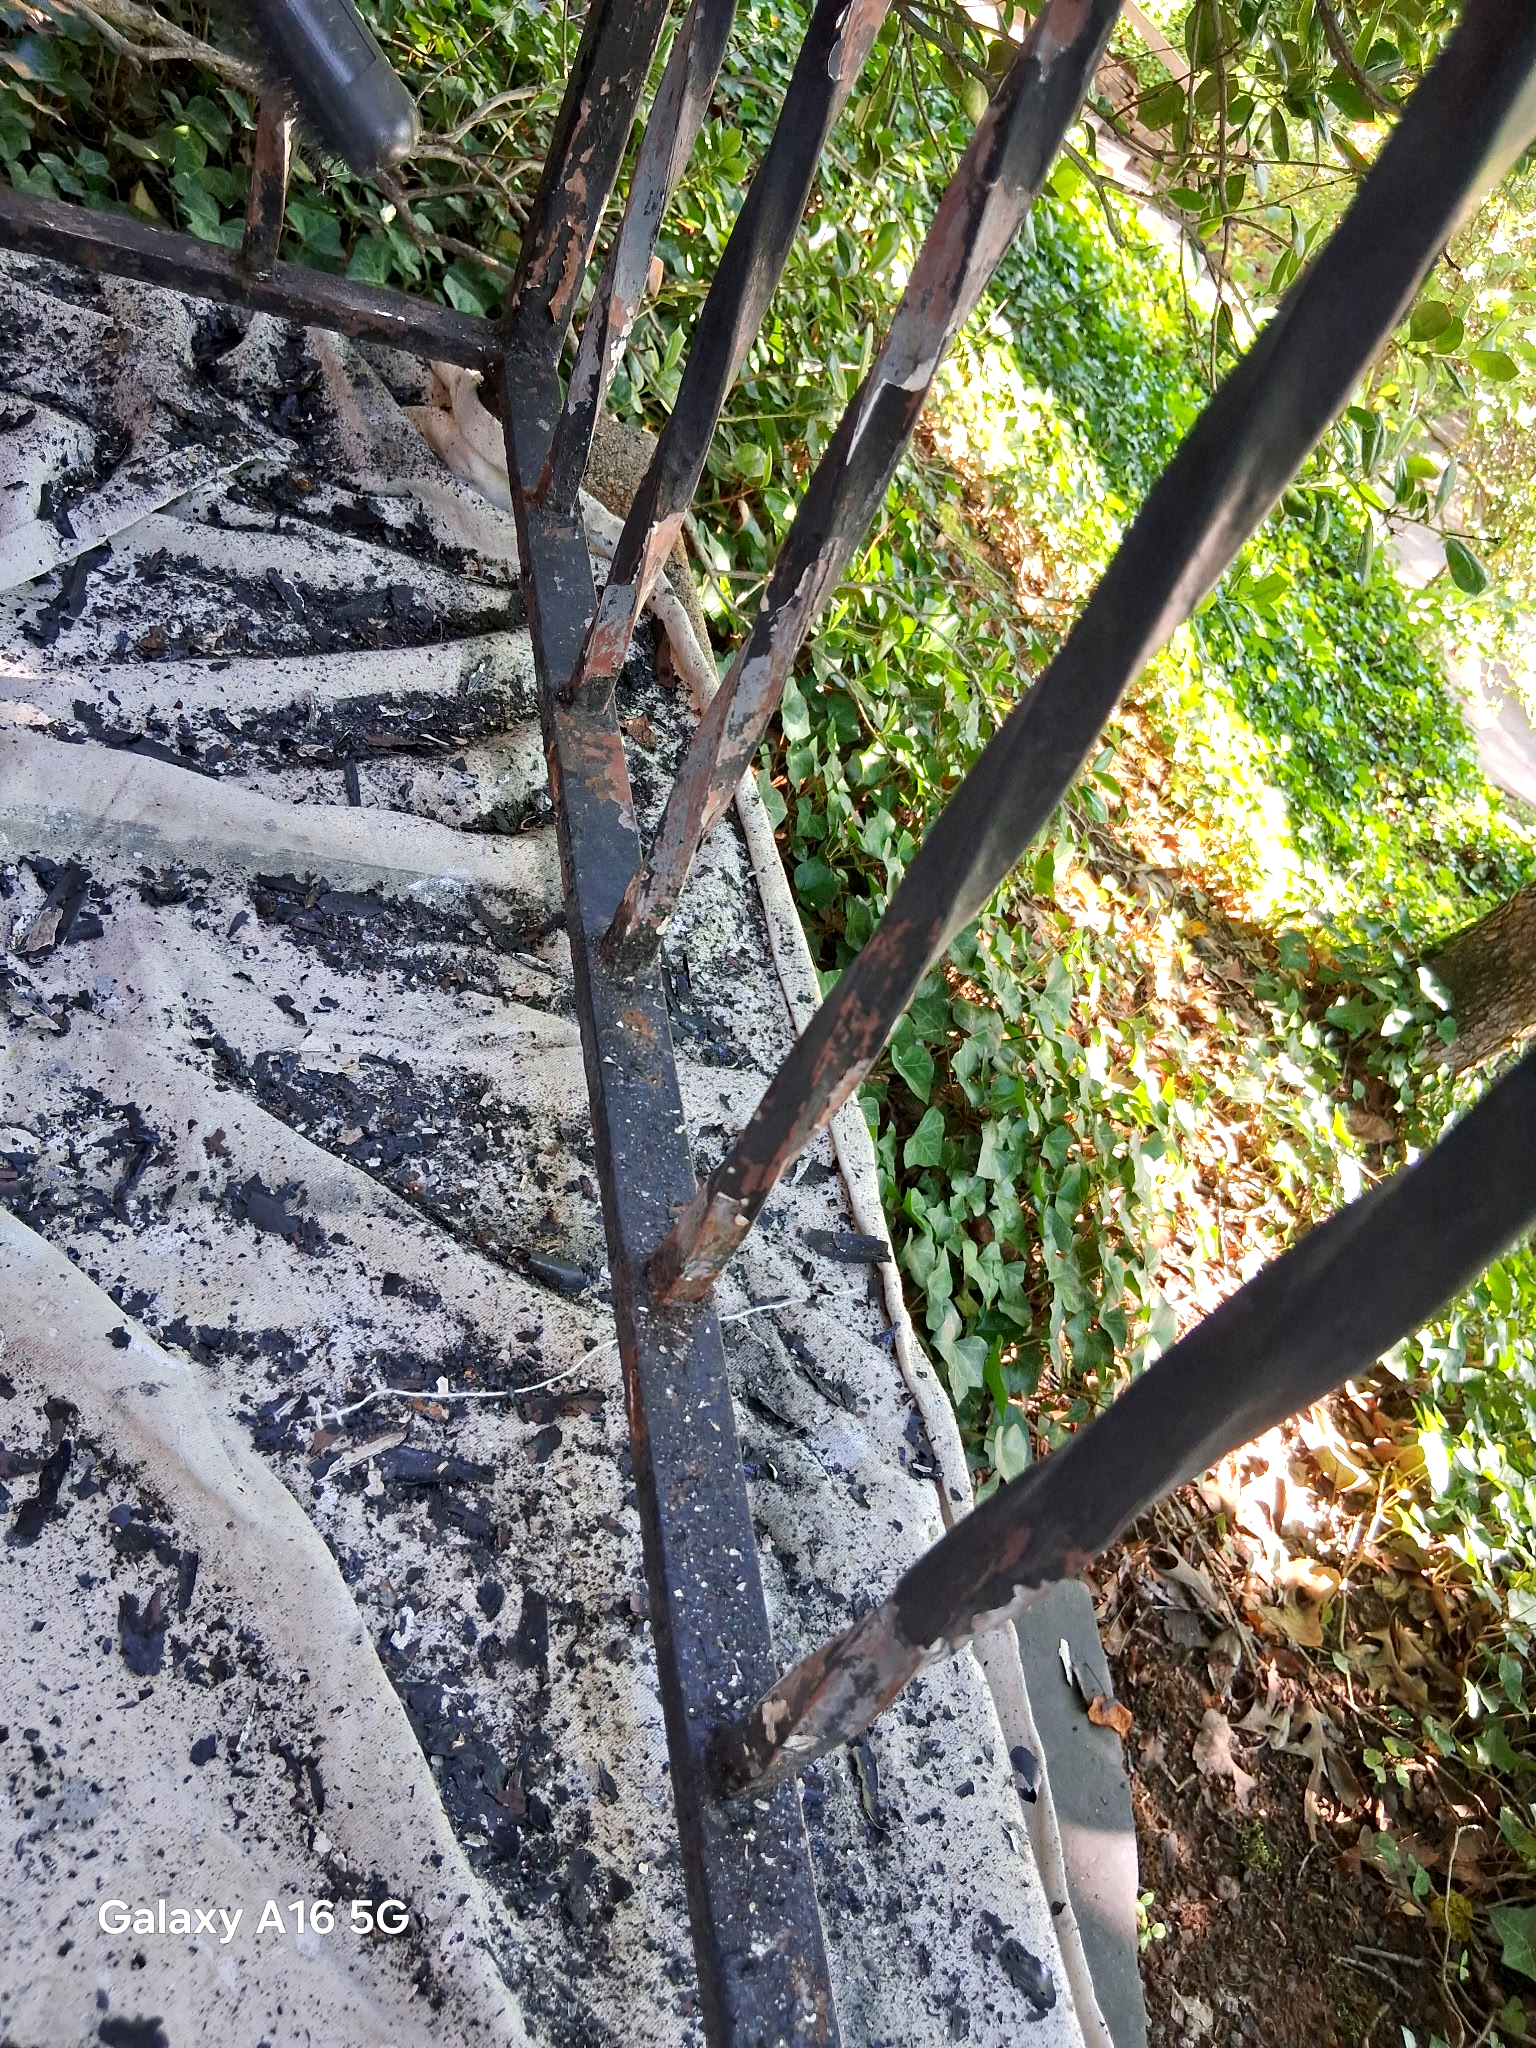
Metal Railing Surface Preparation
The existing metal railing was carefully scraped to remove loose, deteriorated paint and surface buildup. The railing was then properly prepared for painting, creating a clean and suitable surface for a fresh, durable finish.
13
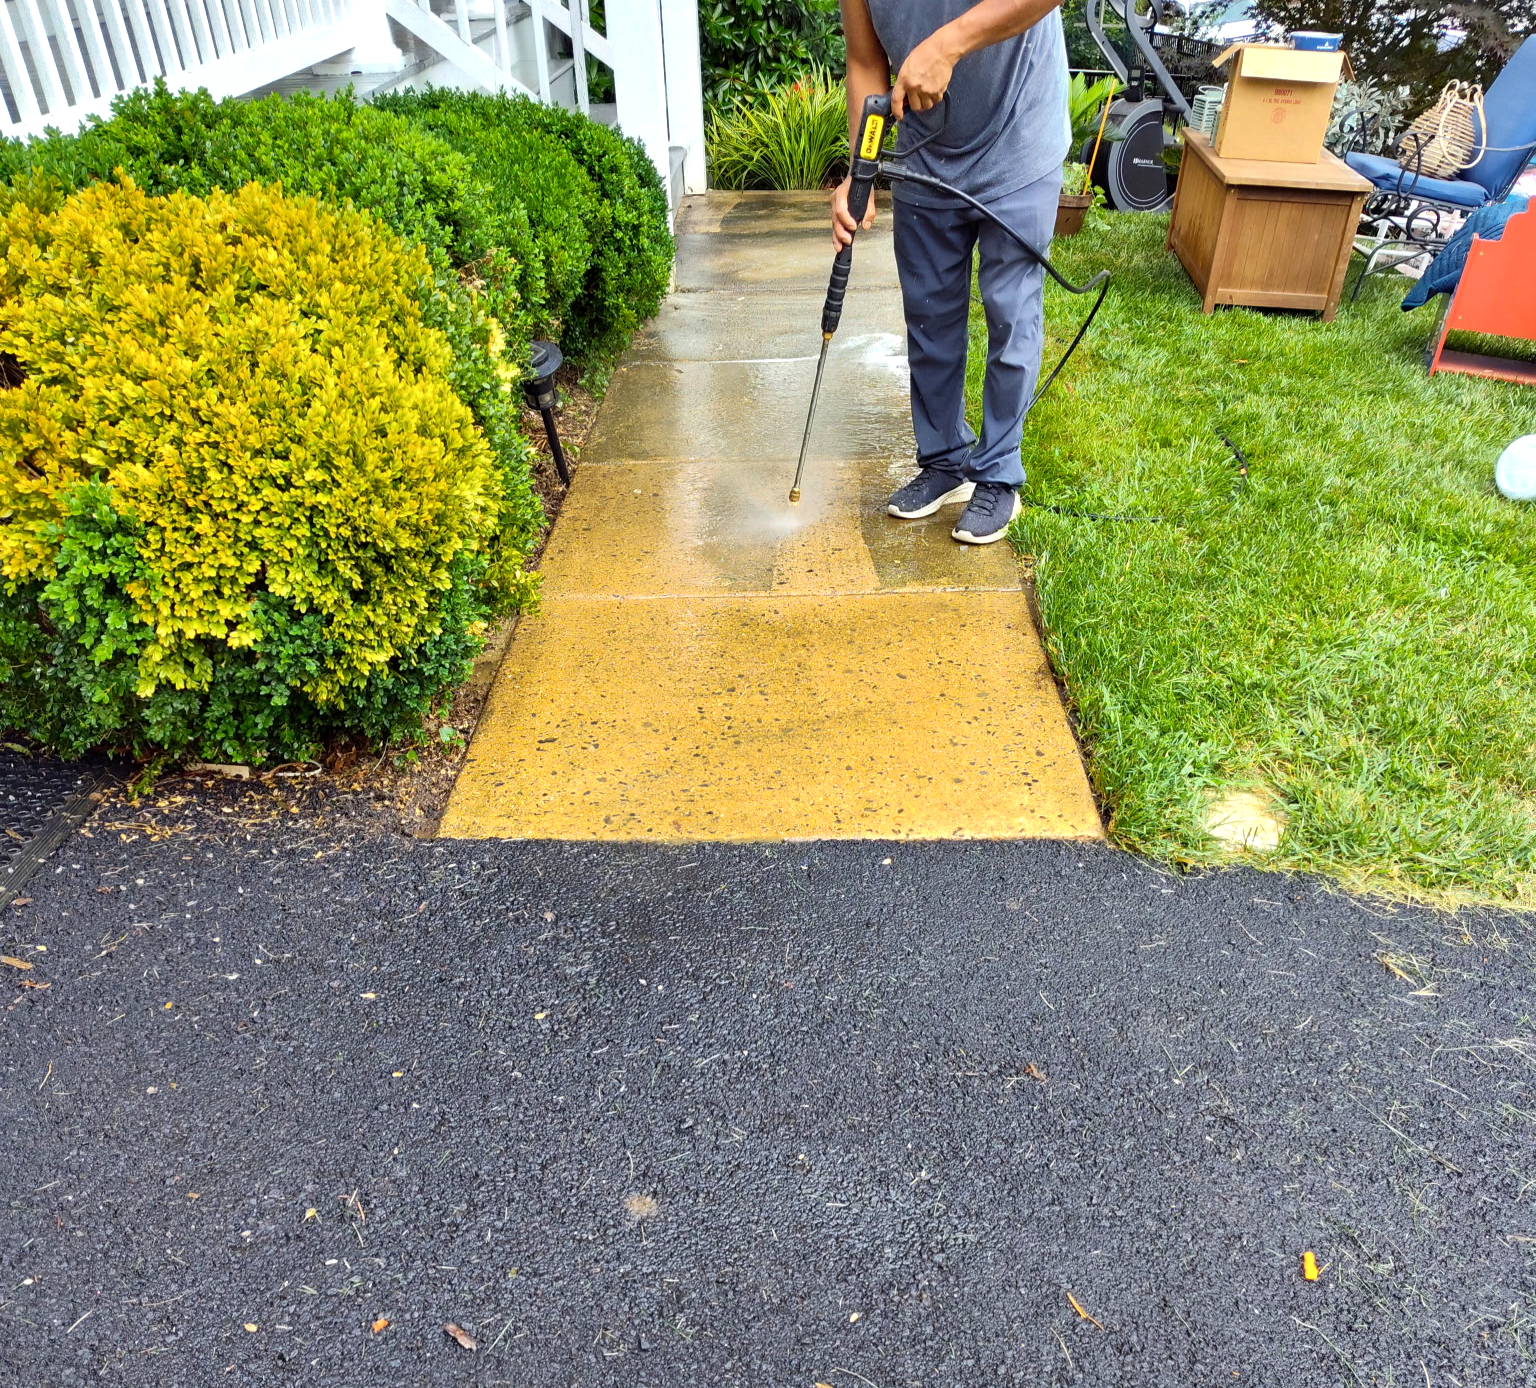
Driveway & Sidewalk Power Washing
The driveway and sidewalk were thoroughly power washed to remove accumulated dirt, grime, and surface buildup. Carefully selected, eco-friendly cleaning solutions were used as part of the cleaning process to help effectively restore the appearance of the surfaces while being mindful of the surrounding environment.

14
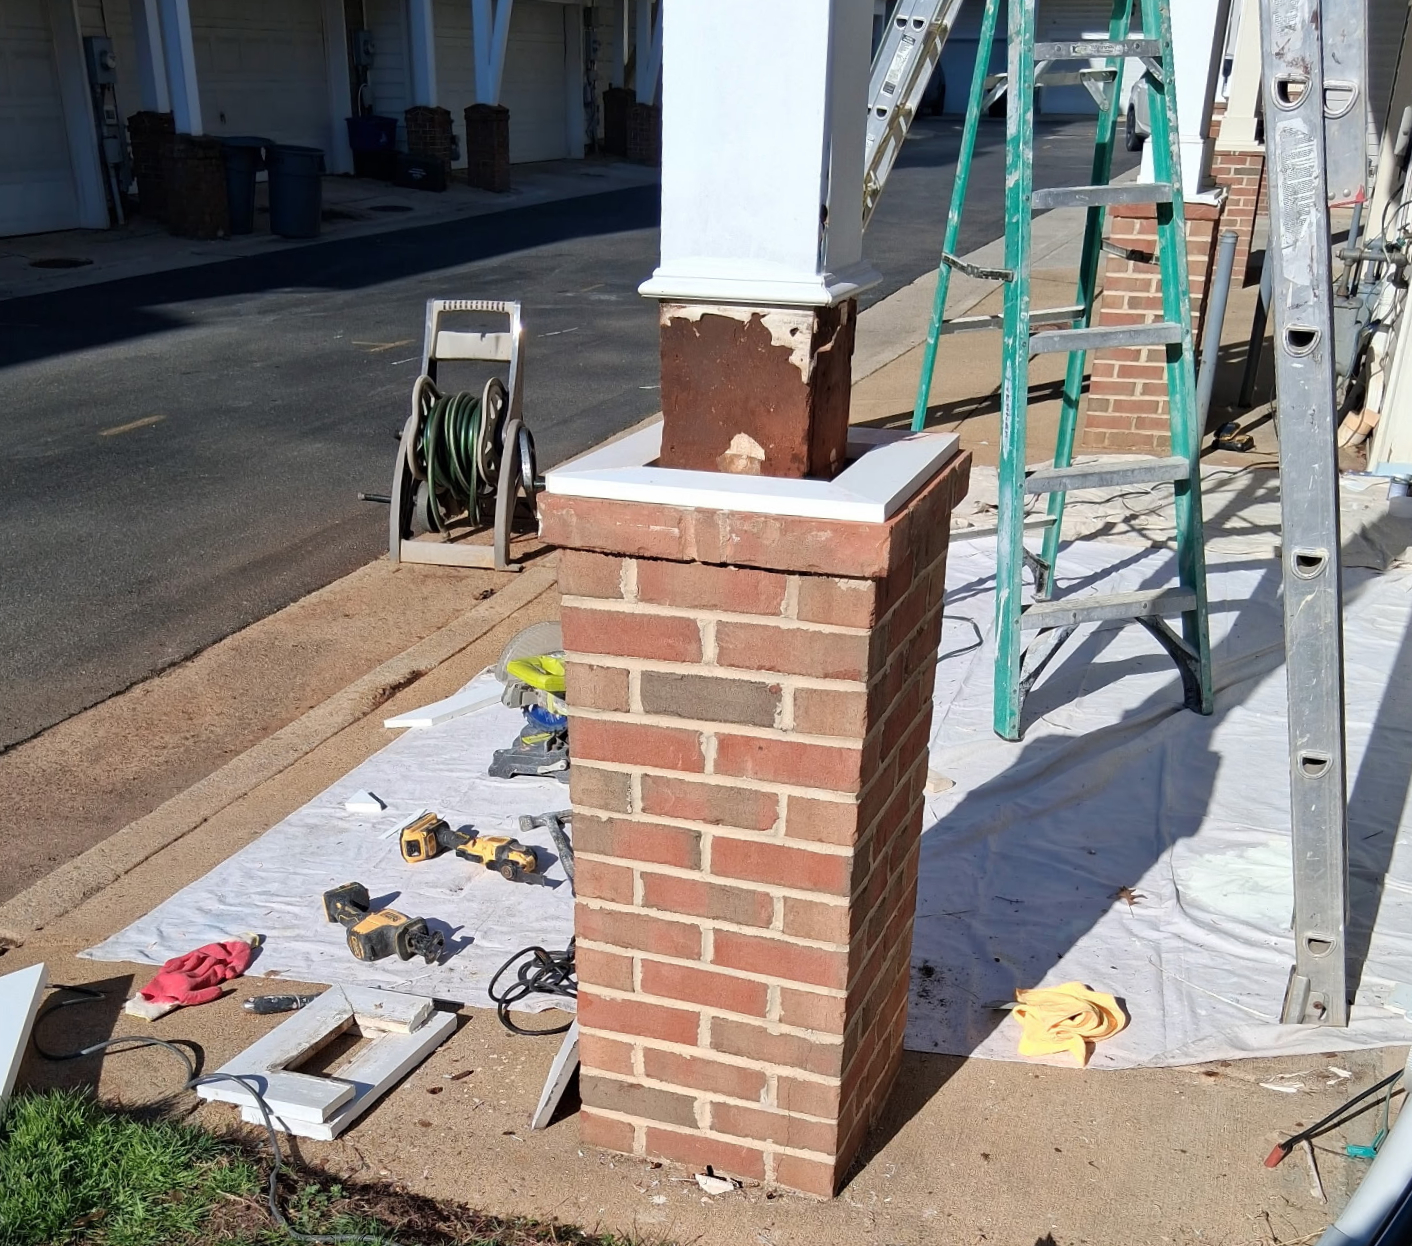
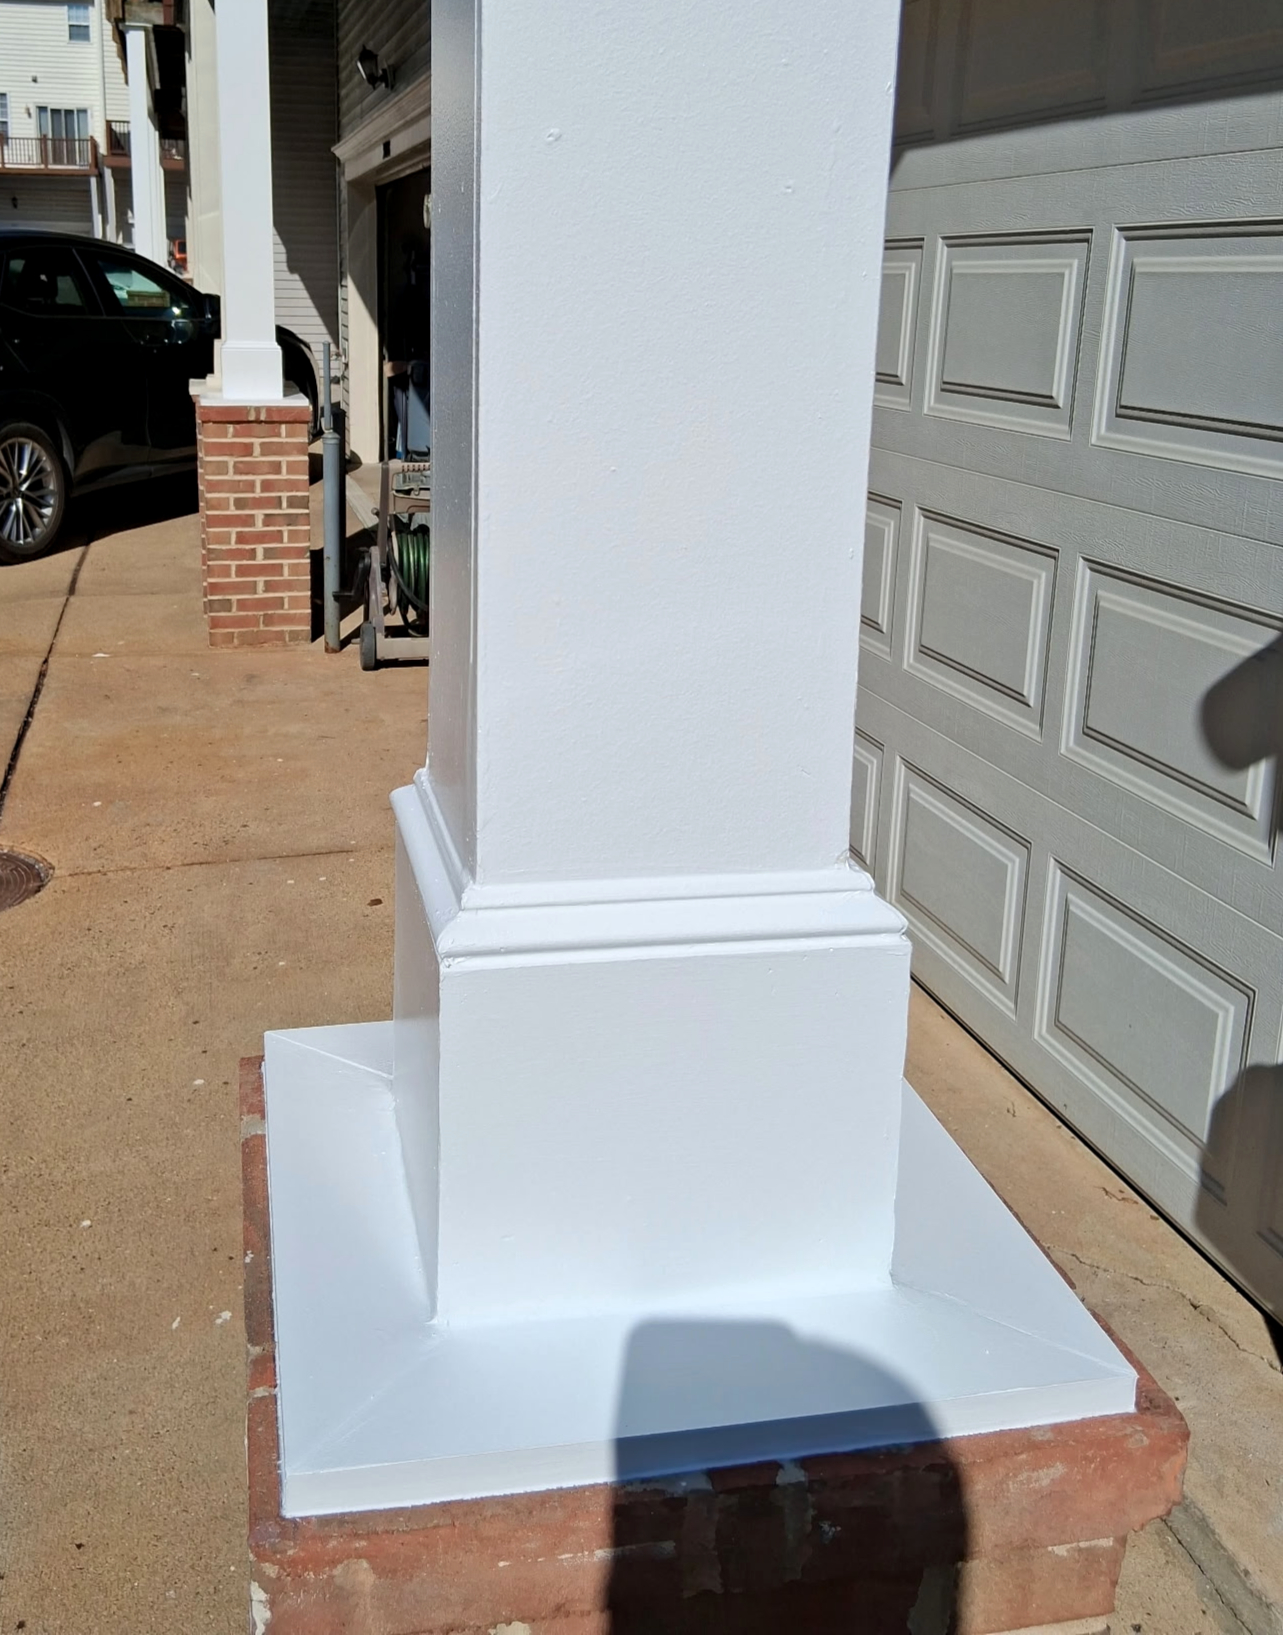
Wooden Post Section Repair & Painting
A damaged section of the existing wooden post was carefully removed and the surrounding area was cleaned and prepared. A new wood section was custom rebuilt and installed to restore the post. The repaired area was then properly prepared and painted for a clean, finished appearance.

15
Wooden Post Section Repair & Painting
A damaged section of the existing wooden post was carefully removed and the surrounding area was cleaned and prepared. A new wood section was custom rebuilt and installed to restore the post. The repaired area was then properly prepared and painted for a clean, finished appearance.

16
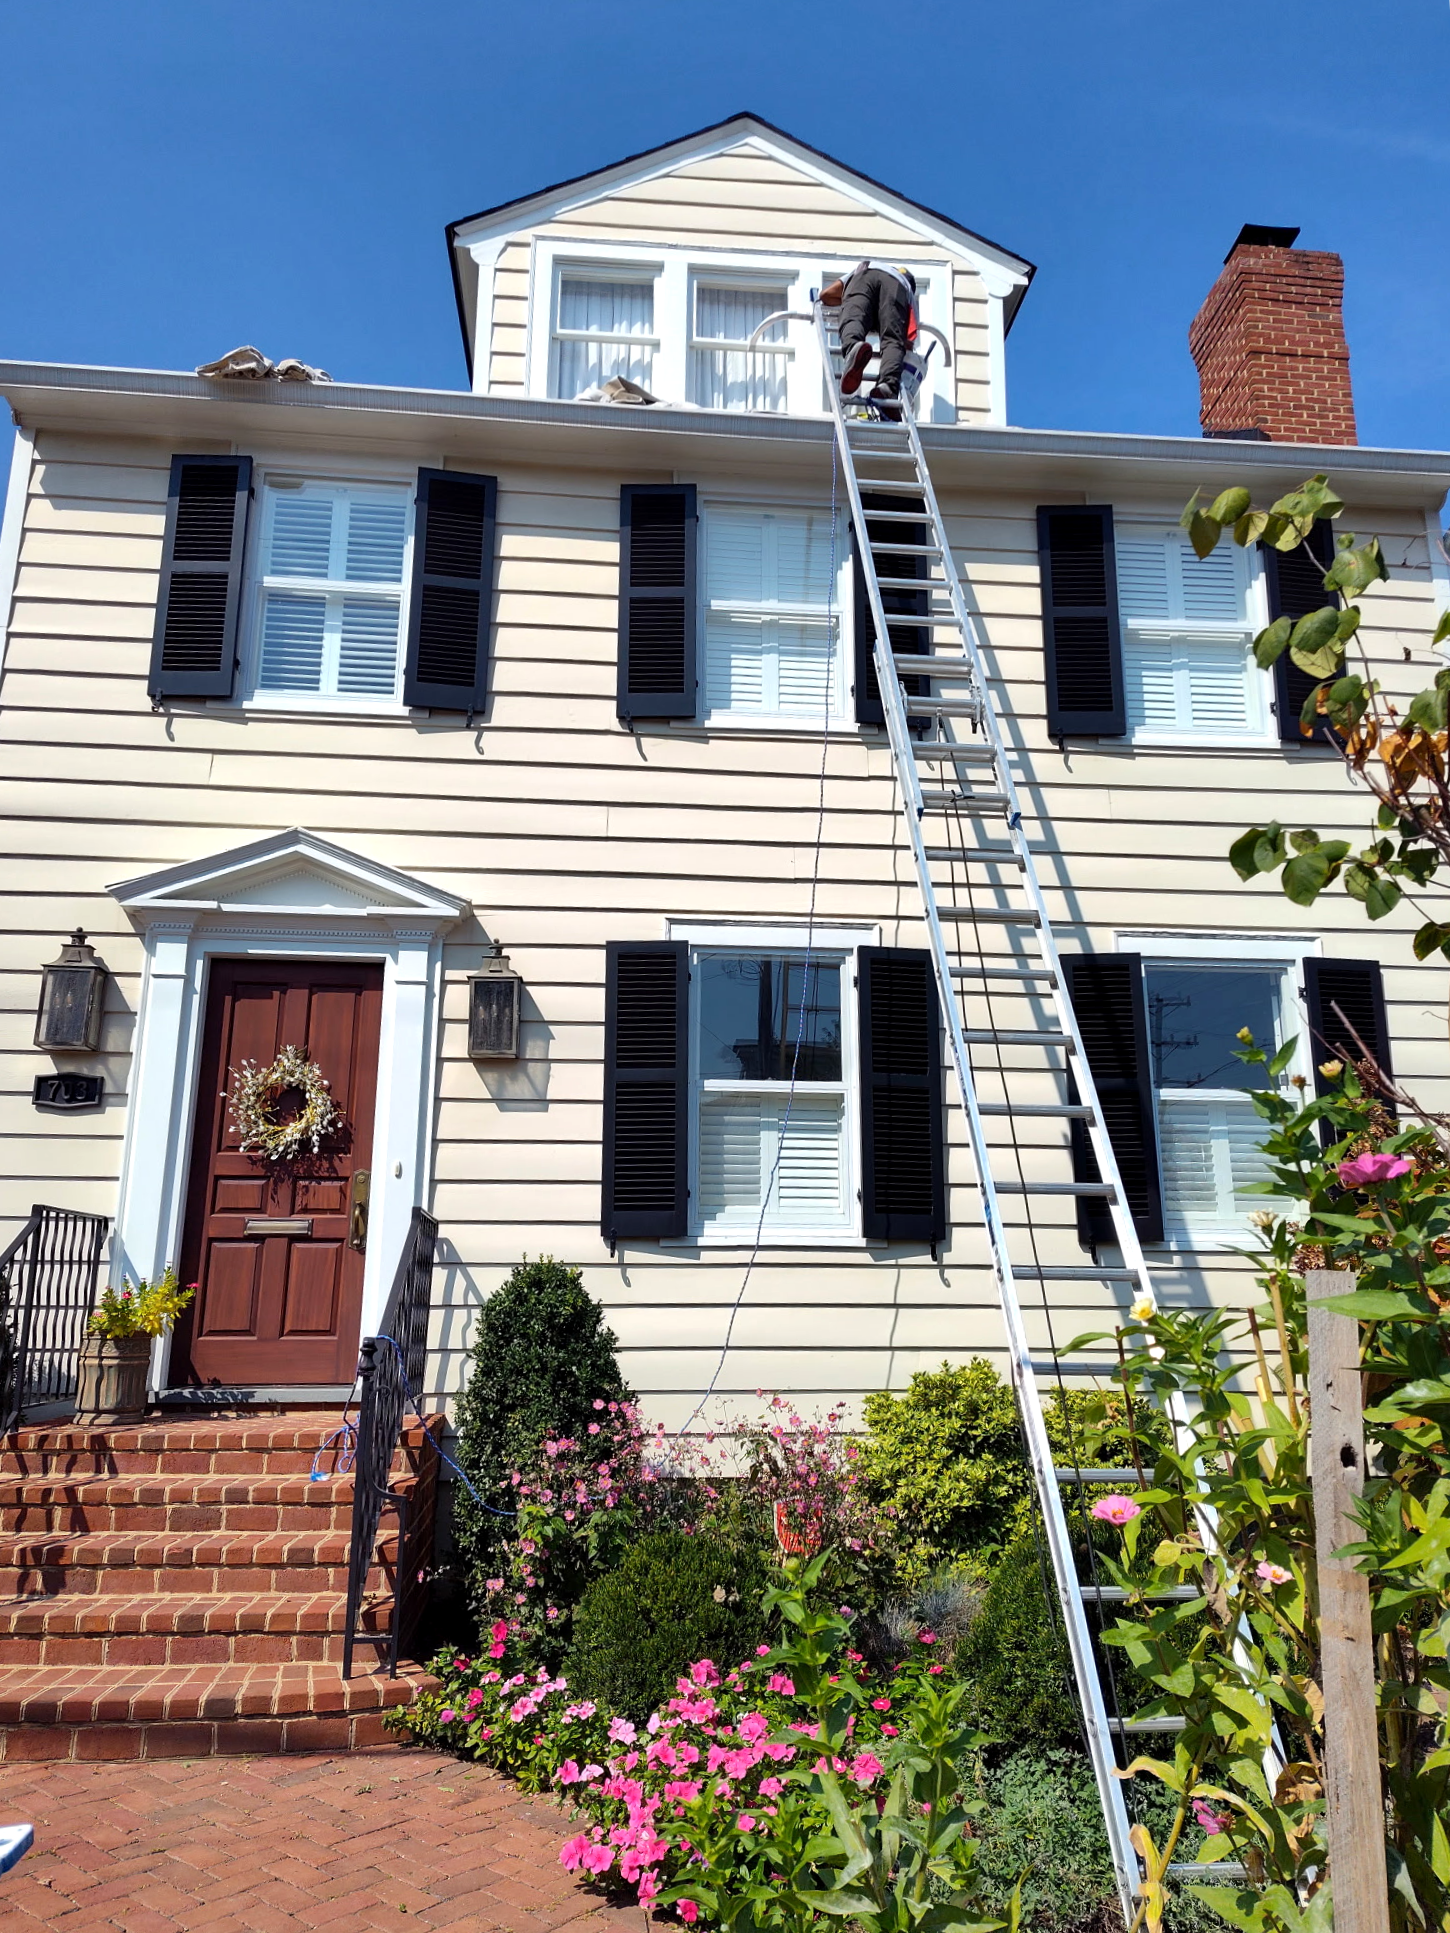
Exterior Painting & Surface Preparation
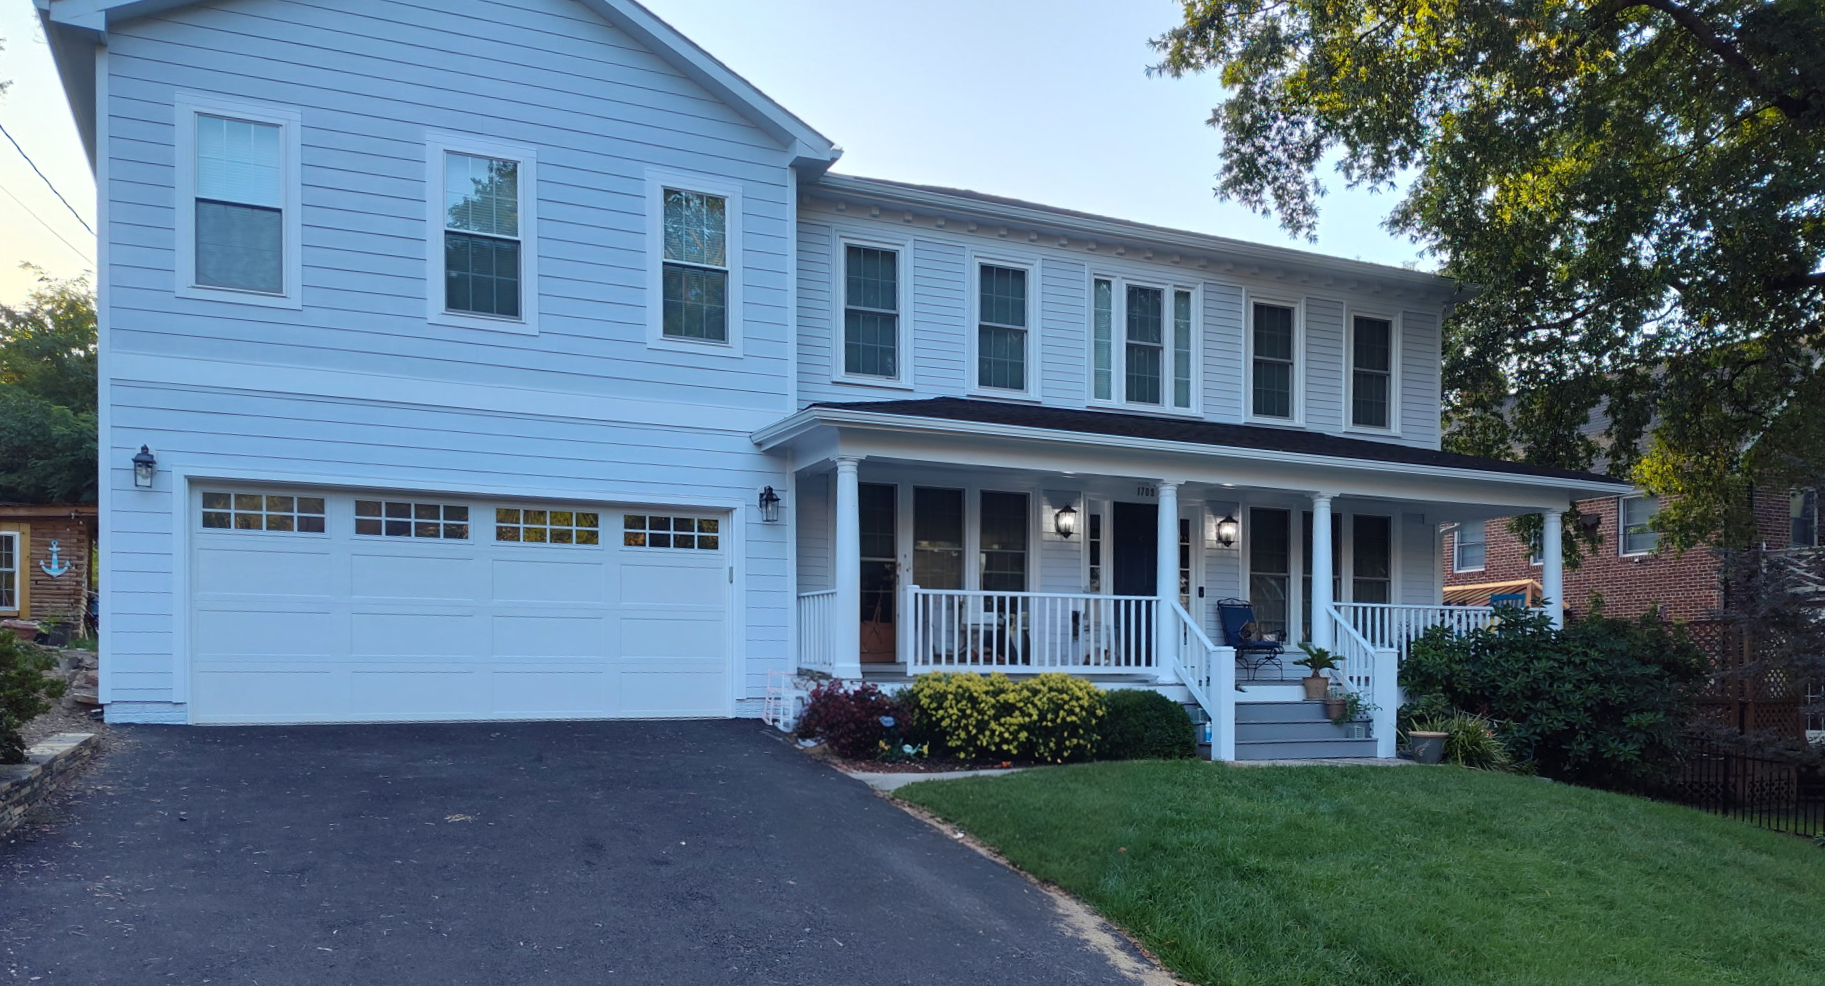
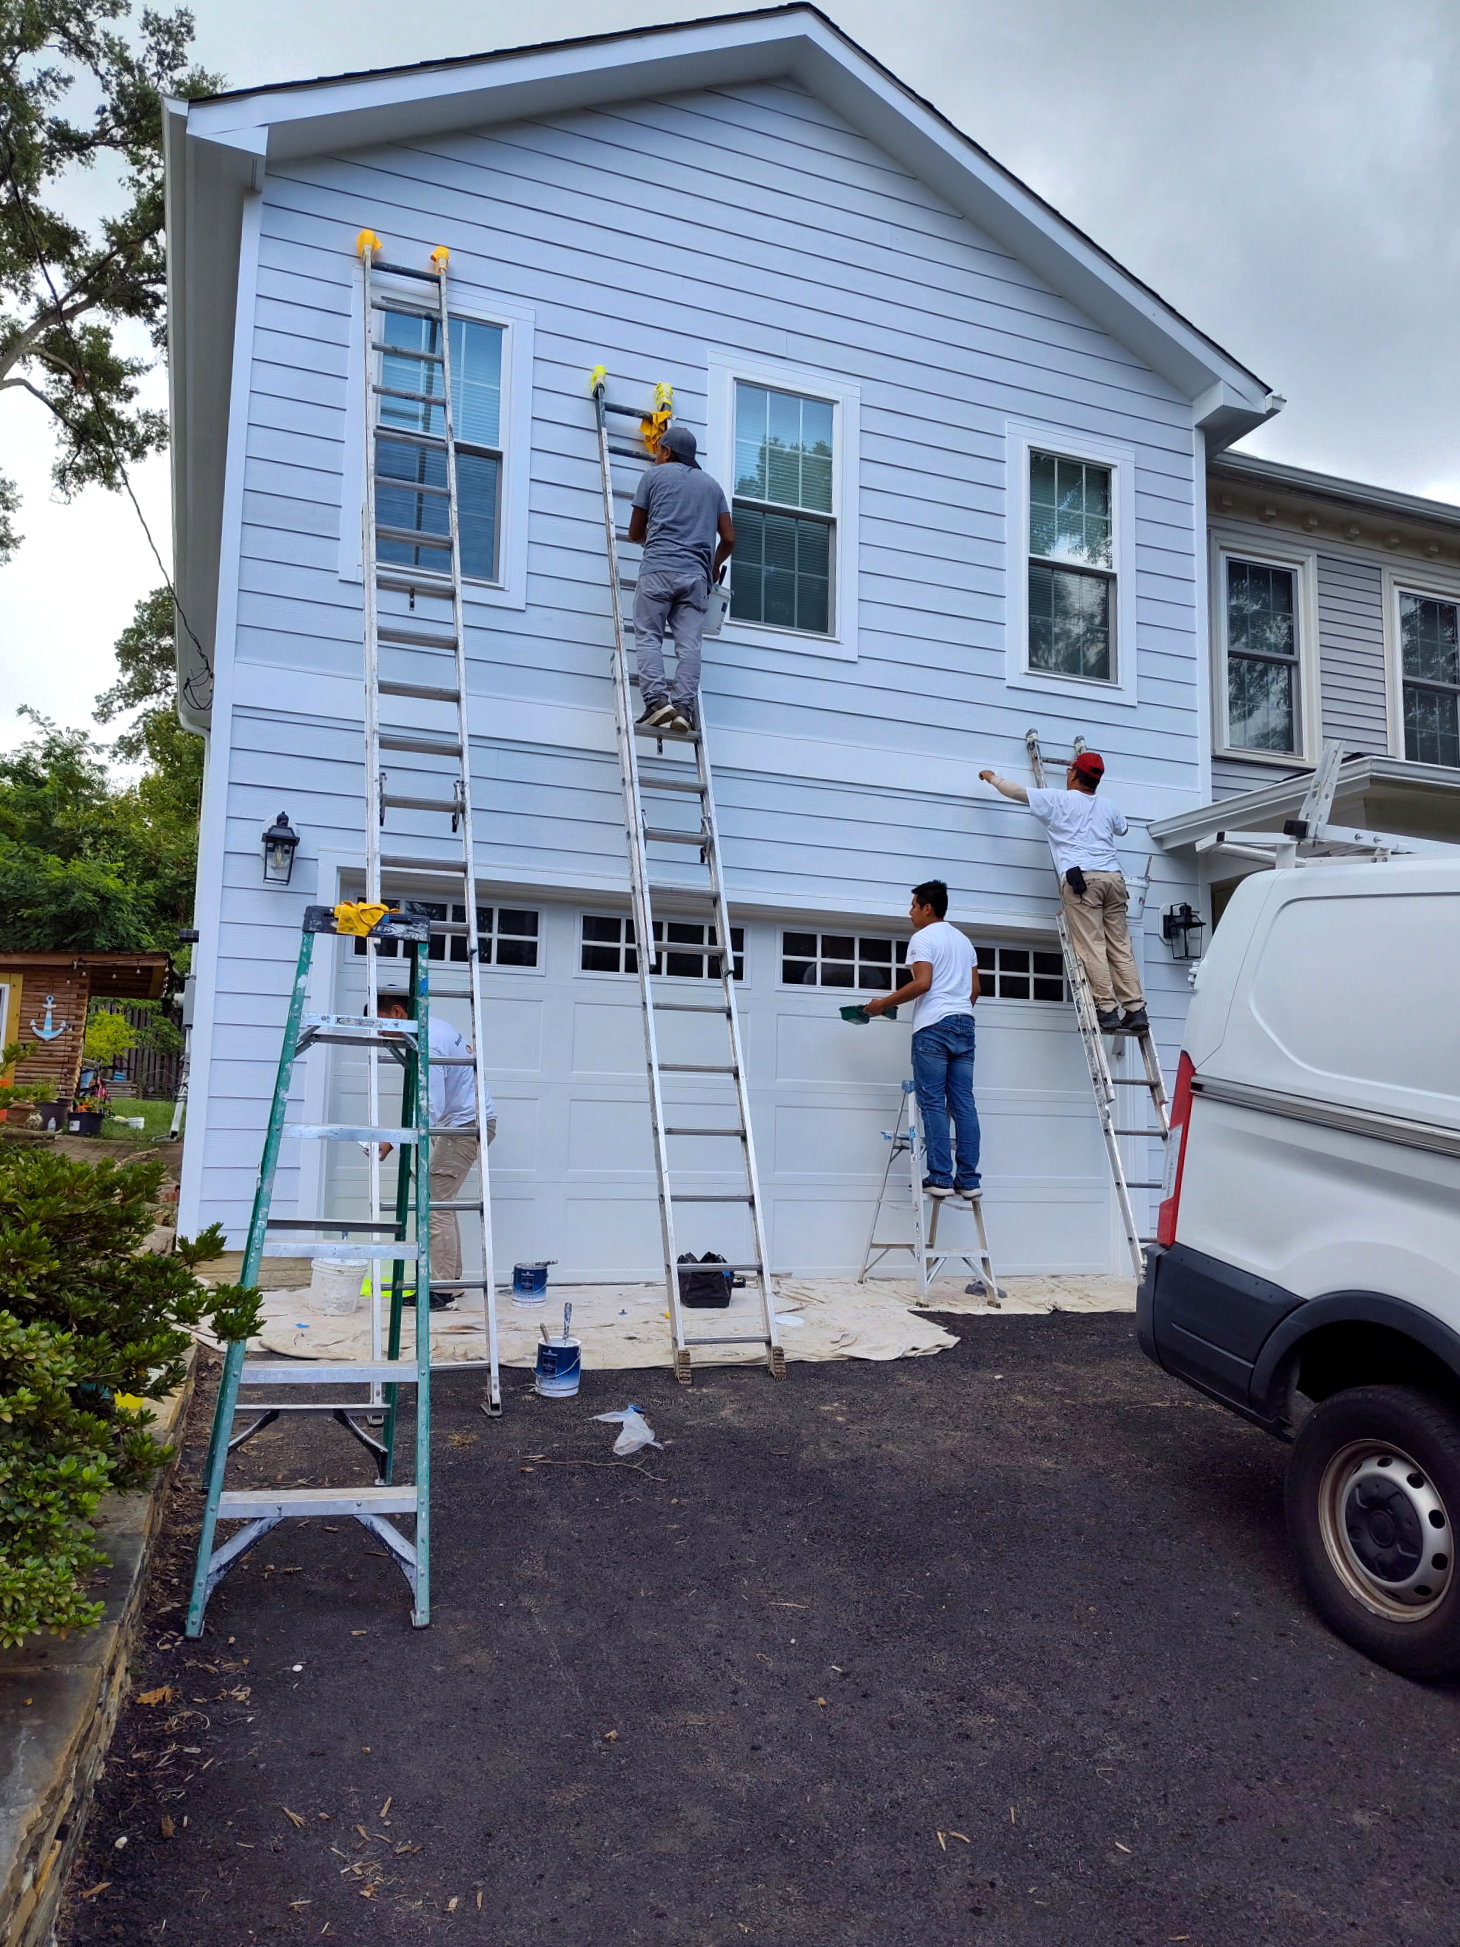
Selected areas of the home's exterior were identified by the homeowner for preparation and painting. The work included exterior siding, window trim, and other designated surfaces. Each area was properly cleaned, prepared, and painted to provide a refreshed and cohesive appearance while helping protect the existing exterior.

17
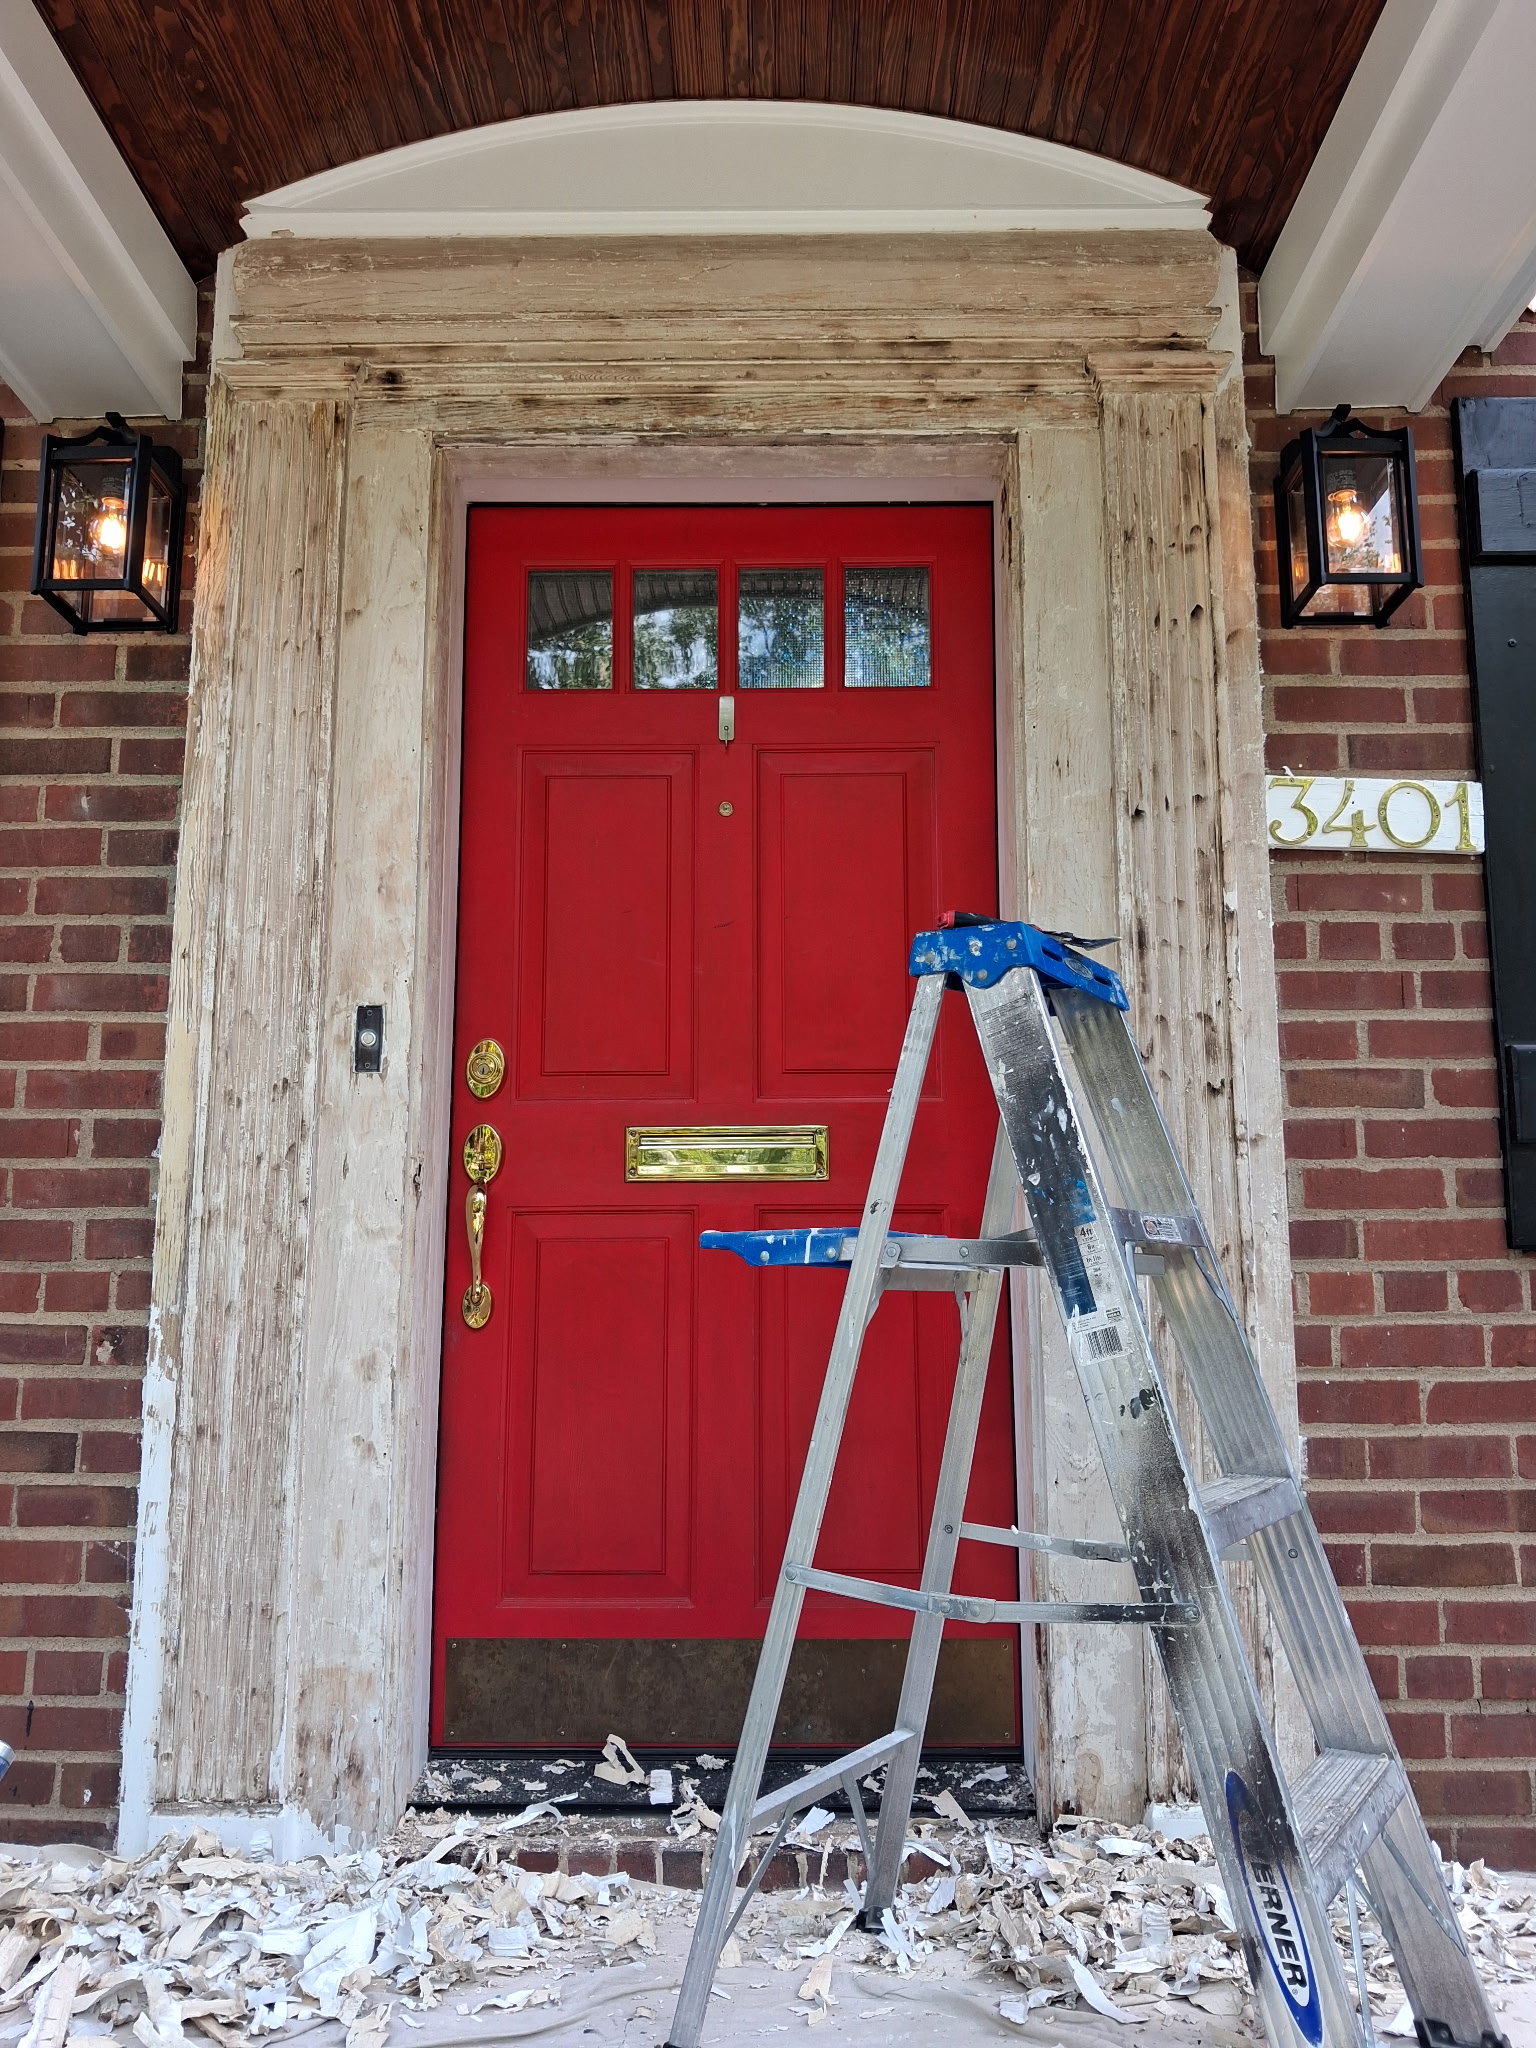
Outdoor Door Trim Repair & Painting
The deteriorated sections of the existing exterior door trim were carefully scraped and removed to create a sound surface for repair. The damaged areas were then properly repaired, prepared, and painted, restoring the trim's appearance and providing a clean, finished look.

18
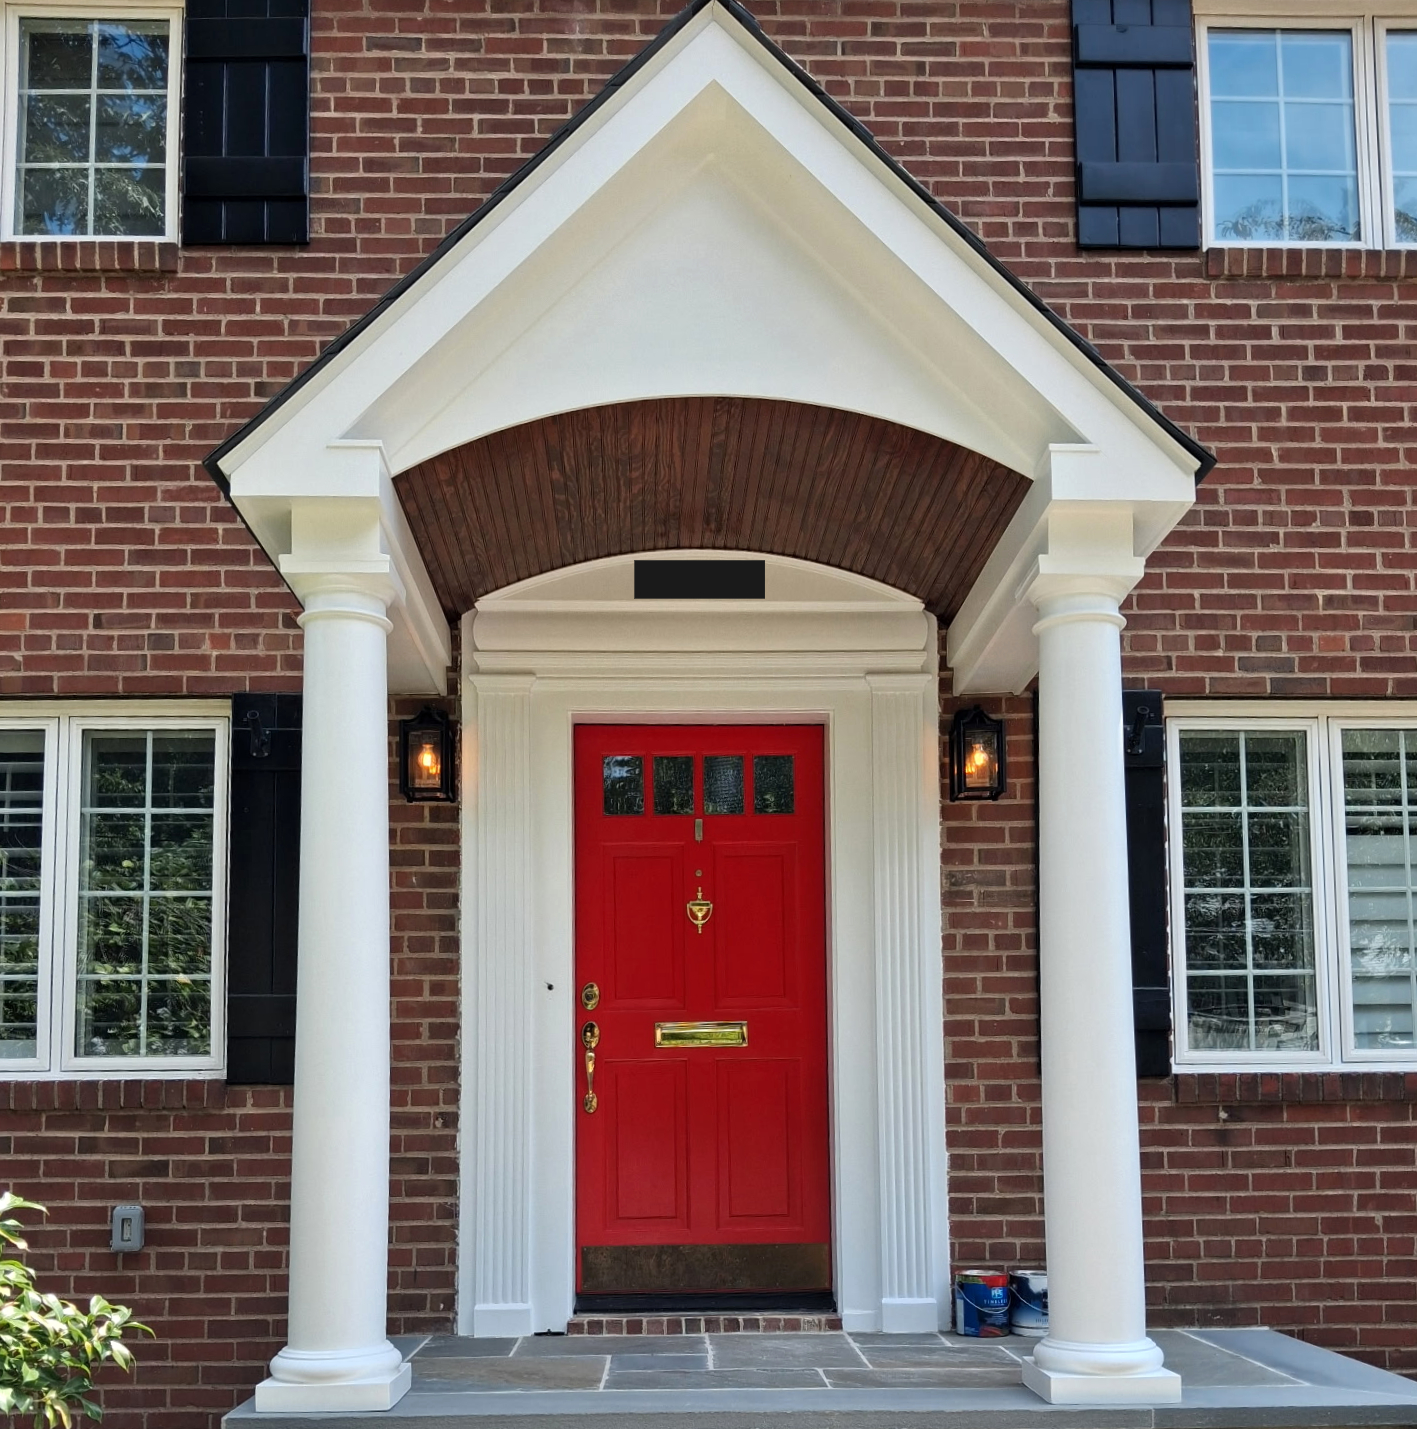
Outdoor Door Trim Repair & Painting
The deteriorated sections of the existing exterior door trim were carefully scraped and removed to create a sound surface for repair. The damaged areas were then properly repaired, prepared, and painted, restoring the trim's appearance and providing a clean, finished look.

19
Exterior House Power Washing
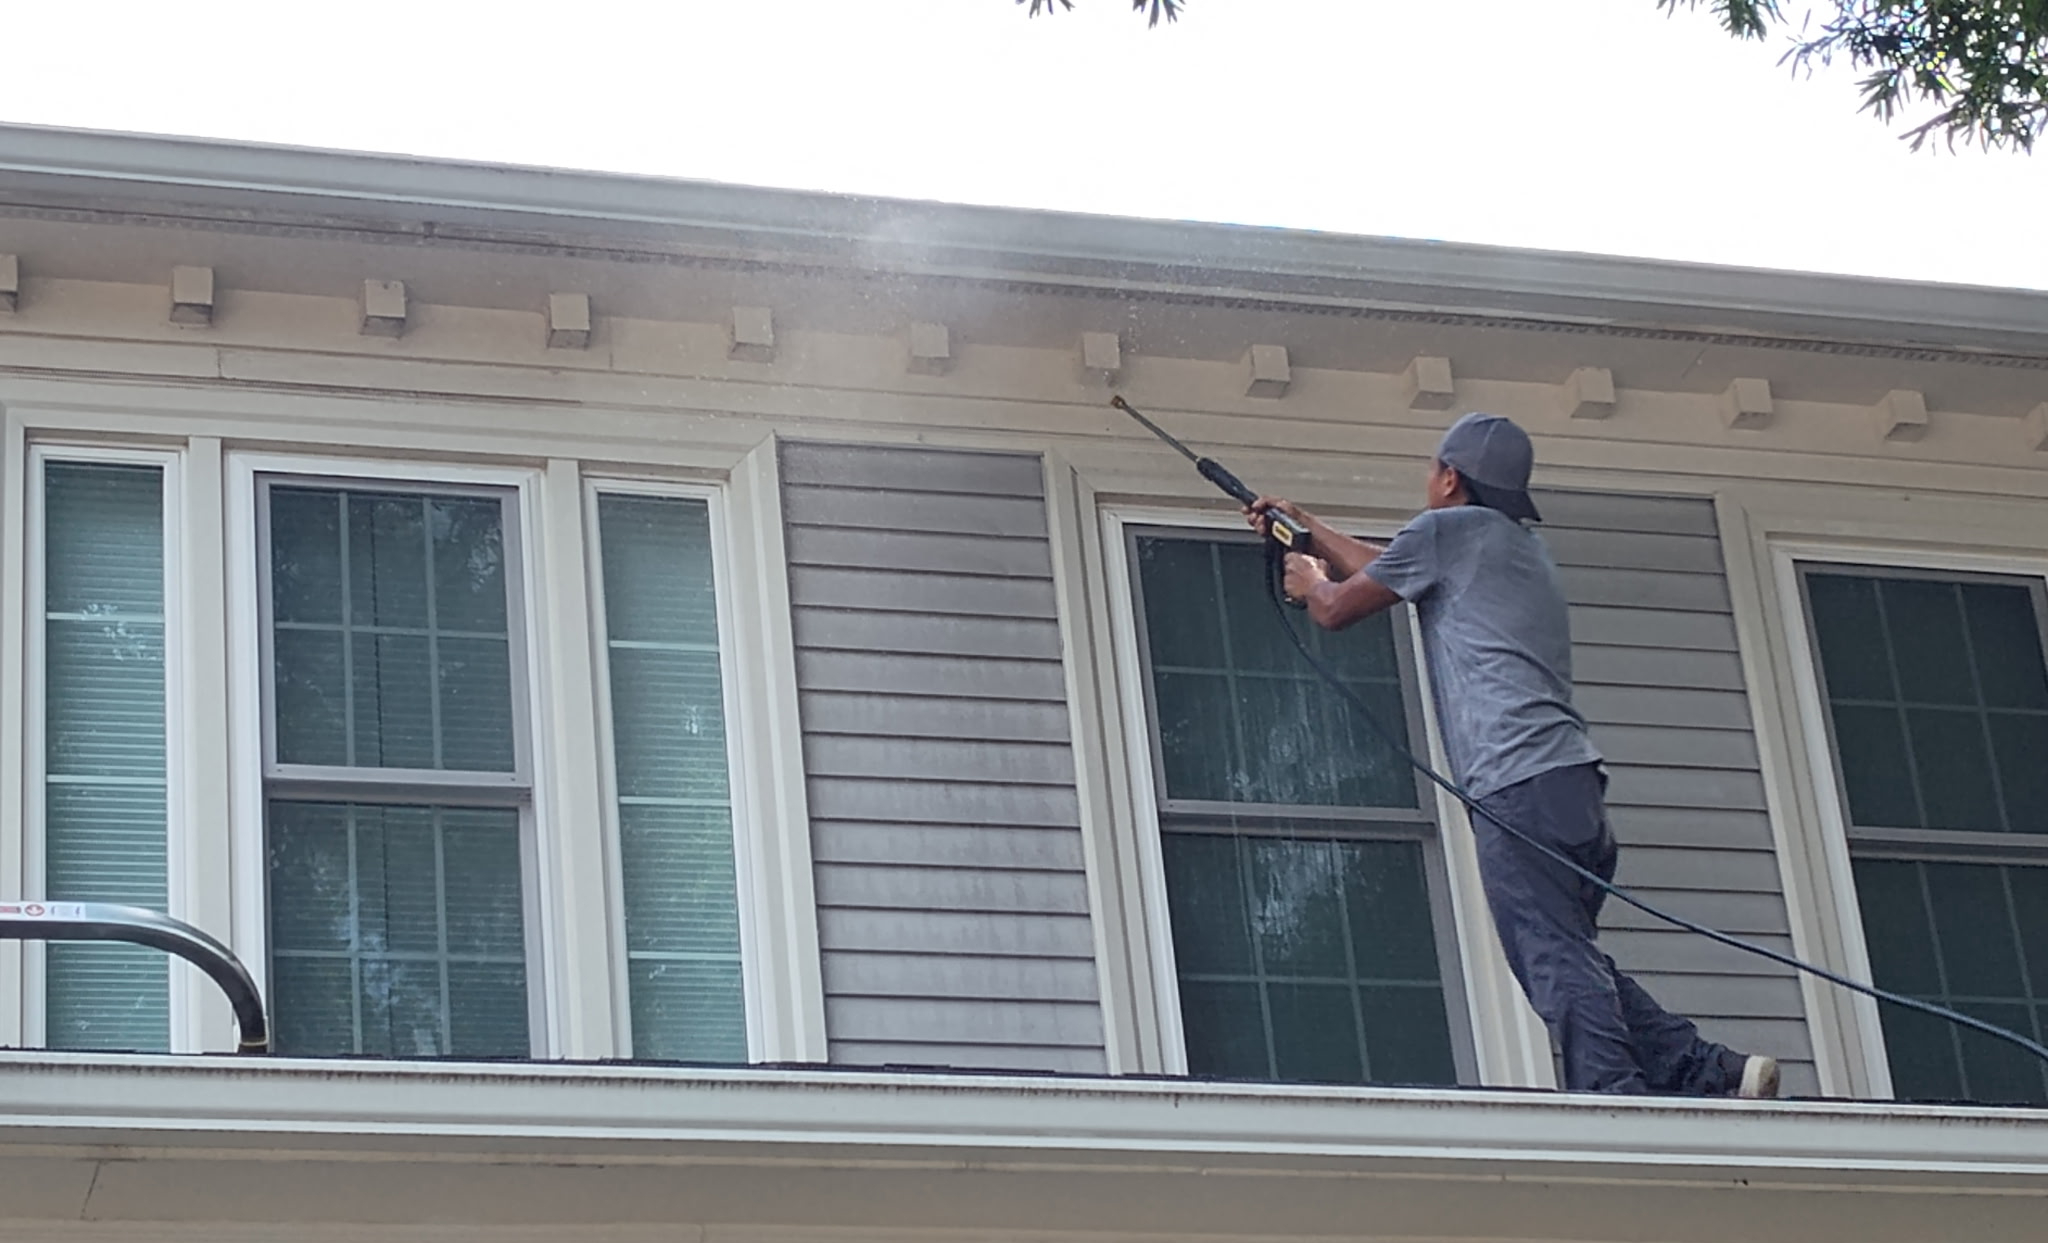
The home's exterior was thoroughly power washed, including the siding, gutters, shutters, and other exterior surfaces. Carefully selected, eco-friendly cleaning solutions were used to help remove accumulated dirt, grime, and surface buildup while maintaining care for the property's existing finishes. The cleaning restored a cleaner, refreshed appearance throughout the home's exterior.

20
Exterior Painting & Surface Preparation
Selected areas of the home's exterior were identified by the homeowner for preparation and painting. The work included exterior siding, window trim, and other designated surfaces. Each area was properly cleaned, prepared, and painted to provide a refreshed and cohesive appearance while helping protect the existing exterior.

21
Exterior Painting & Surface Preparation
Selected areas of the home's exterior were identified by the homeowner for preparation and painting. The work included exterior siding, window trim, and other designated surfaces. Each area was properly cleaned, prepared, and painted to provide a refreshed and cohesive appearance while helping protect the existing exterior.
01 / 21
Wooden Door Gate Repair
The existing paint was carefully scraped from the door gate to expose the underlying surface and identify areas requiring repair
01
Wooden Door Gate Repair
The existing paint was carefully scraped from the door gate to expose the underlying surface and identify areas requiring repair
02
Wooden Door Gate Repair & Painting
Damaged sections were repaired with wood filler, then sanded smooth and properly prepared before being painted to restore the gate's appearance and provide a clean, finished surface.
03
Wooden Door Gate Repair & Painting
Damaged sections were repaired with wood filler, then sanded smooth and properly prepared before being painted to restore the gate's appearance and provide a clean, finished surface.
04
Fence Surface Preparation
The existing paint on the fence was carefully scraped to remove loose and deteriorated areas. The surface was then thoroughly sanded to create a smooth, properly prepared surface before applying a fresh coat of paint for a clean and renewed finish.
05
Fence Surface Preparation & Painting
The existing paint on the fence was carefully scraped to remove loose and deteriorated areas. The surface was then thoroughly sanded to create a smooth, properly prepared surface before applying a fresh coat of paint for a clean and renewed finish.
06
Deck Floor Repair
The deteriorated sections of the existing deck floor were carefully scraped and removed to eliminate damaged material. The affected areas were repaired with wood filler, then sanded smooth to properly prepare the surface for finishing.
07
Deck Stair Installation
A separate portion of the project included the custom design and installation of new deck stairs, providing improved access while complementing the existing deck structure.
08
Garage Wooden Door Preparation & Staining
The existing wooden garage door was carefully scraped to remove deteriorated material and loose finish. The surface was then thoroughly sanded smooth and properly prepared for the application of a wood stain, enhancing the natural appearance of the wood and providing a refreshed finish.
09
Garage Wooden Door Preparation & Staining
The existing wooden garage door was carefully scraped to remove deteriorated material and loose finish. The surface was then thoroughly sanded smooth and properly prepared for the application of a wood stain, enhancing the natural appearance of the wood and providing a refreshed finish.
10
Complete Fence Painting.png
Damaged and deteriorated sections of the fence were repaired or replaced as needed before the entire fence was properly prepared, primed, and professionally painted. The completed work restored the fence's appearance while providing a clean, consistent finish.
11
Custom Fence Installation
A custom fence was designed and installed to meet the property's specific layout and needs. The fence was carefully measured, assembled, and installed to provide a durable, functional, and finished addition to the property.
12
Metal Railing Surface Preparation
The existing metal railing was carefully scraped to remove loose, deteriorated paint and surface buildup. The railing was then properly prepared for painting, creating a clean and suitable surface for a fresh, durable finish.
13
Driveway & Sidewalk Power Washing
The driveway and sidewalk were thoroughly power washed to remove accumulated dirt, grime, and surface buildup. Carefully selected, eco-friendly cleaning solutions were used as part of the cleaning process to help effectively restore the appearance of the surfaces while being mindful of the surrounding environment.
14
Wooden Post Section Repair & Painting
A damaged section of the existing wooden post was carefully removed and the surrounding area was cleaned and prepared. A new wood section was custom rebuilt and installed to restore the post. The repaired area was then properly prepared and painted for a clean, finished appearance.
15
Wooden Post Section Repair & Painting
A damaged section of the existing wooden post was carefully removed and the surrounding area was cleaned and prepared. A new wood section was custom rebuilt and installed to restore the post. The repaired area was then properly prepared and painted for a clean, finished appearance.
16
Exterior Painting & Surface Preparation
Selected areas of the home's exterior were identified by the homeowner for preparation and painting. The work included exterior siding, window trim, and other designated surfaces. Each area was properly cleaned, prepared, and painted to provide a refreshed and cohesive appearance while helping protect the existing exterior.
17
Outdoor Door Trim Repair & Painting
The deteriorated sections of the existing exterior door trim were carefully scraped and removed to create a sound surface for repair. The damaged areas were then properly repaired, prepared, and painted, restoring the trim's appearance and providing a clean, finished look.
18
Outdoor Door Trim Repair & Painting
The deteriorated sections of the existing exterior door trim were carefully scraped and removed to create a sound surface for repair. The damaged areas were then properly repaired, prepared, and painted, restoring the trim's appearance and providing a clean, finished look.
19
Exterior House Power Washing
The home's exterior was thoroughly power washed, including the siding, gutters, shutters, and other exterior surfaces. Carefully selected, eco-friendly cleaning solutions were used to help remove accumulated dirt, grime, and surface buildup while maintaining care for the property's existing finishes. The cleaning restored a cleaner, refreshed appearance throughout the home's exterior.
20
Exterior Painting & Surface Preparation
Selected areas of the home's exterior were identified by the homeowner for preparation and painting. The work included exterior siding, window trim, and other designated surfaces. Each area was properly cleaned, prepared, and painted to provide a refreshed and cohesive appearance while helping protect the existing exterior.
21
Exterior Painting & Surface Preparation
Selected areas of the home's exterior were identified by the homeowner for preparation and painting. The work included exterior siding, window trim, and other designated surfaces. Each area was properly cleaned, prepared, and painted to provide a refreshed and cohesive appearance while helping protect the existing exterior.
Our Portfolio Is Growing — More Projects Coming Soon
bottom of page